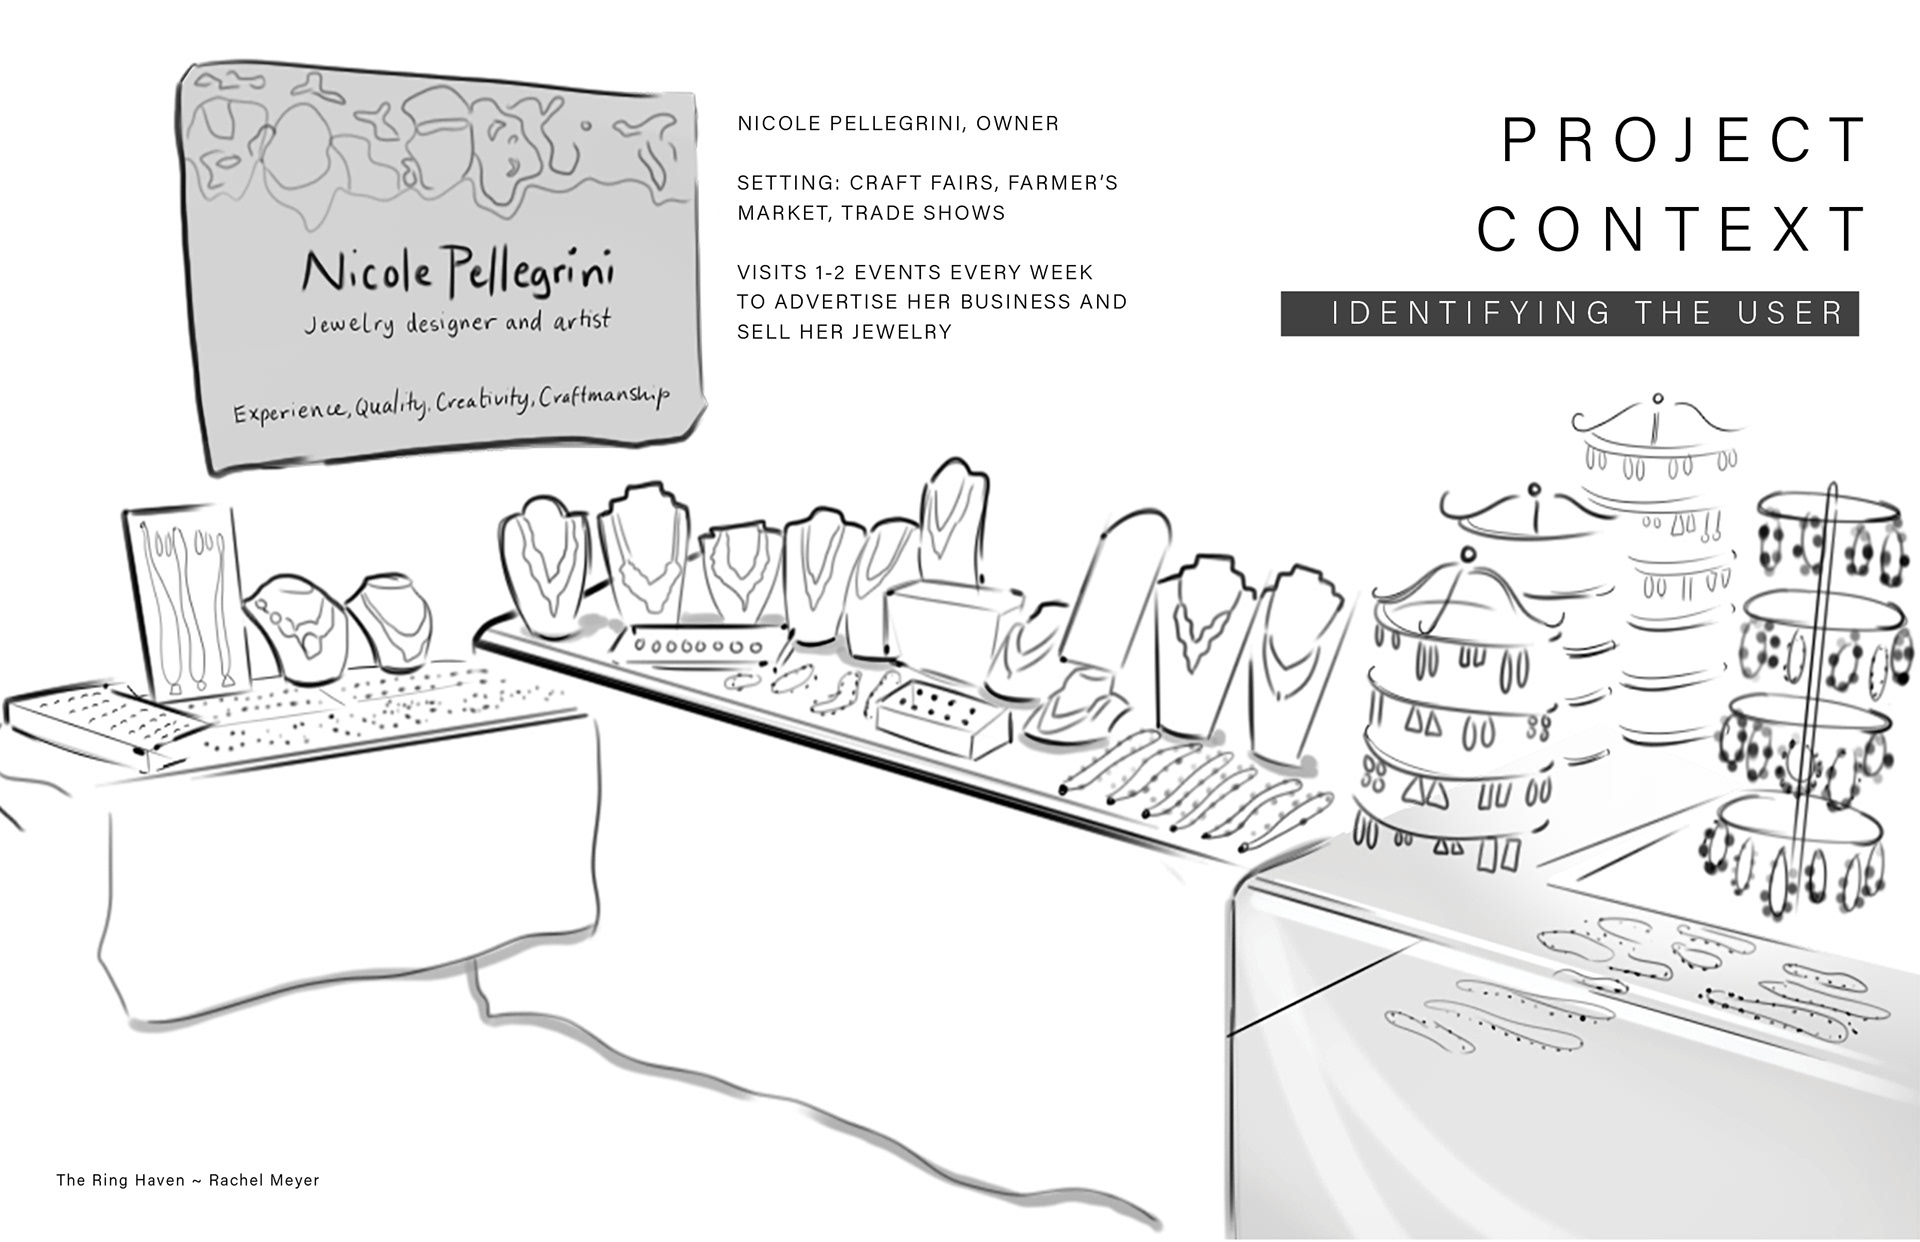
The Story Behind the Project
Throughout high school, I worked at a bakery that often had me staff their booth at craft fairs. I usually arrived about twenty minutes early to set up and spent the same amount of time packing up at the end of the day. But there was one thing I noticed at nearly every fair: the women selling handmade jewelry were always there much longer.
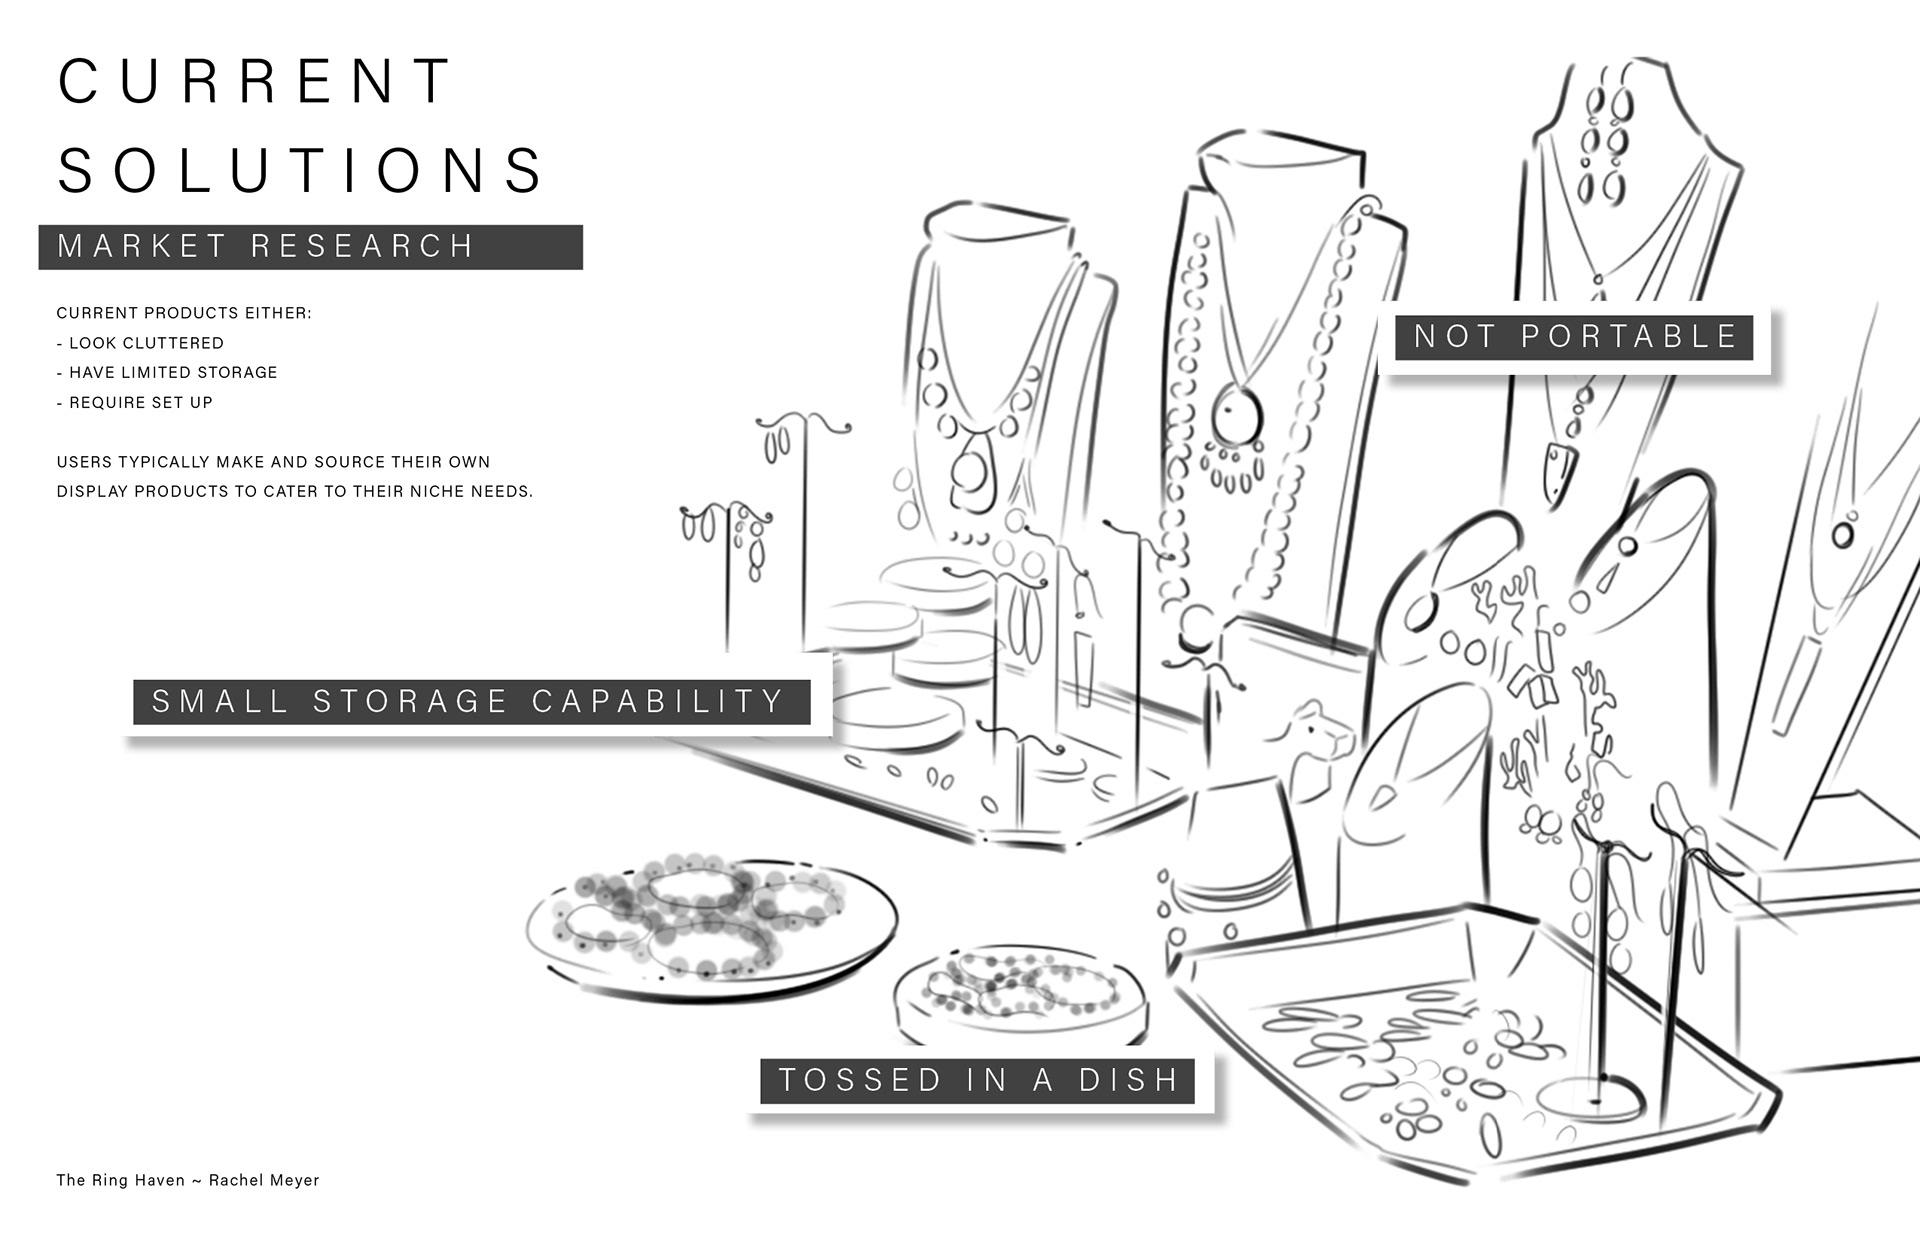
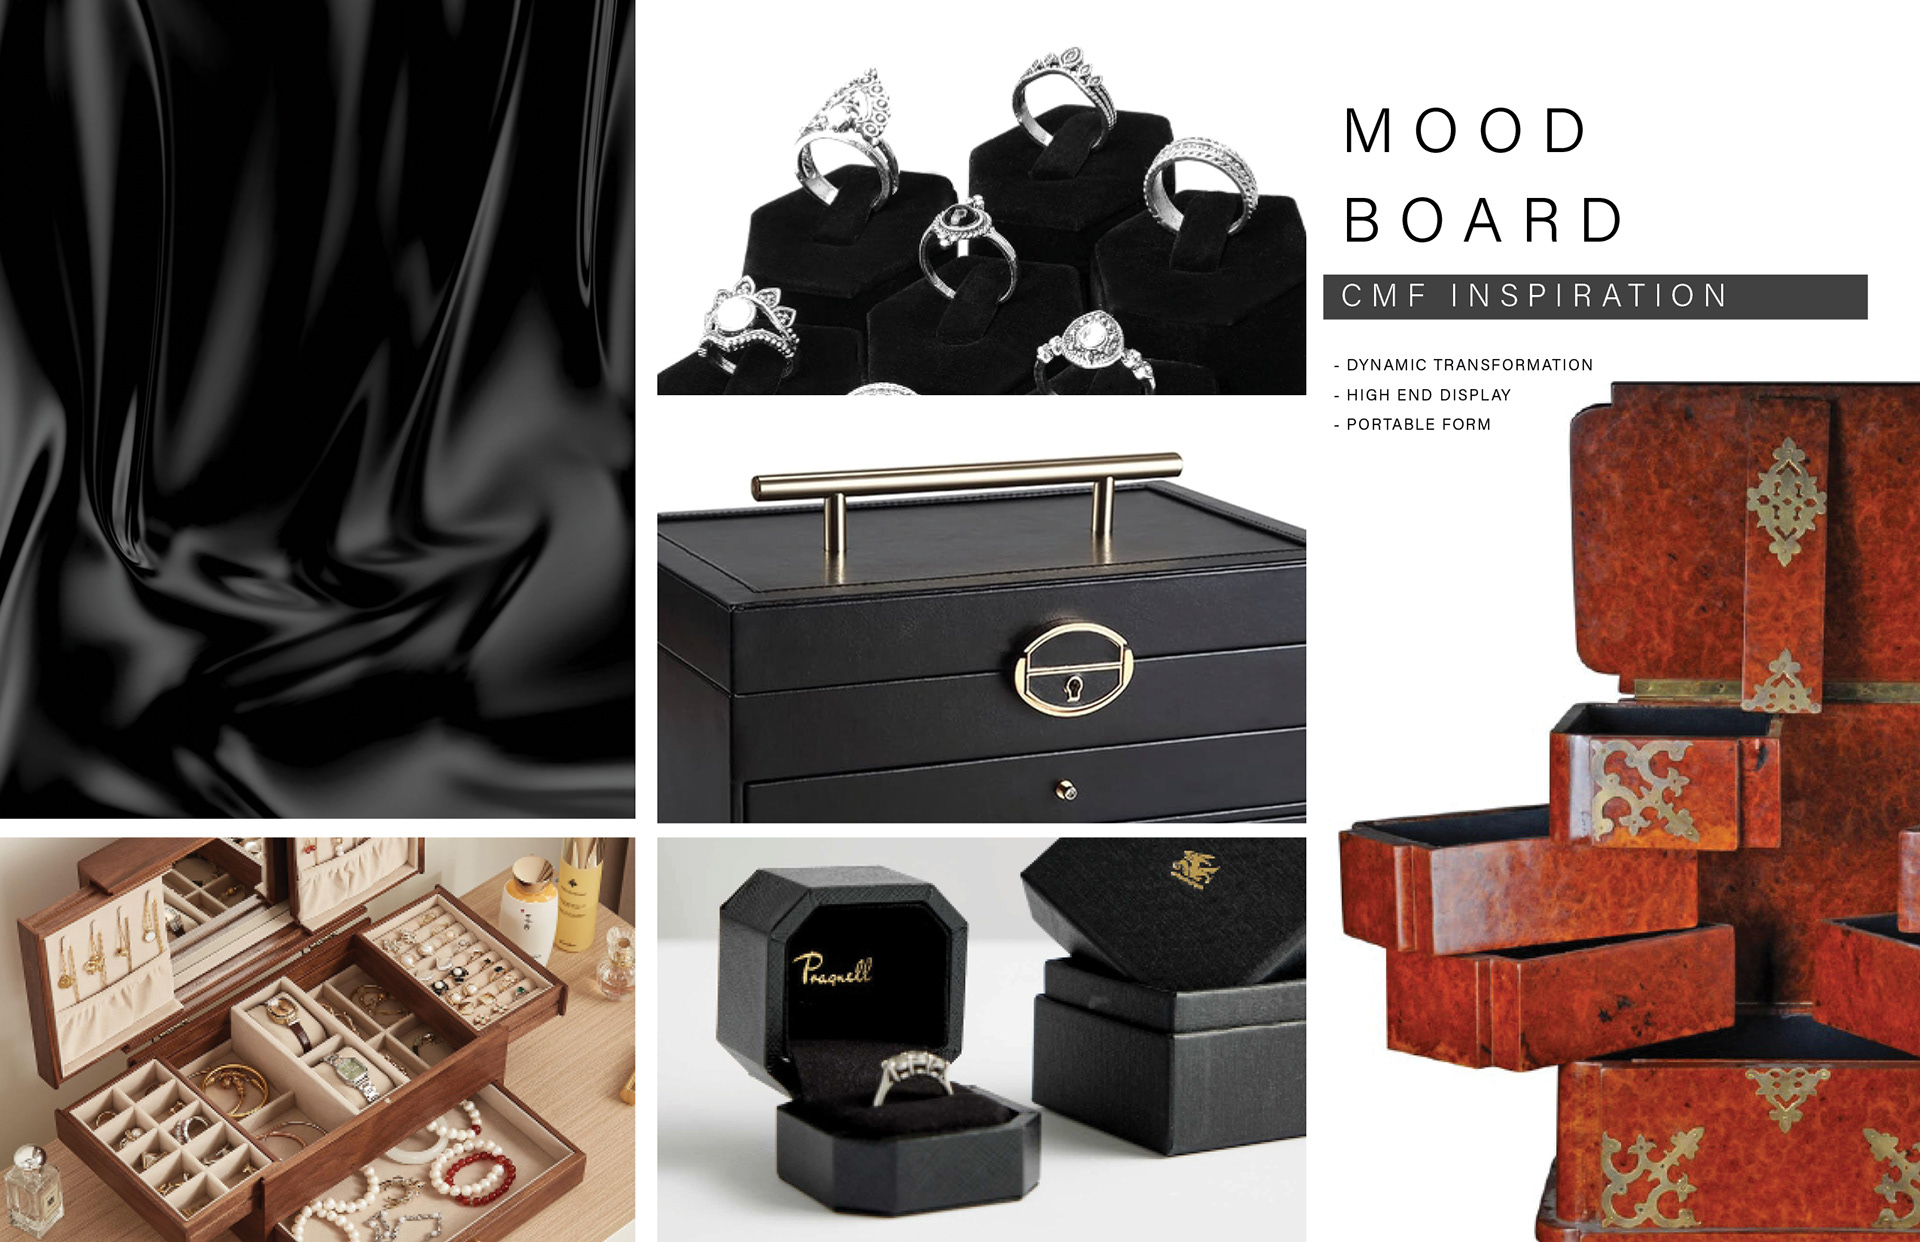
These women would show up hours early and spend just as much time packing up afterward. Their product displays were often DIY or clearly repurposed from something not designed for jewelry.
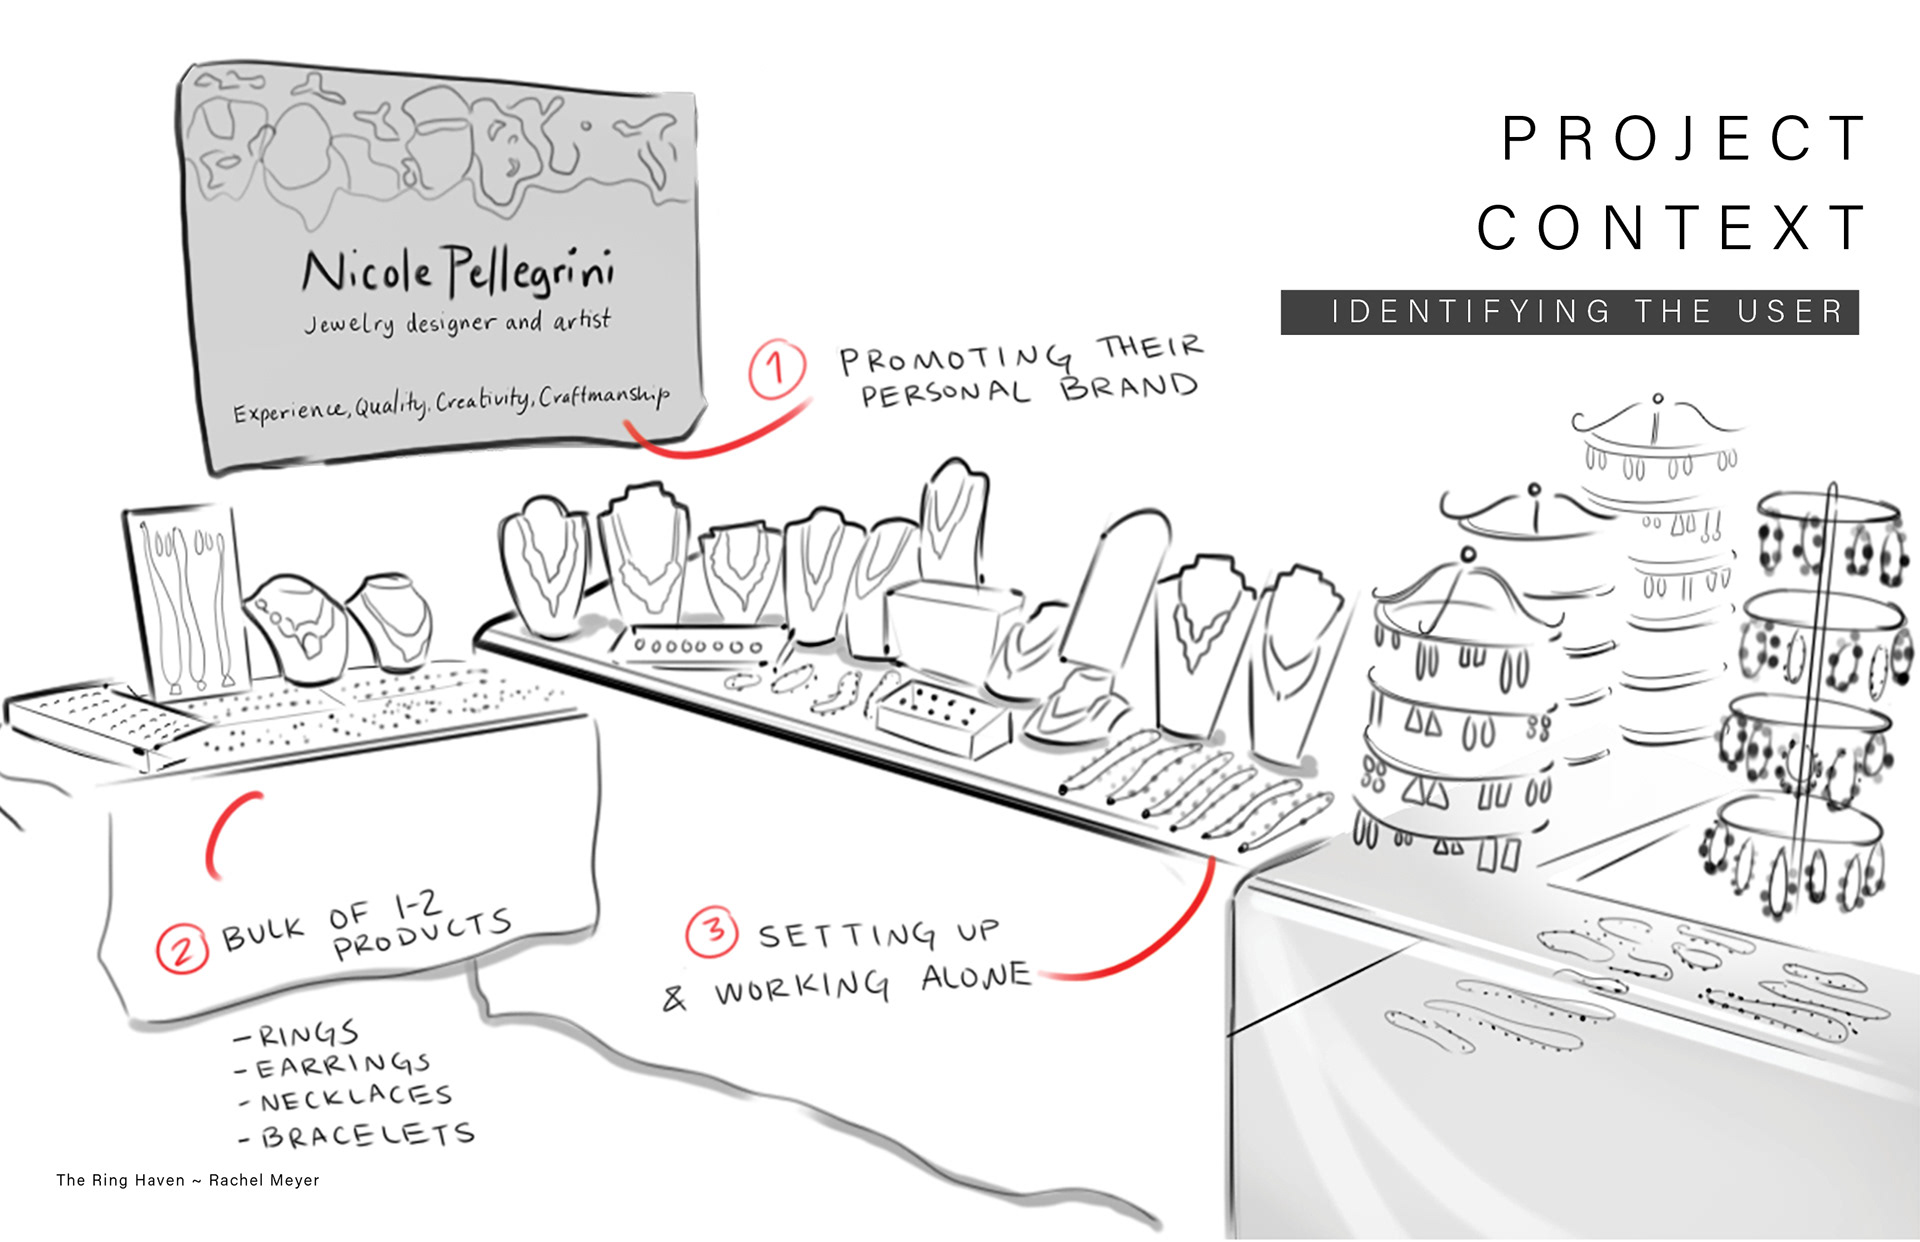
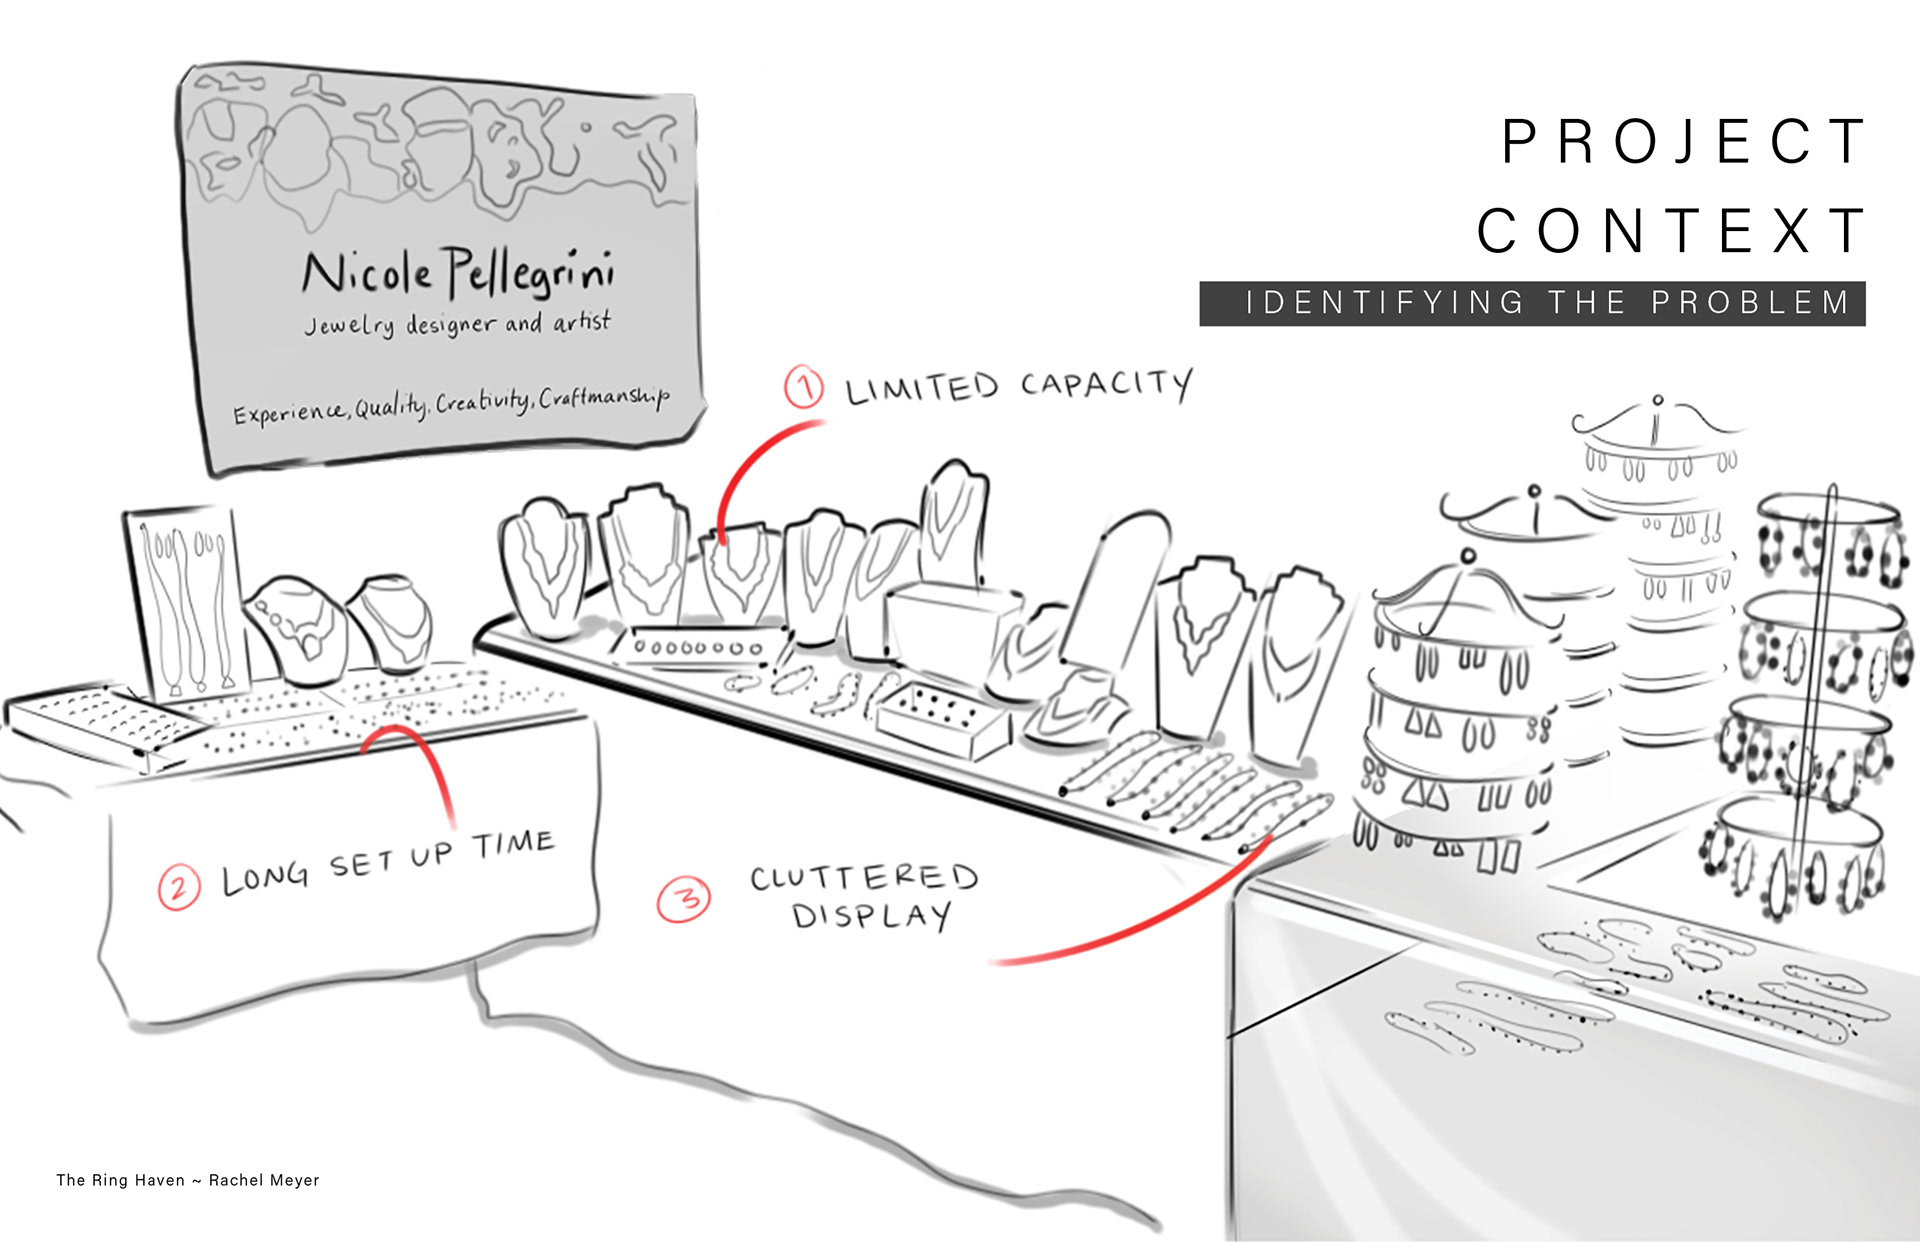
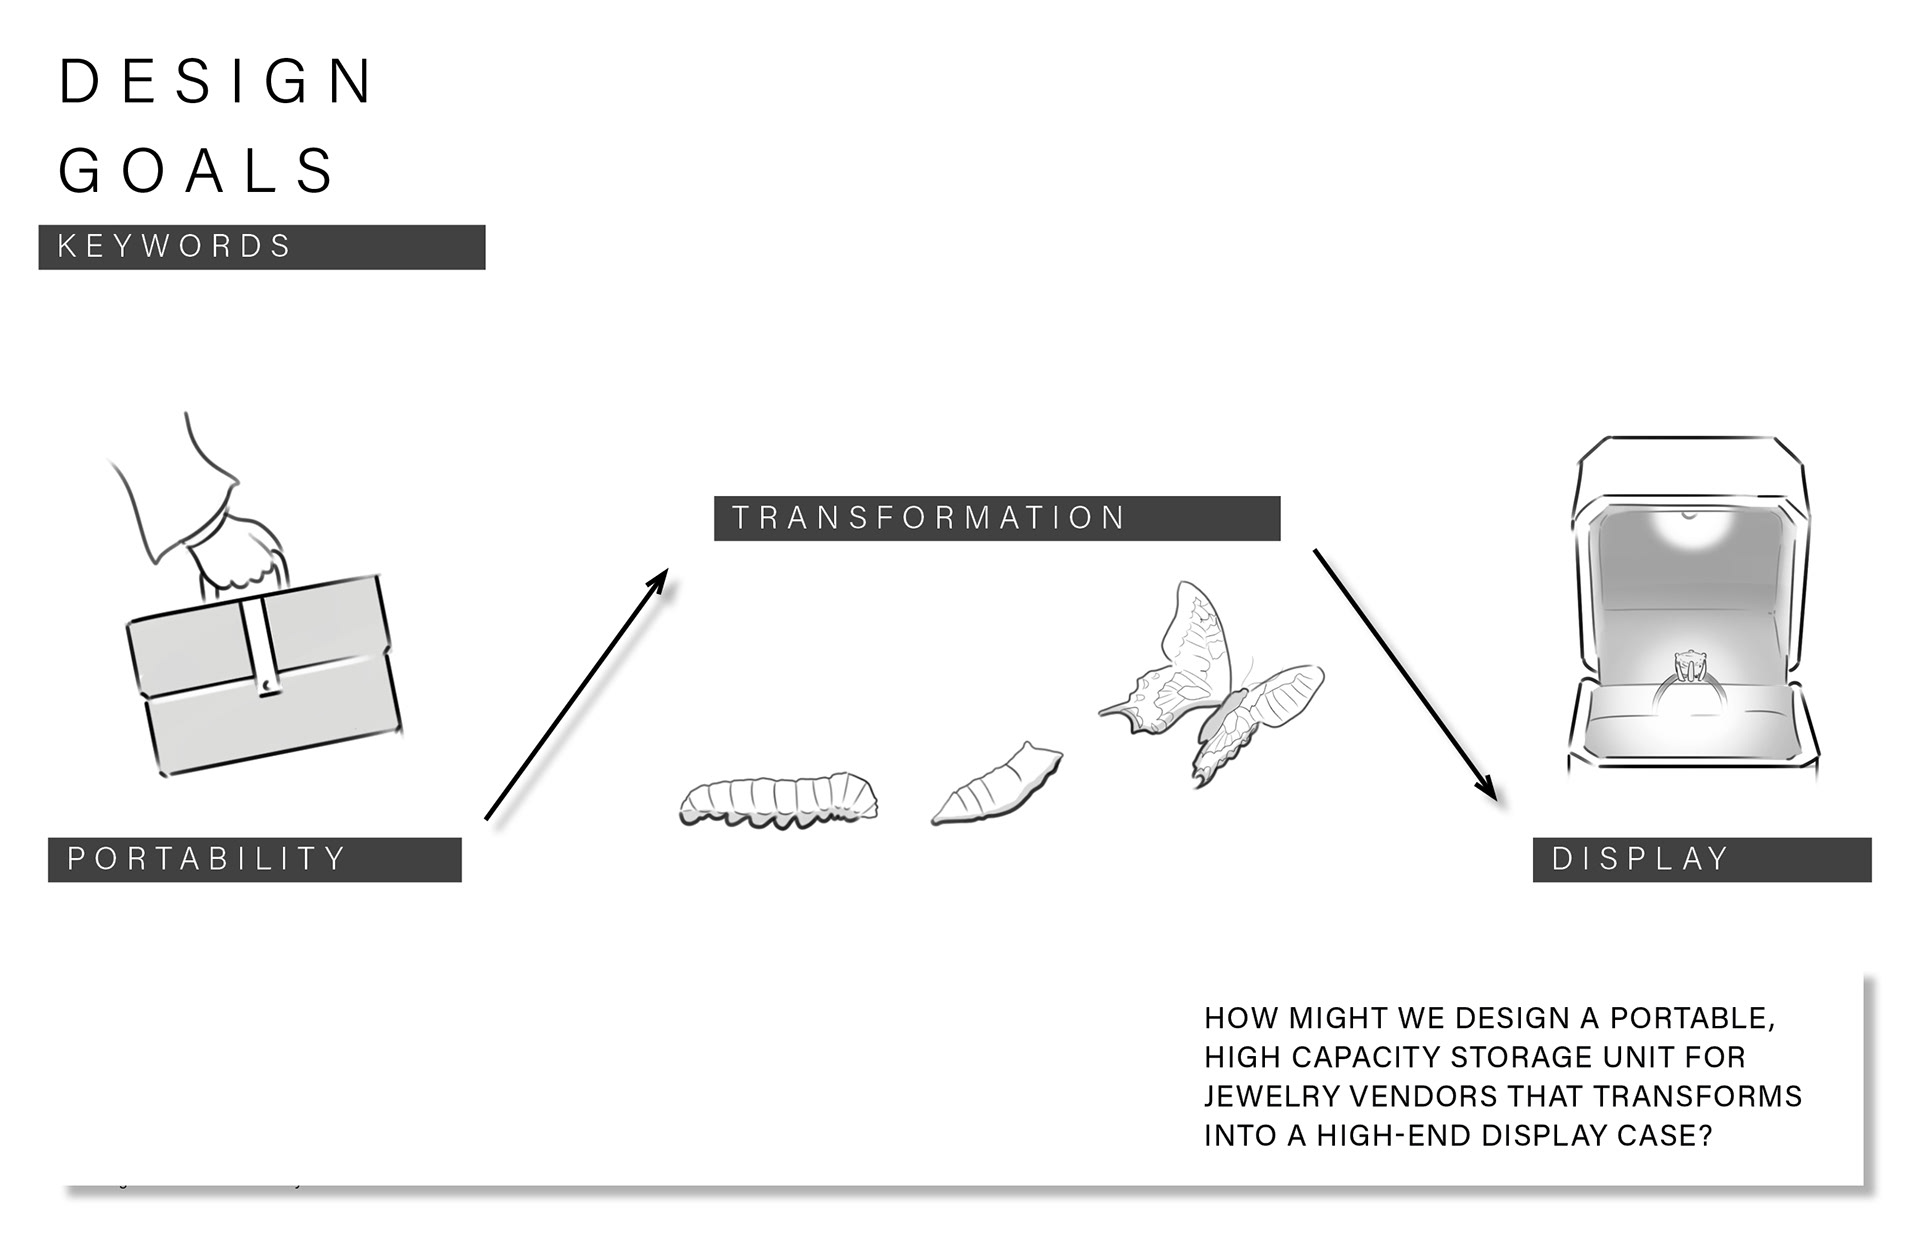
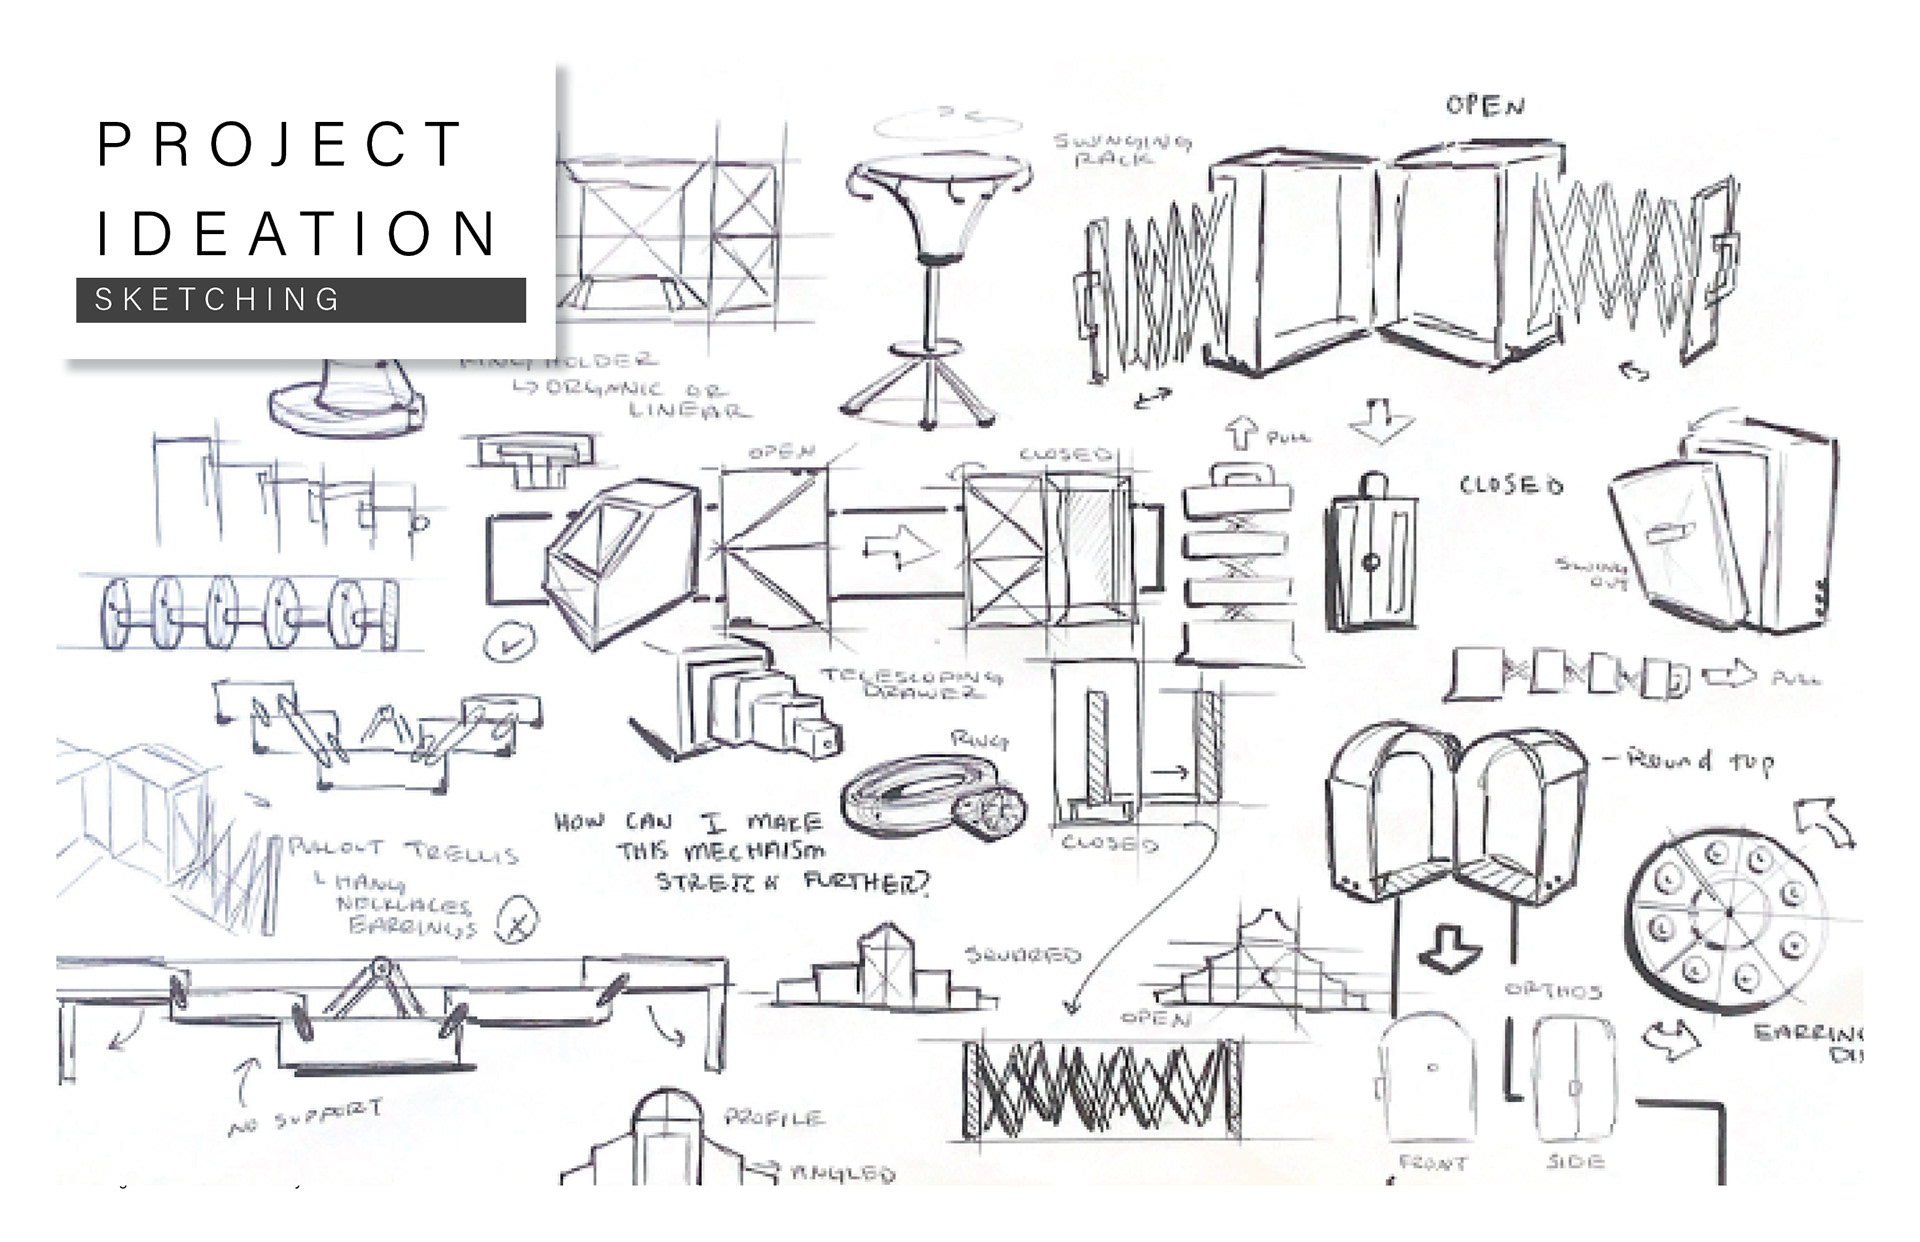
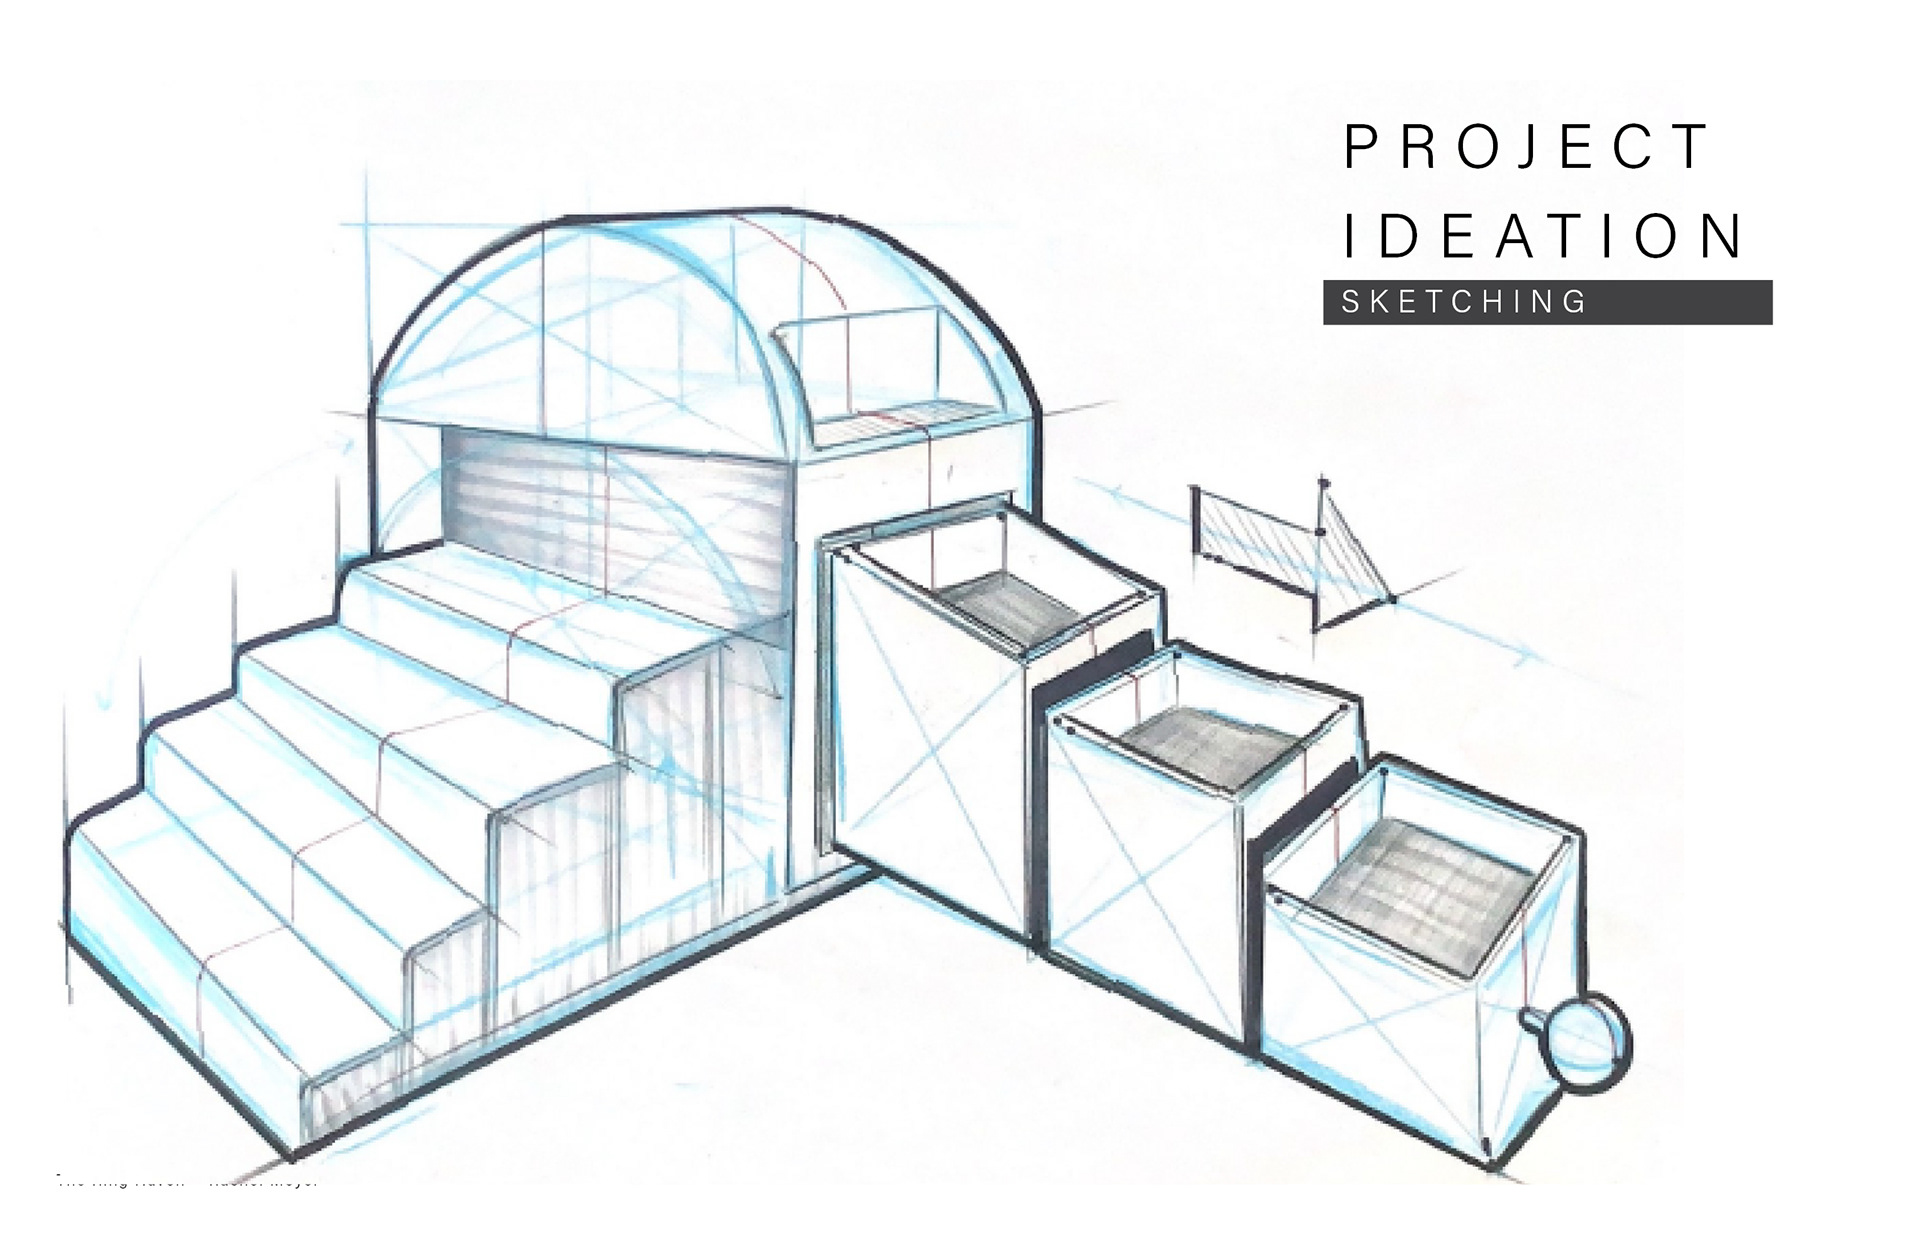
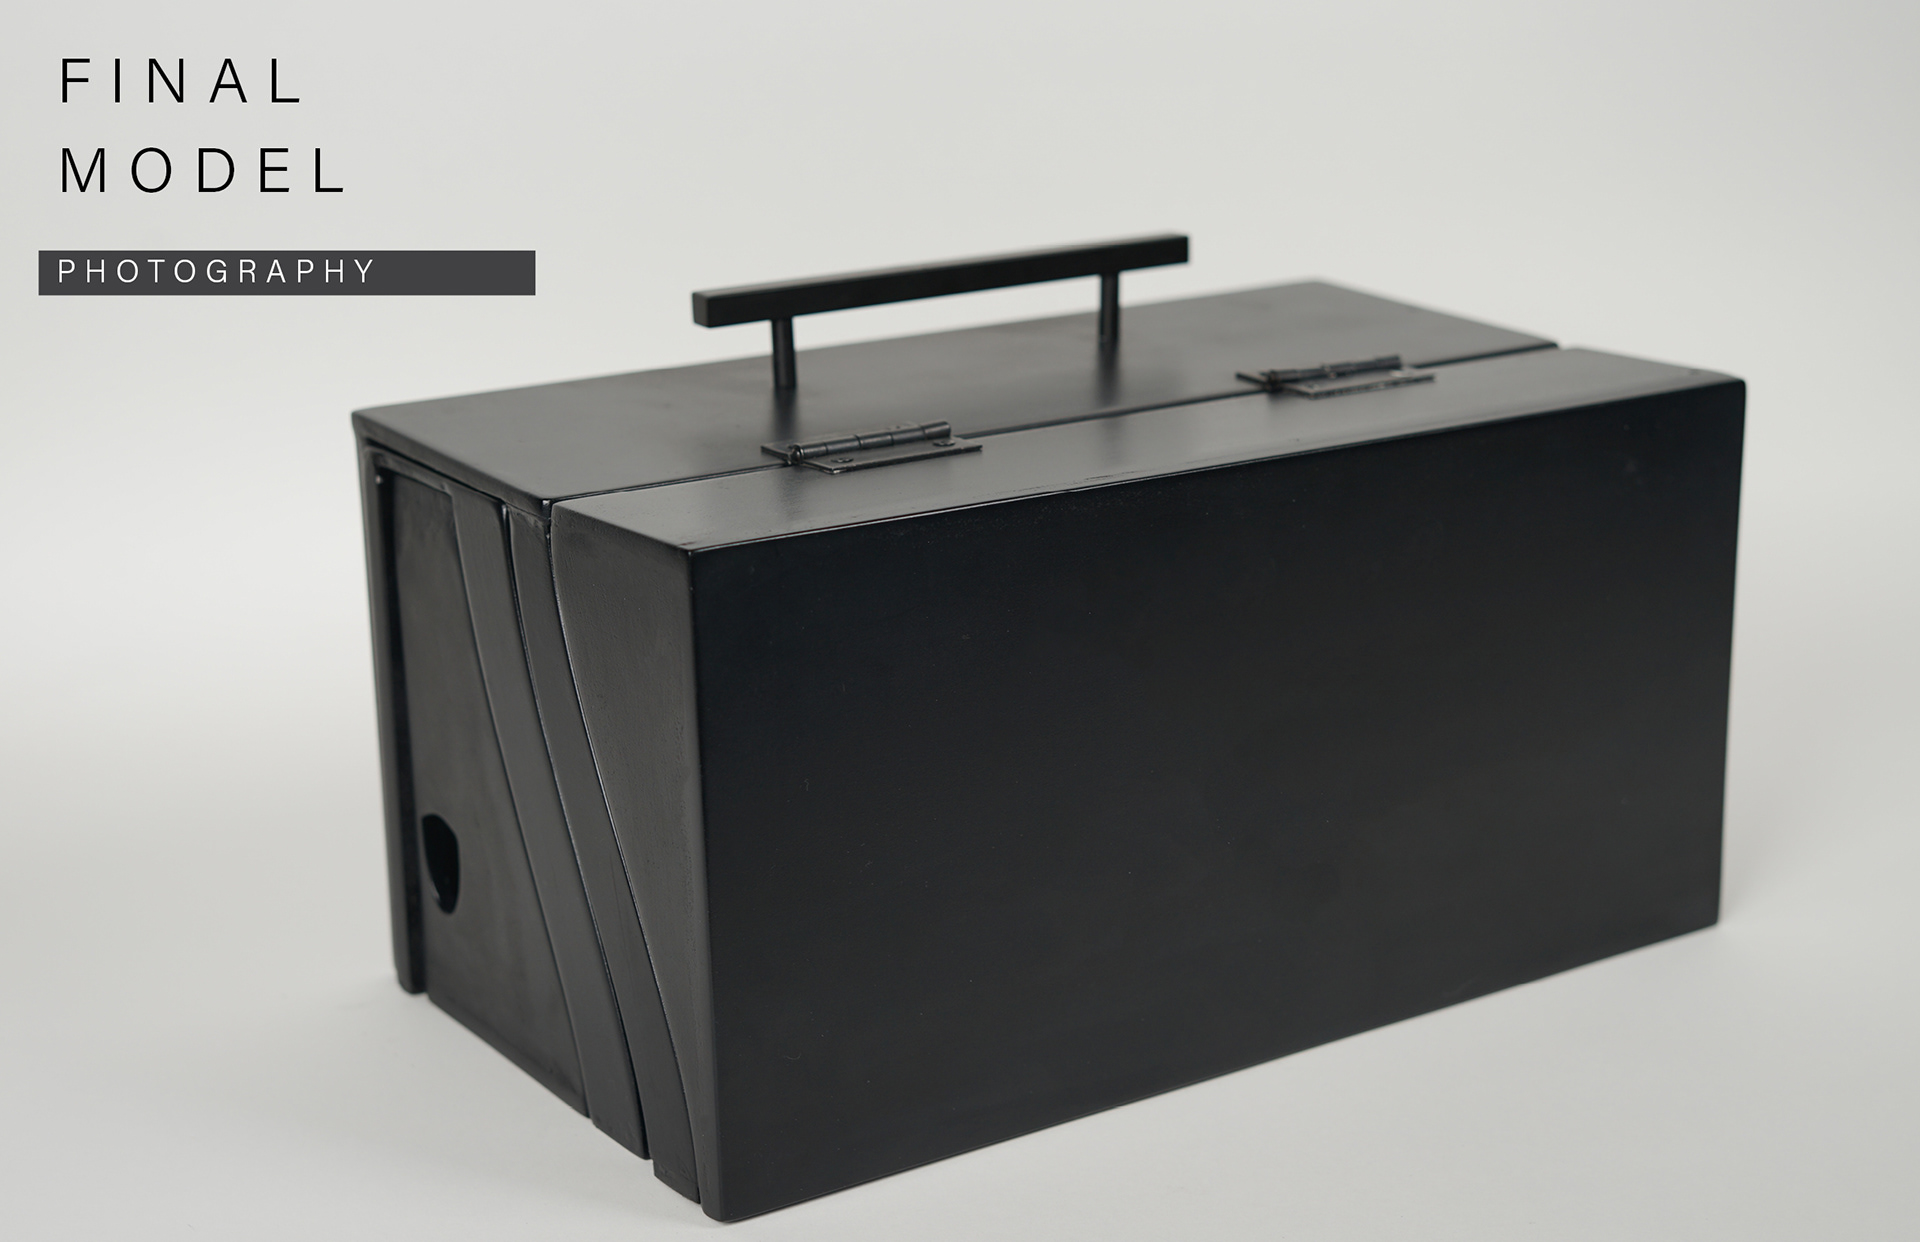
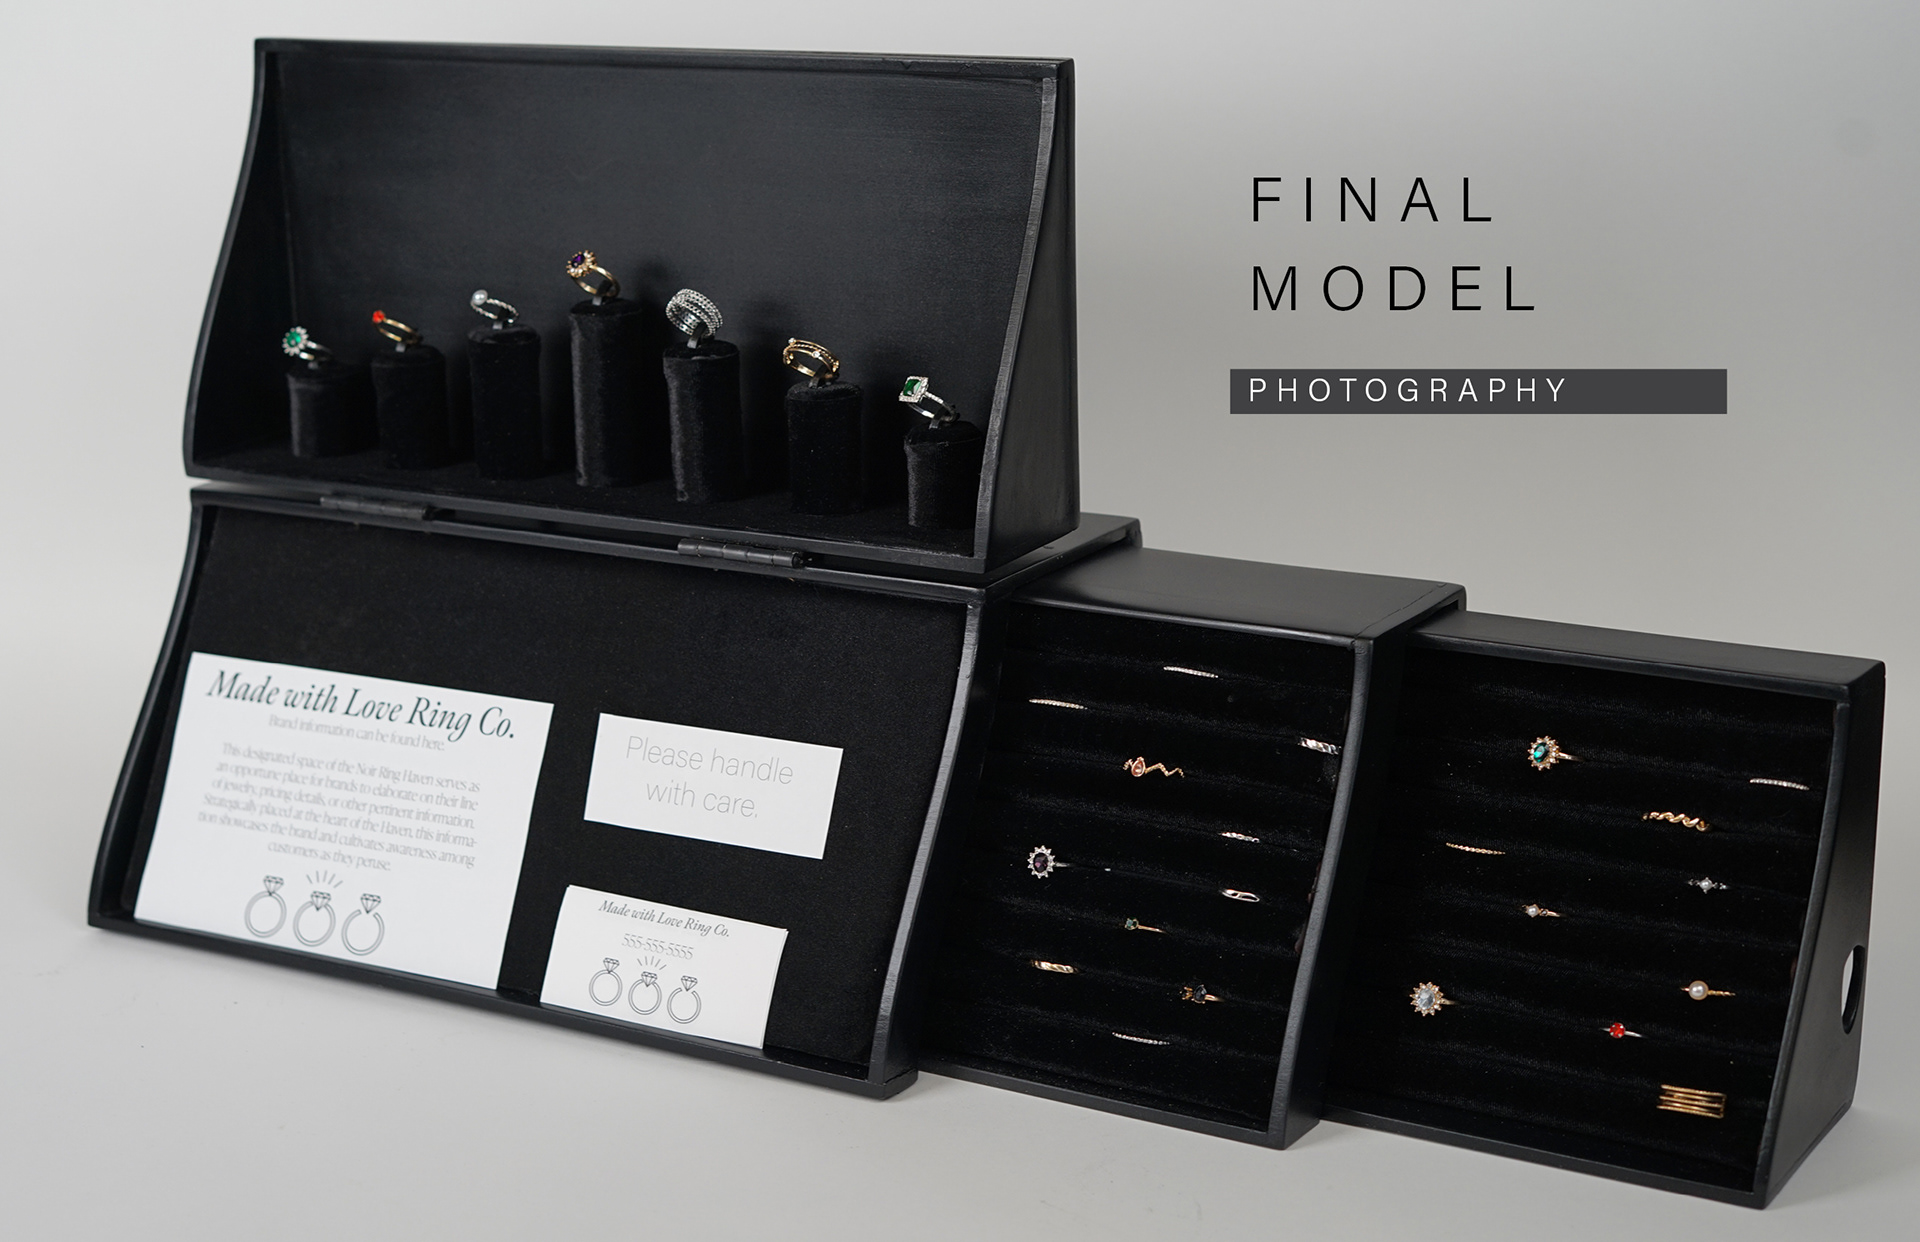
When this project was announced, the objective was to create a product that could transform in some way. As I brainstormed ideas, I kept thinking back to those women and the challenges they faced. That’s when the idea for this project took shape: how could I create a transportable storage solution that seamlessly transforms into a sophisticated jewelry display?
"In five years, i haven't found a better system. setting up a booth just takes time."
Janice Flynn, small jewelry business owner

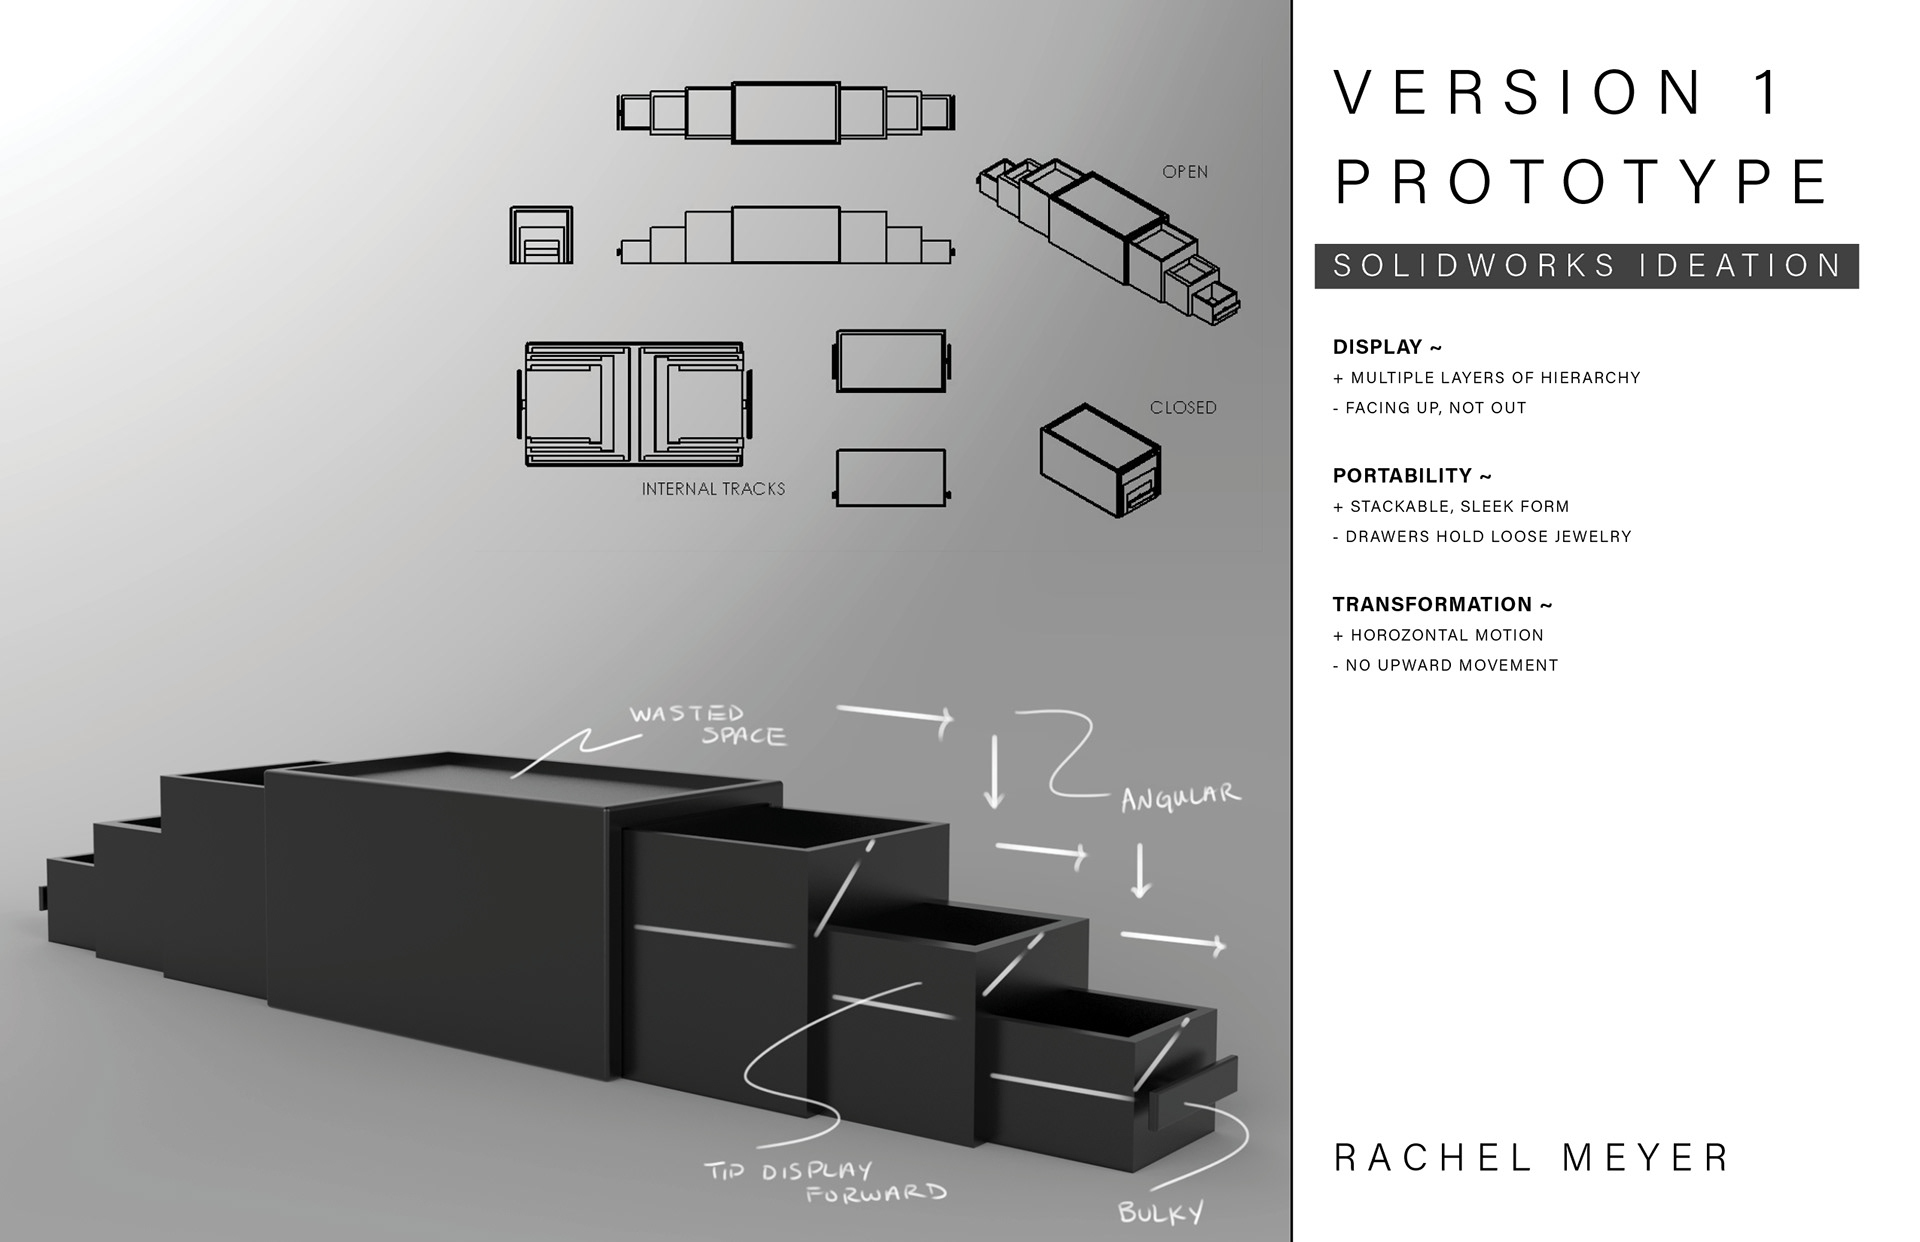

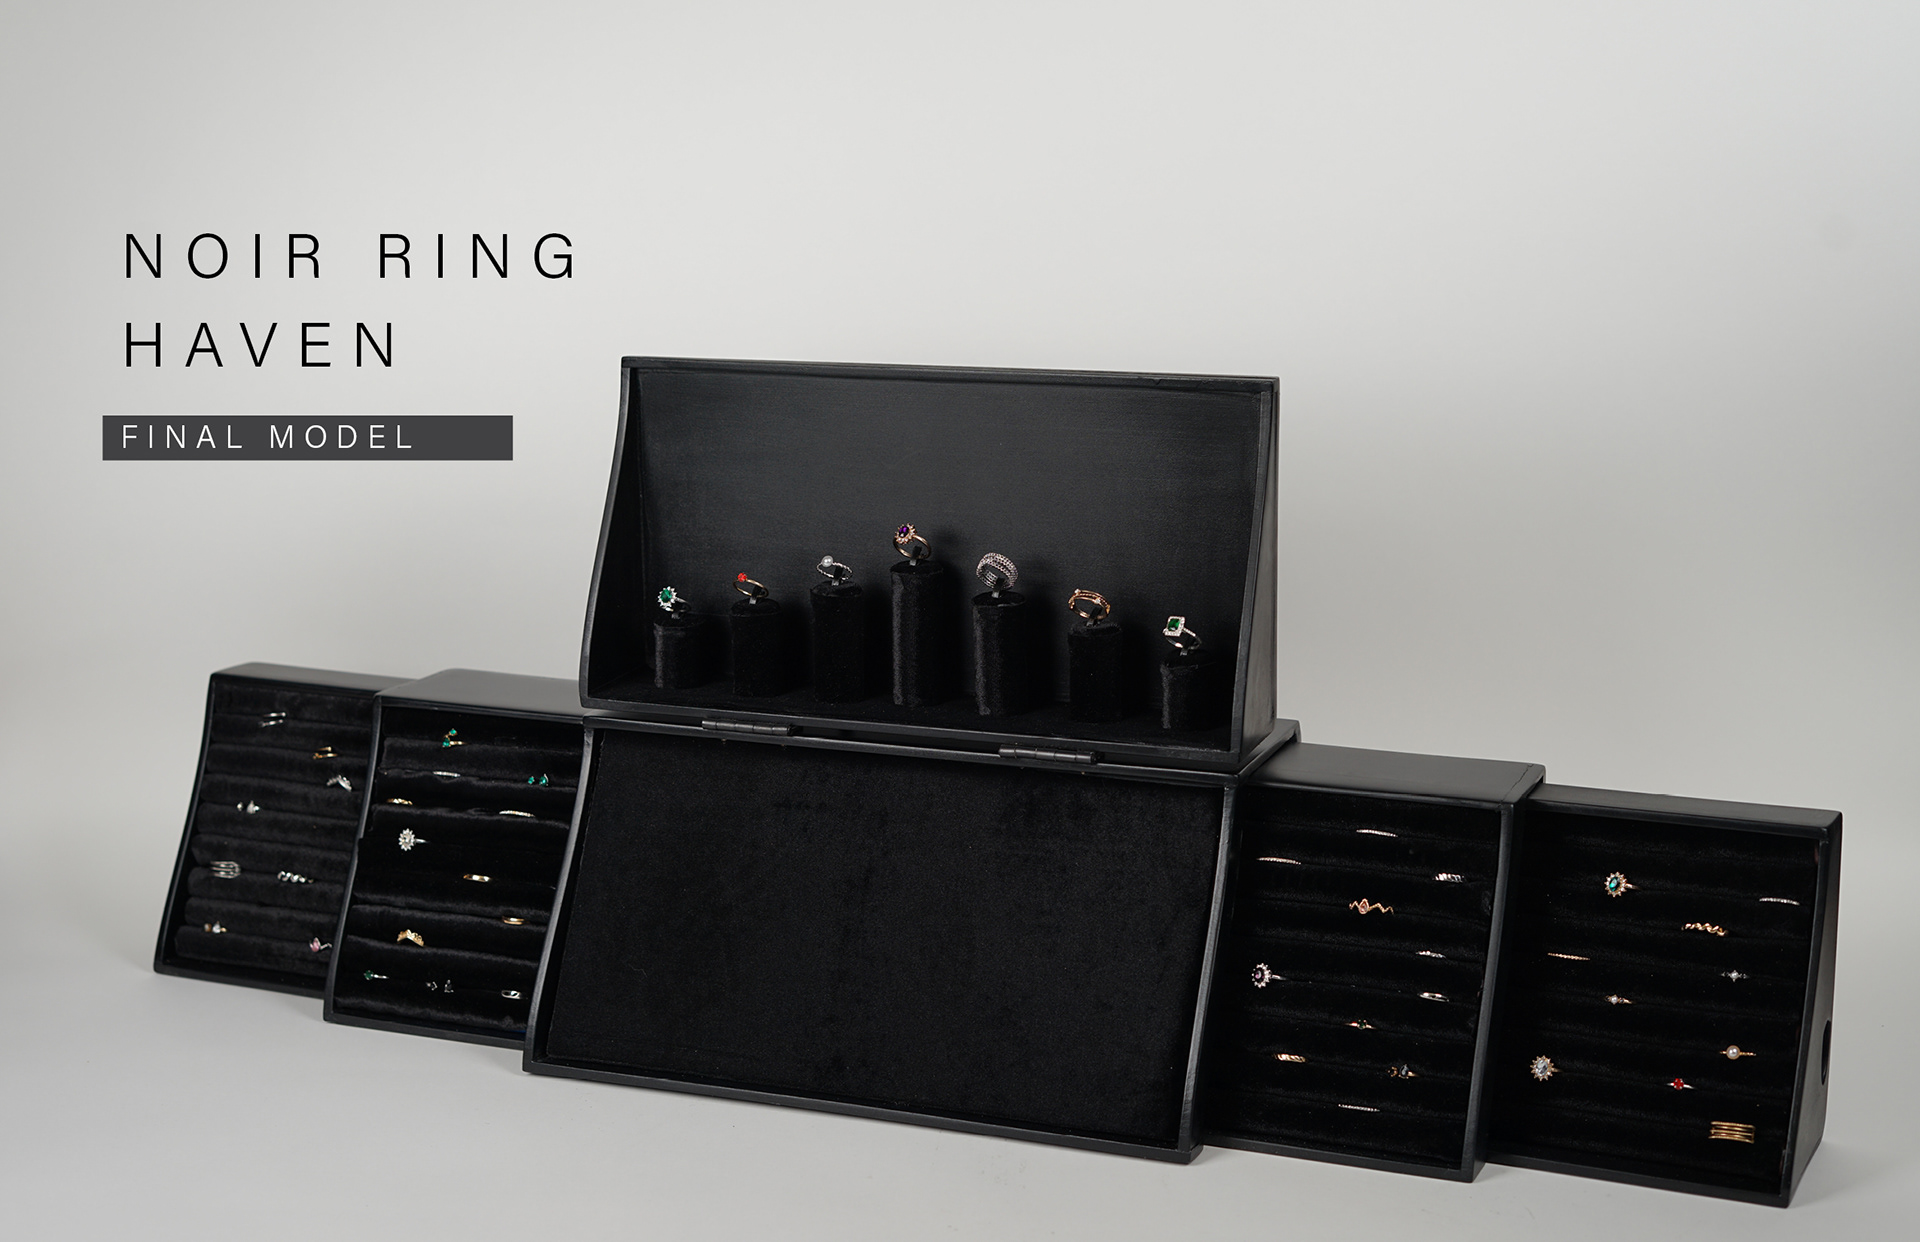


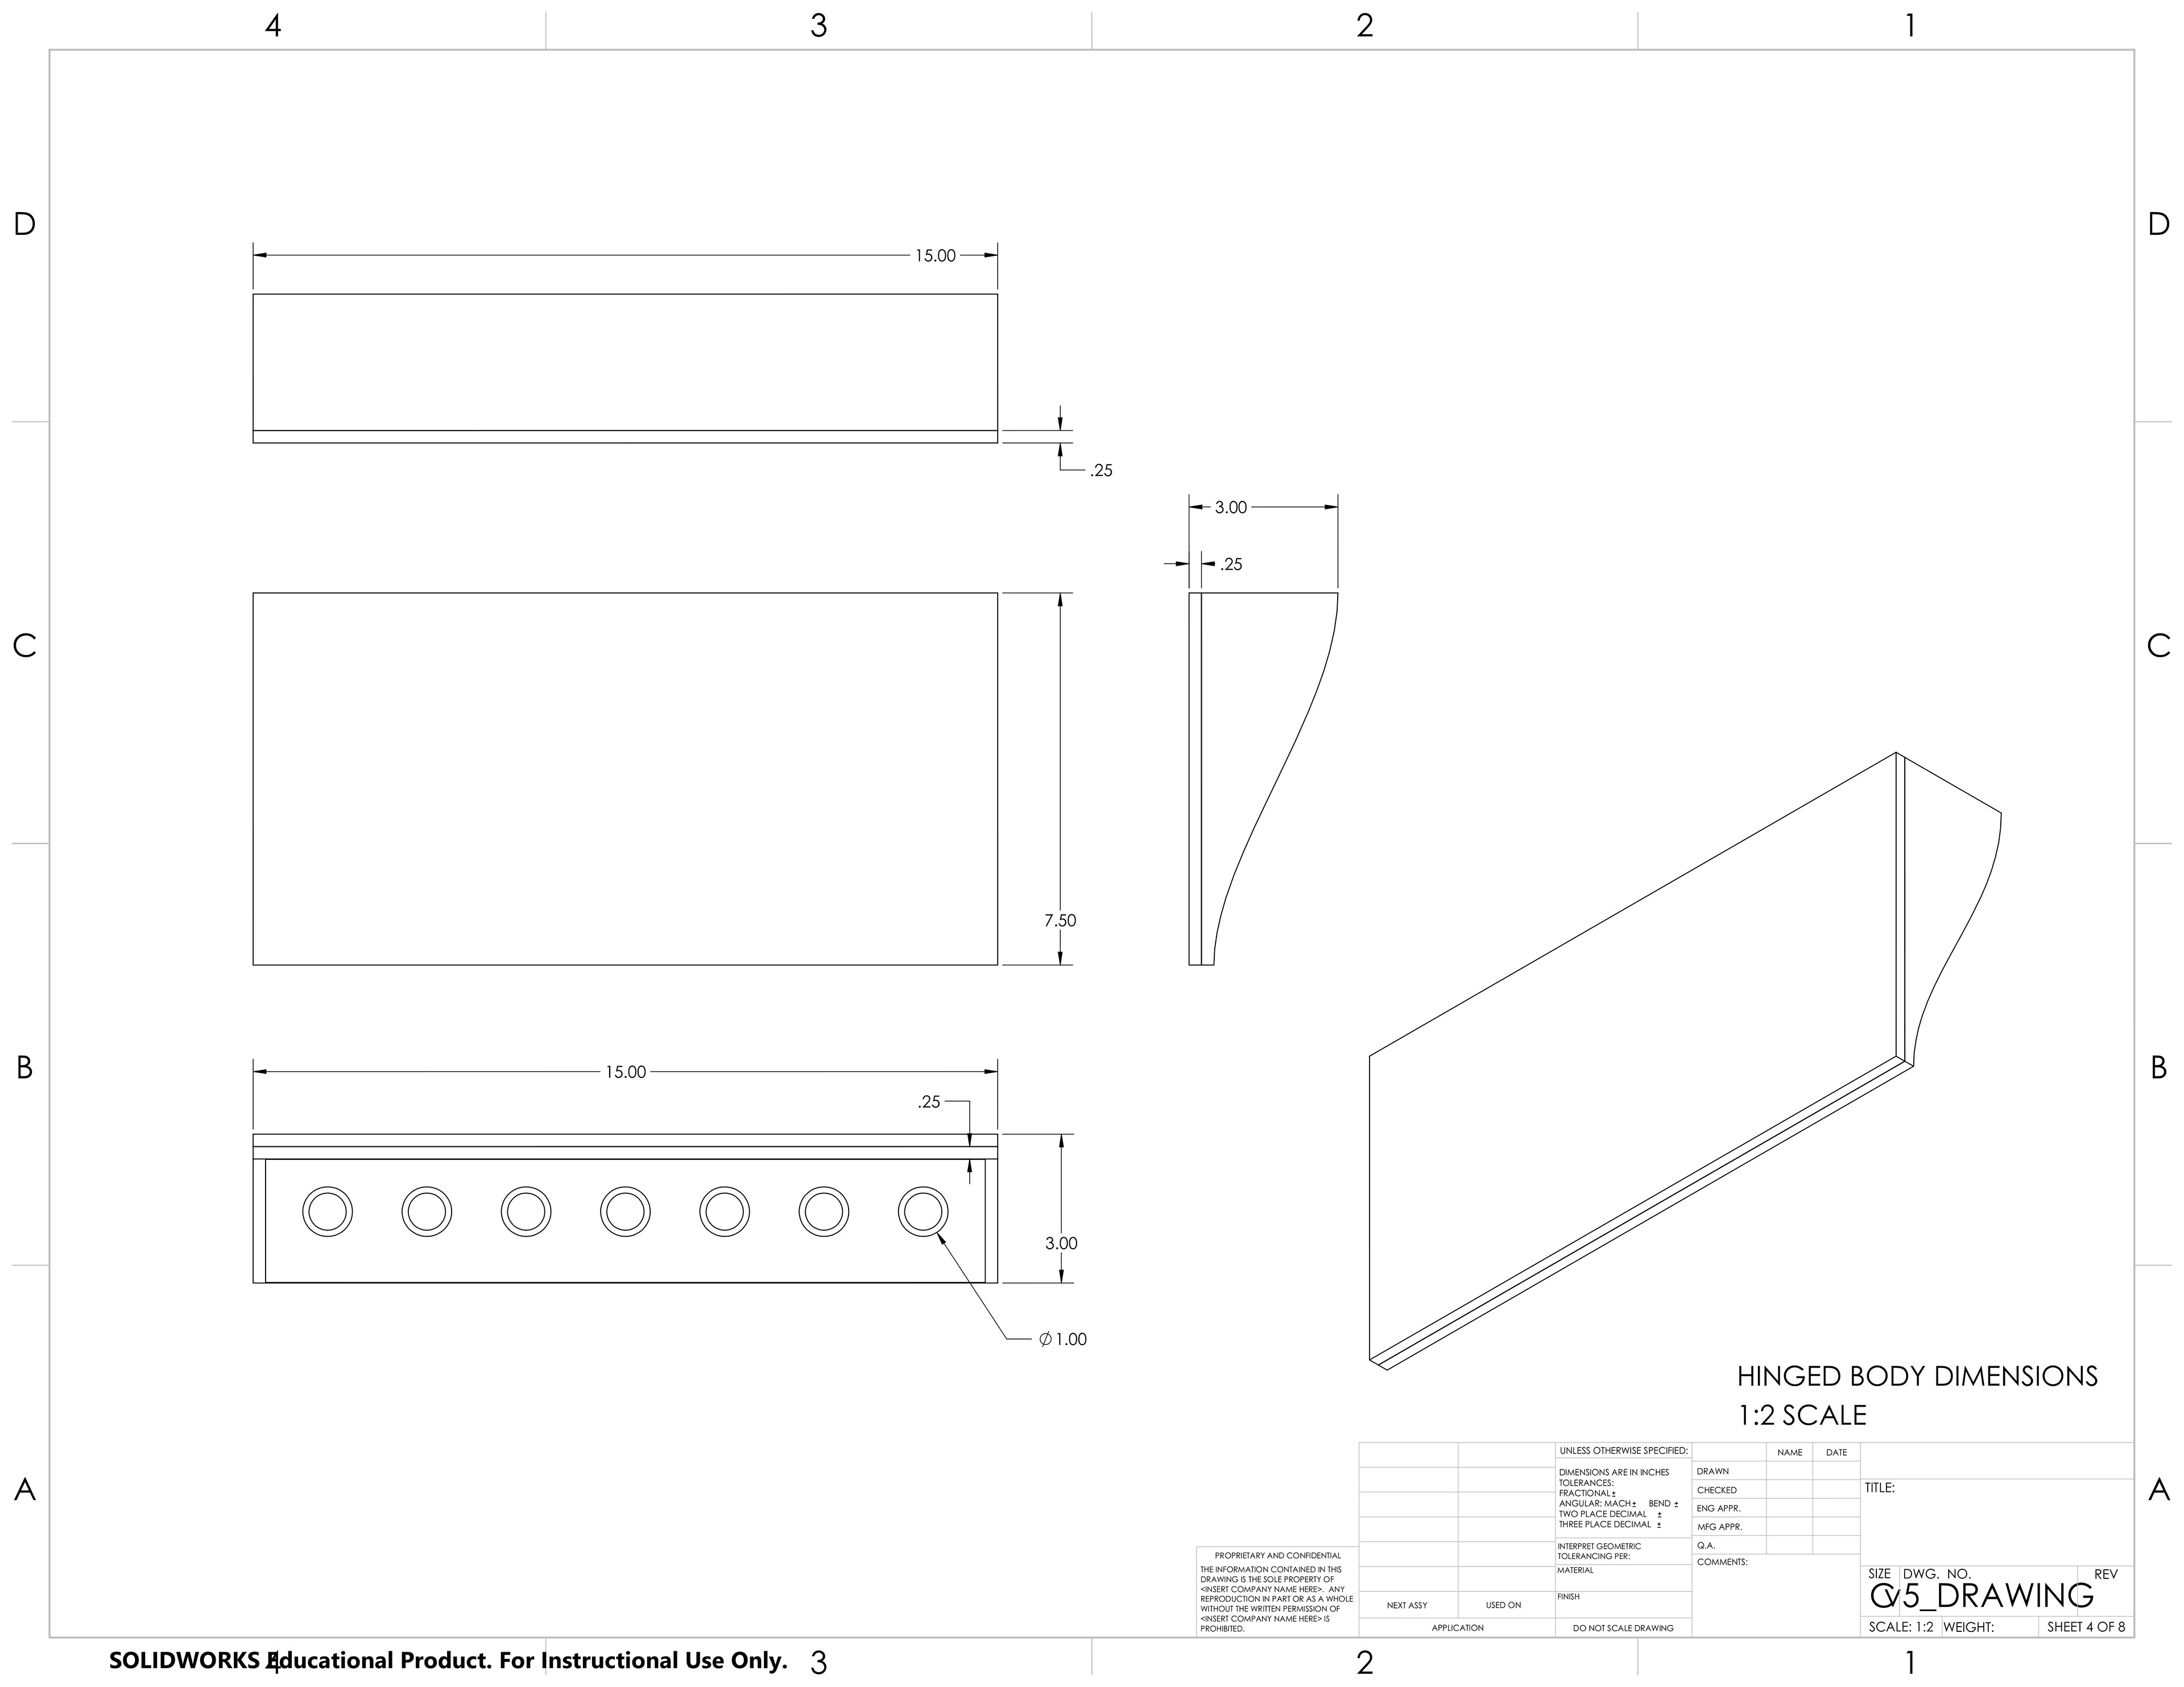
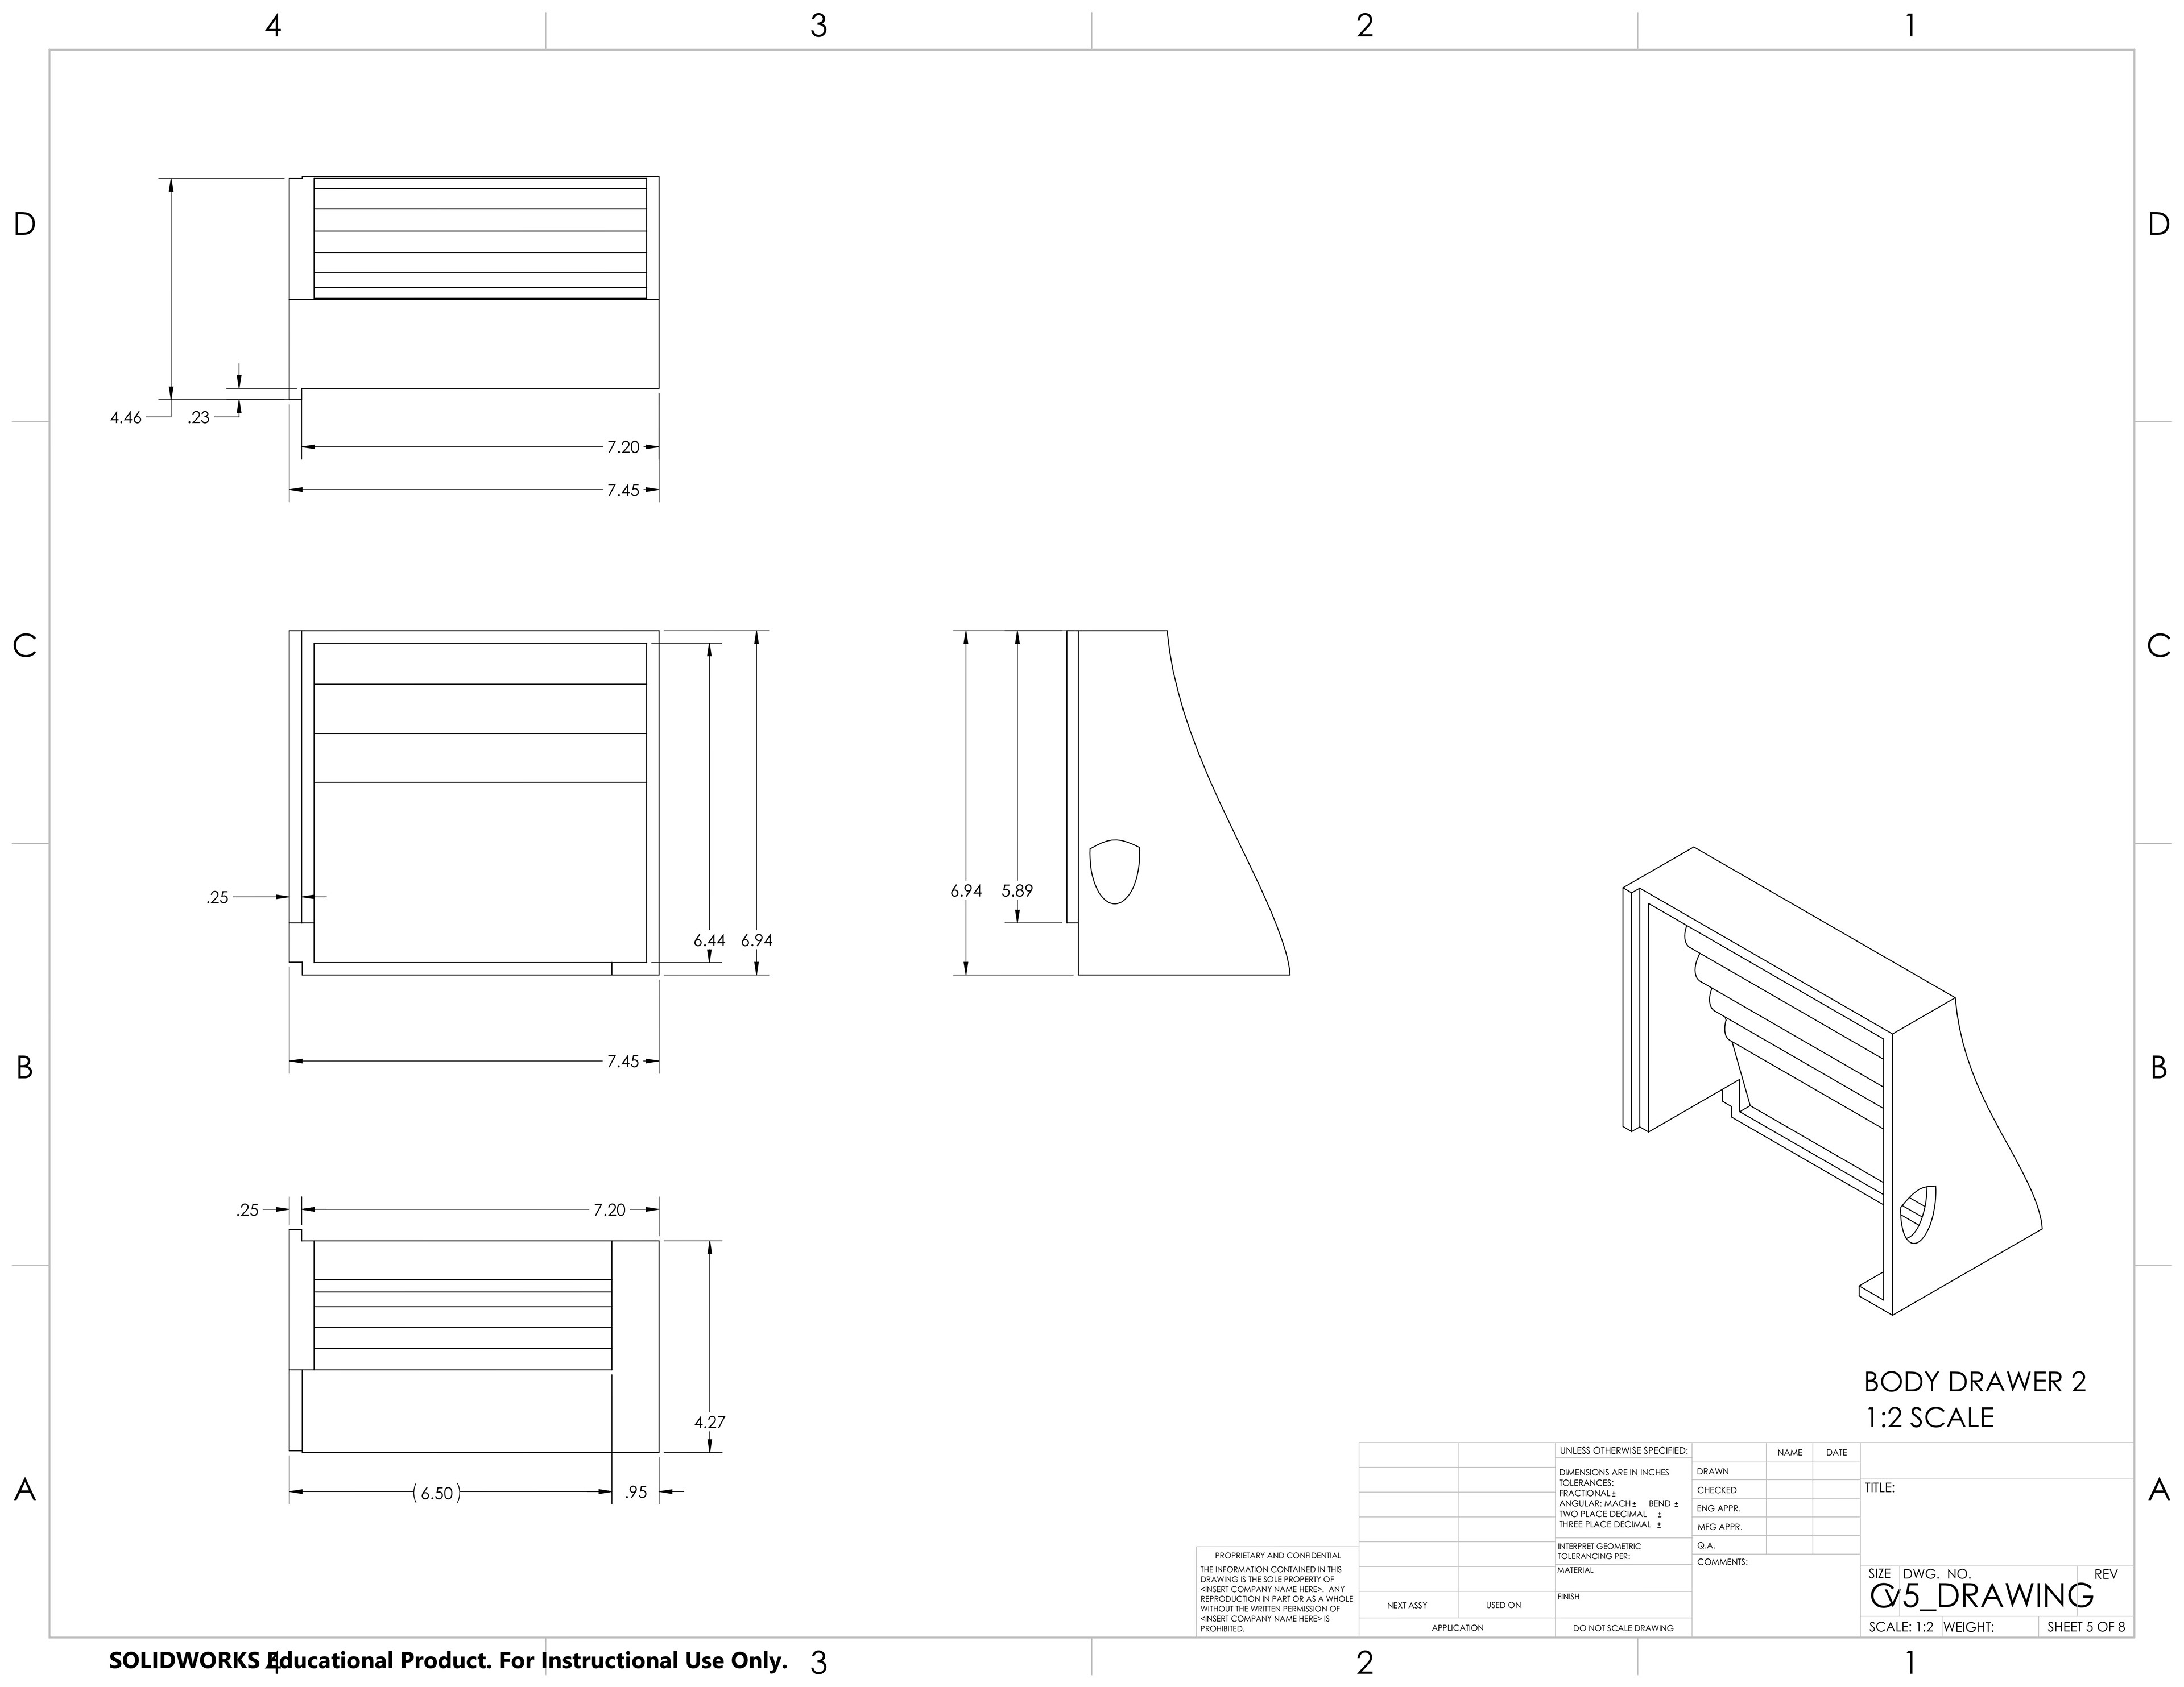
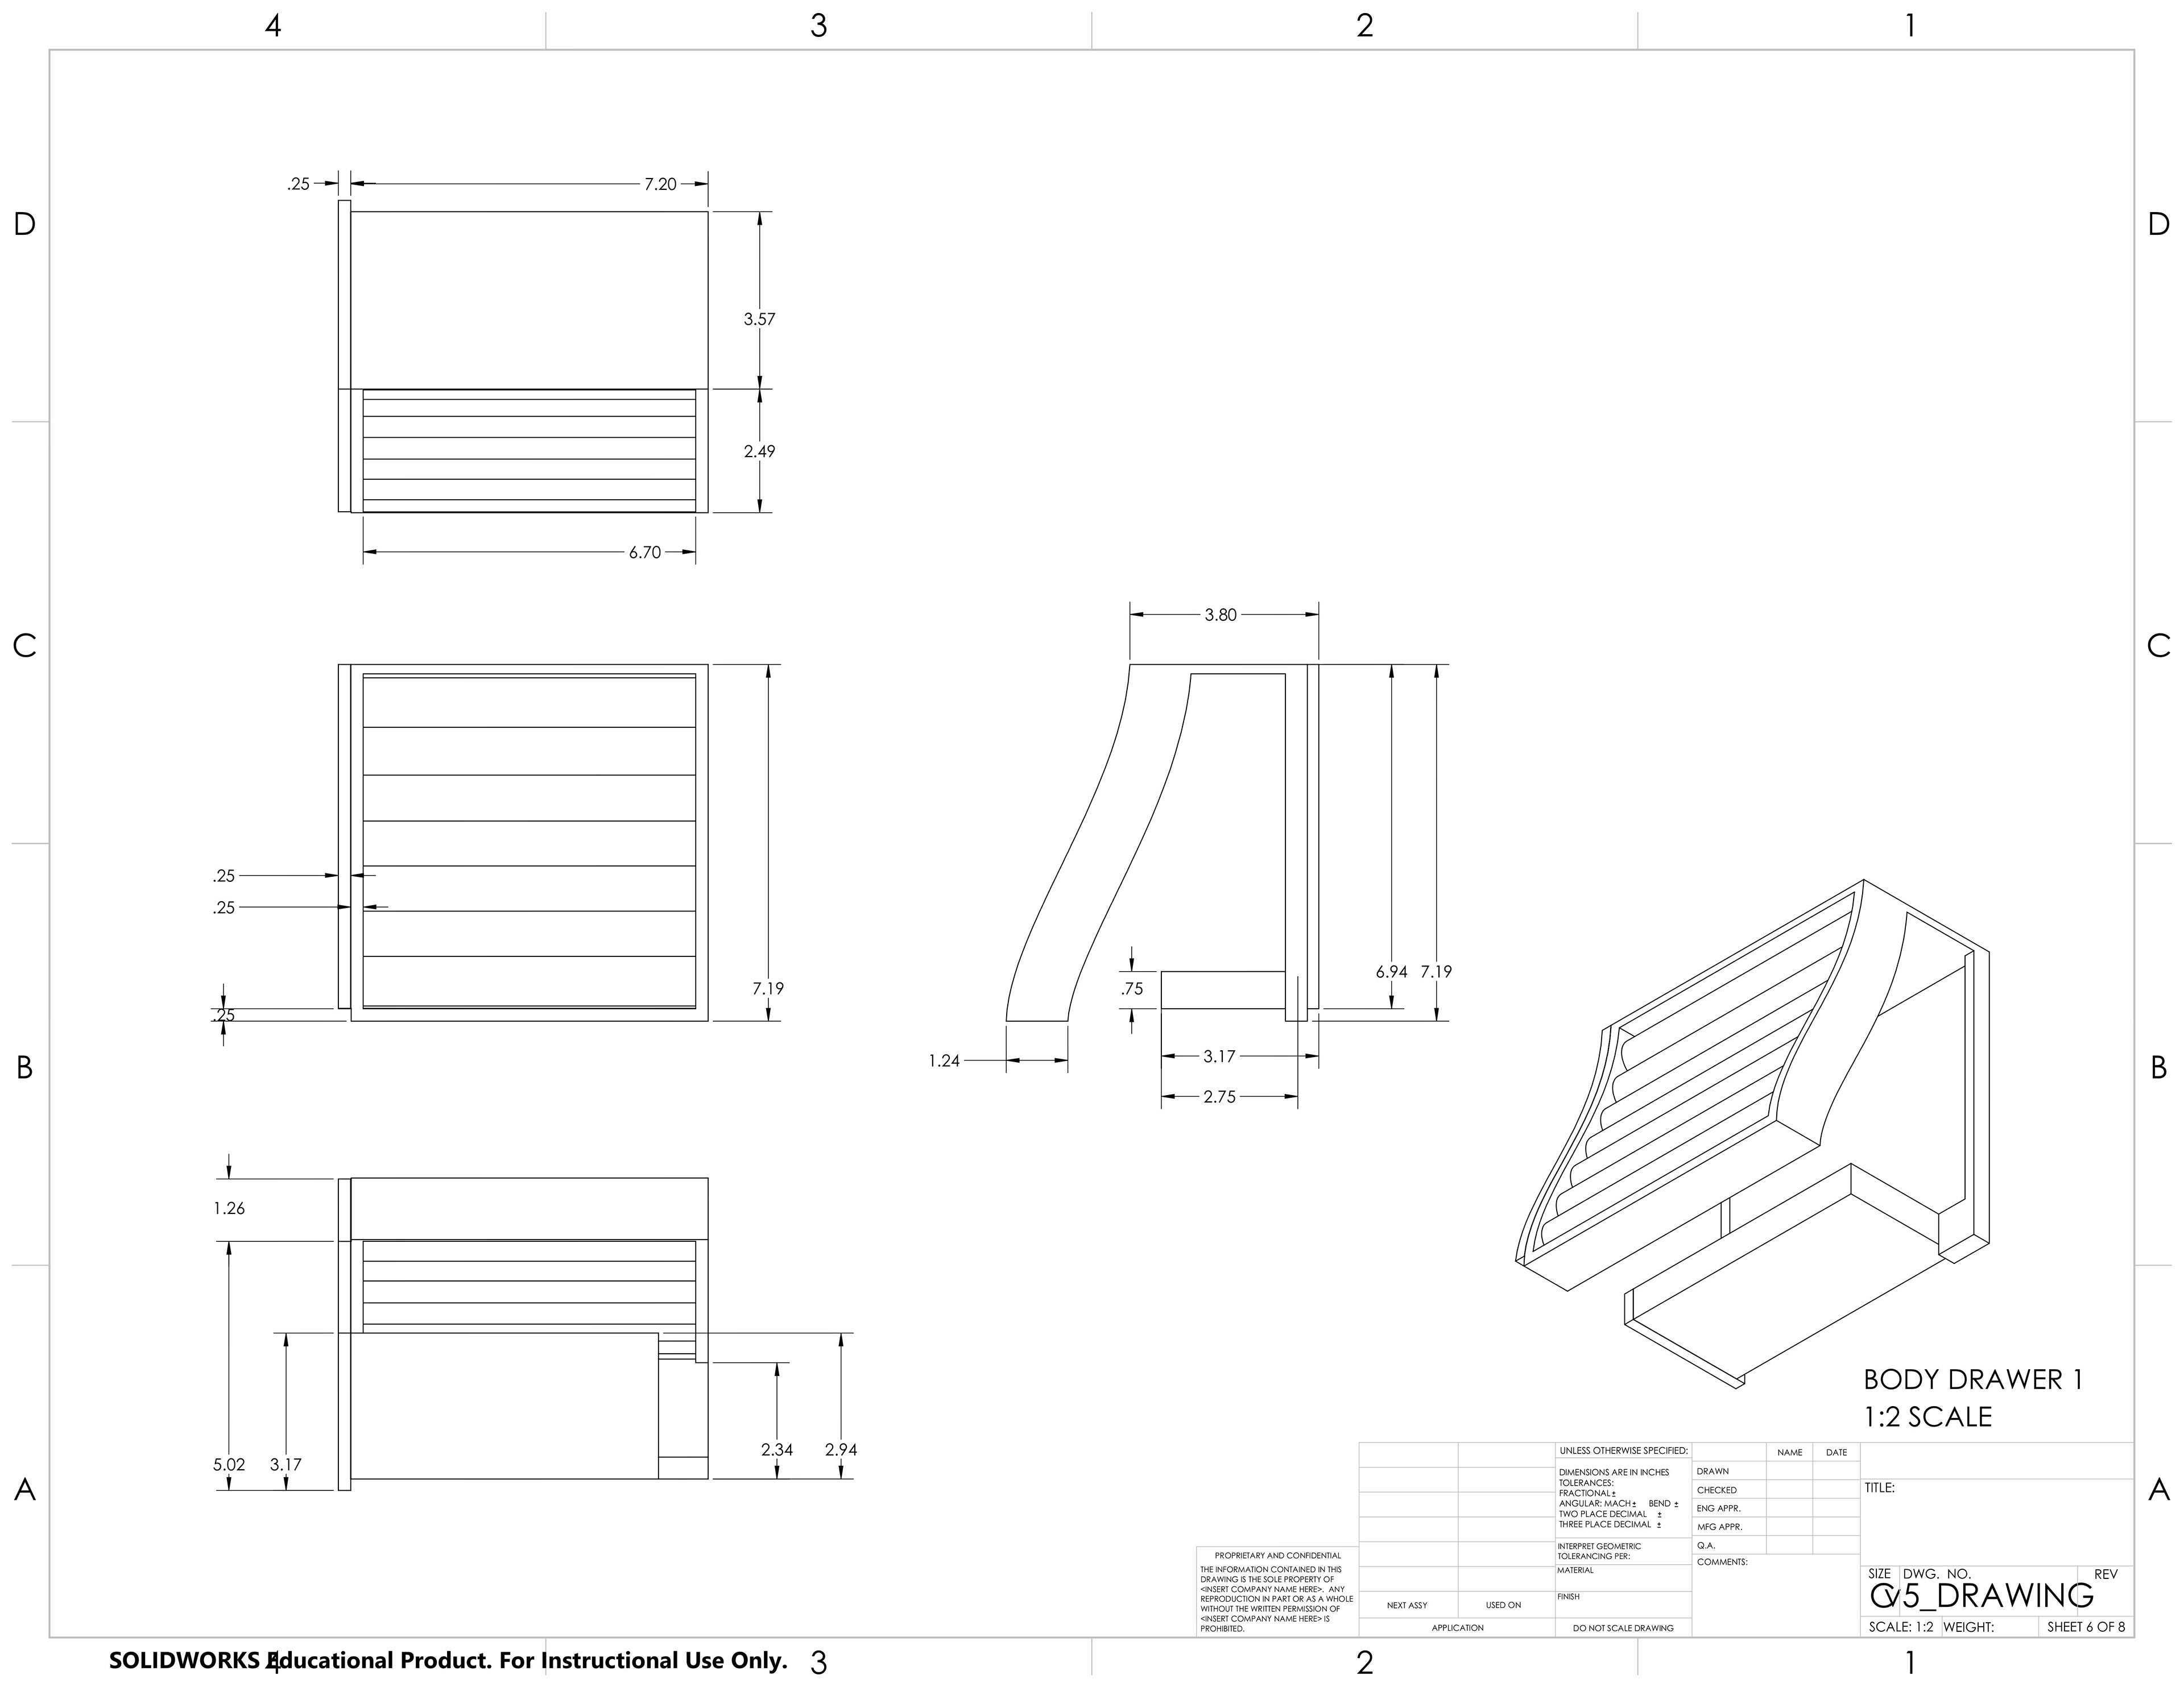
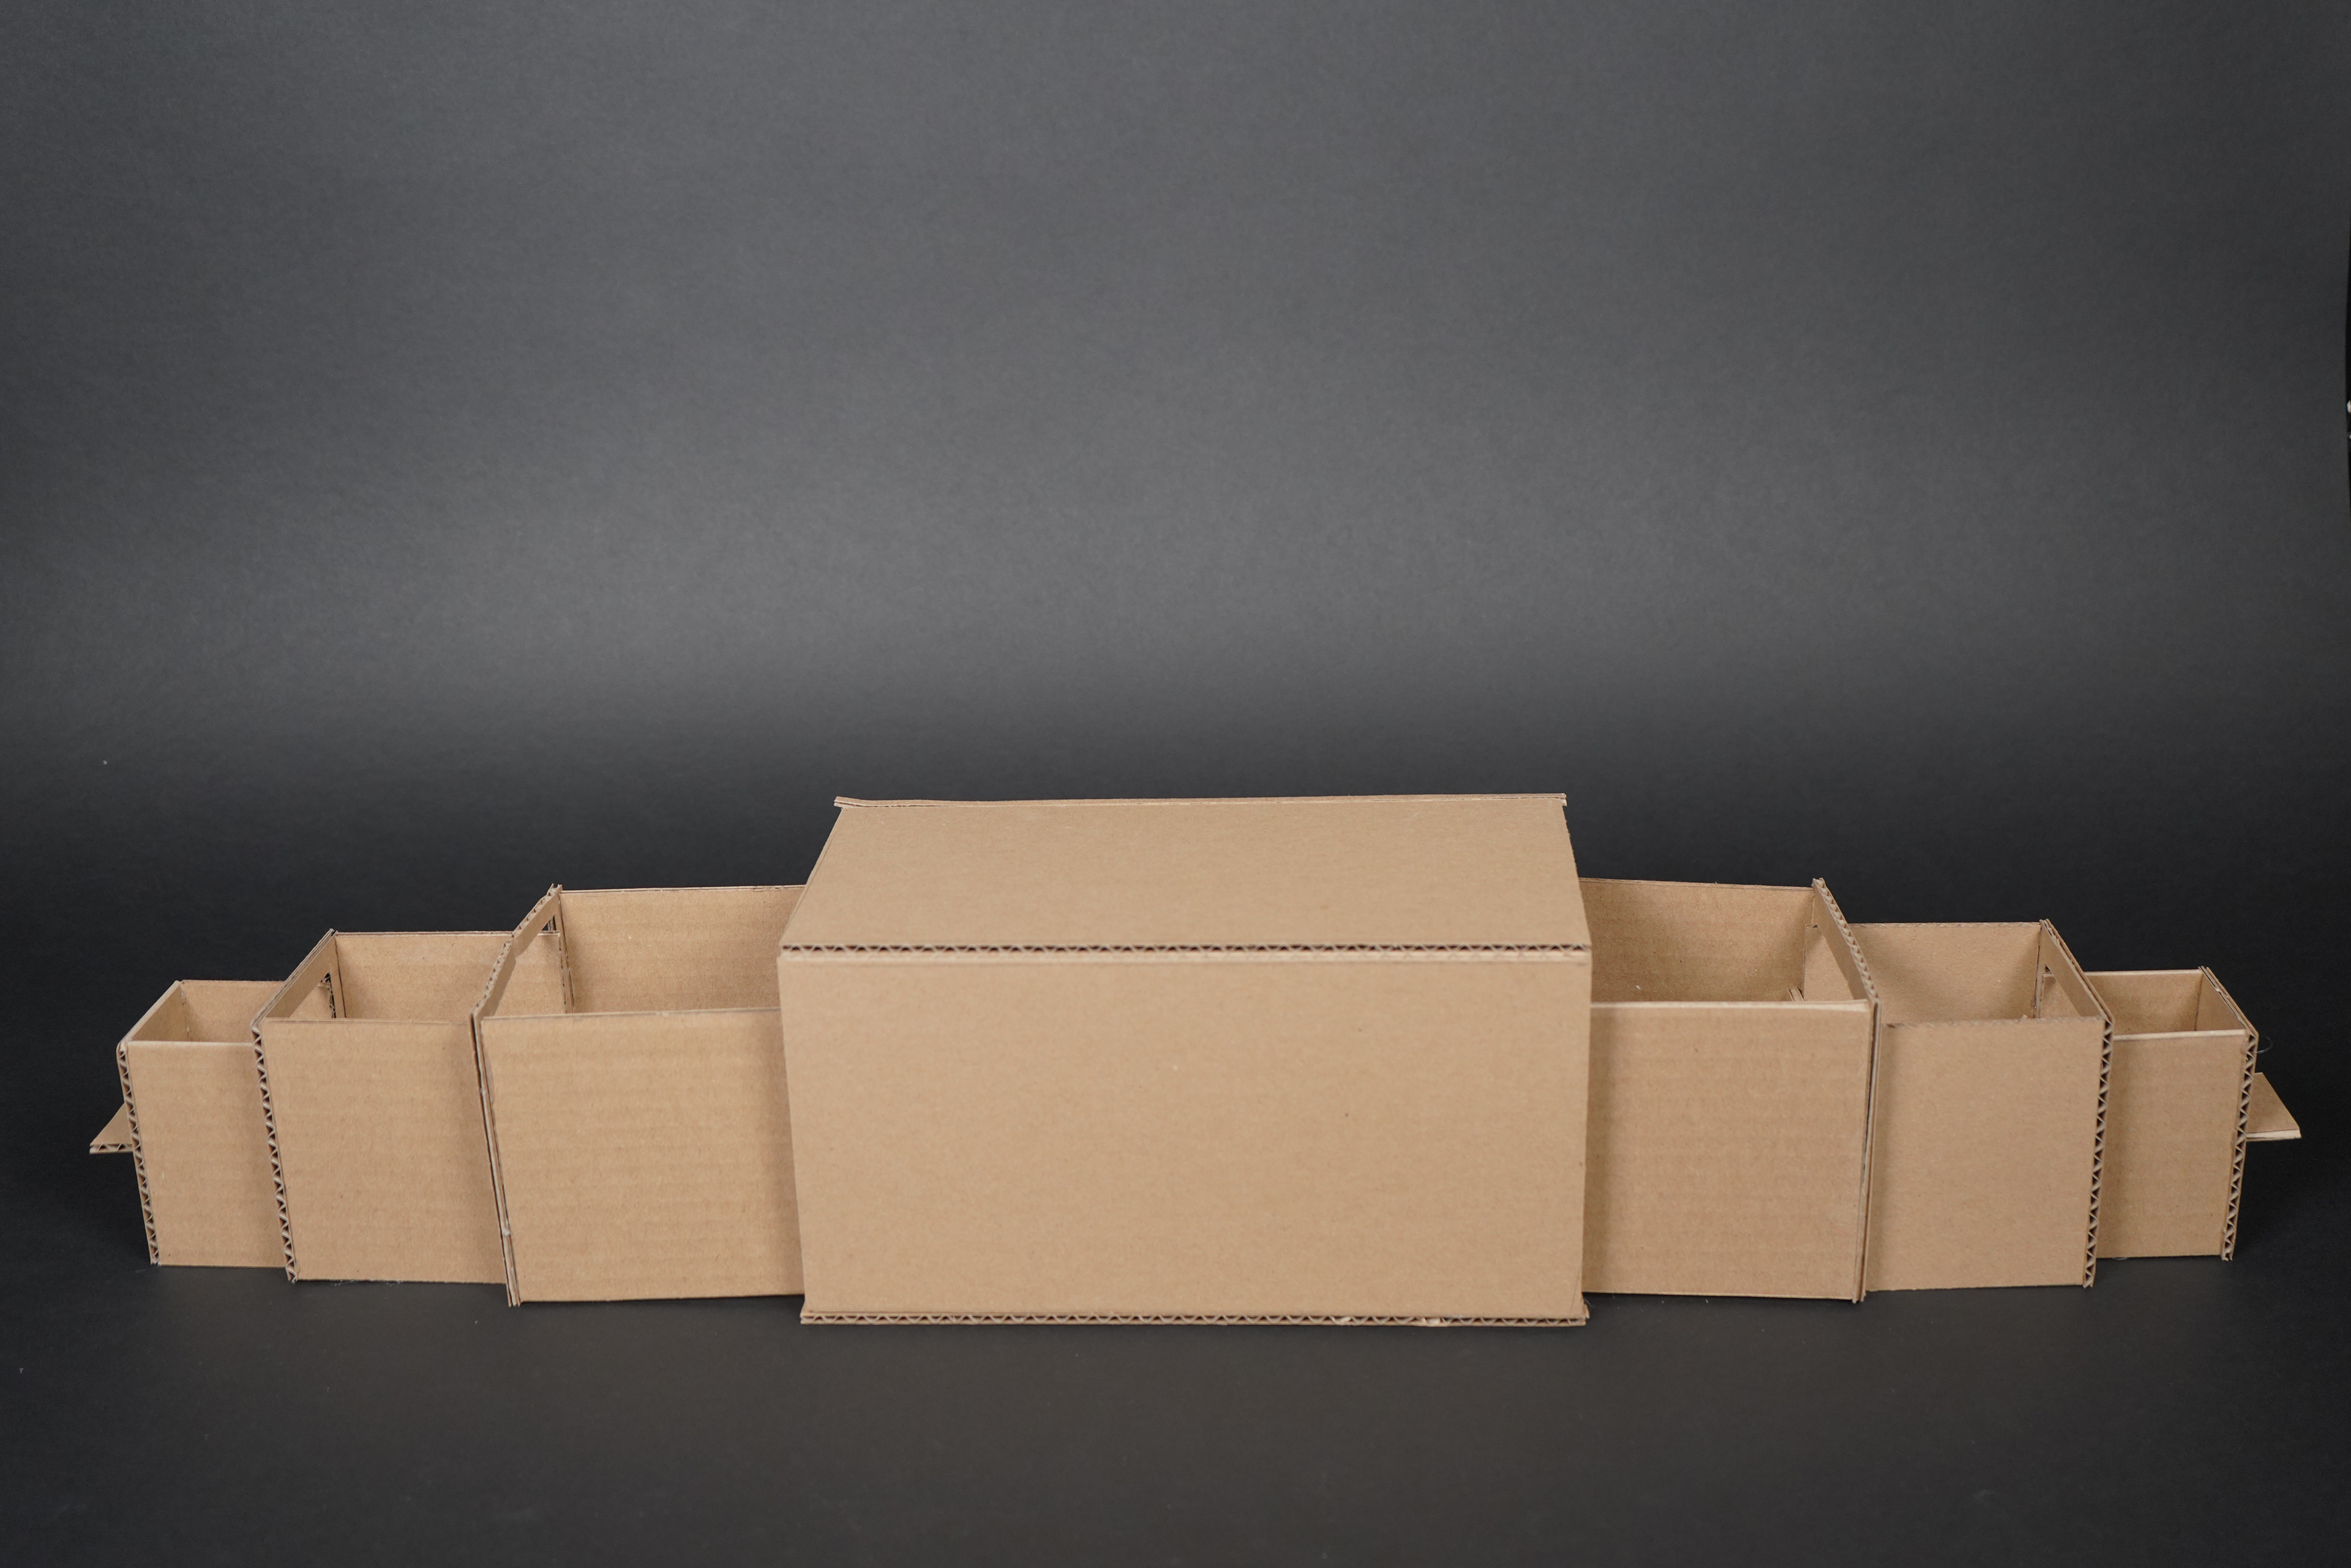
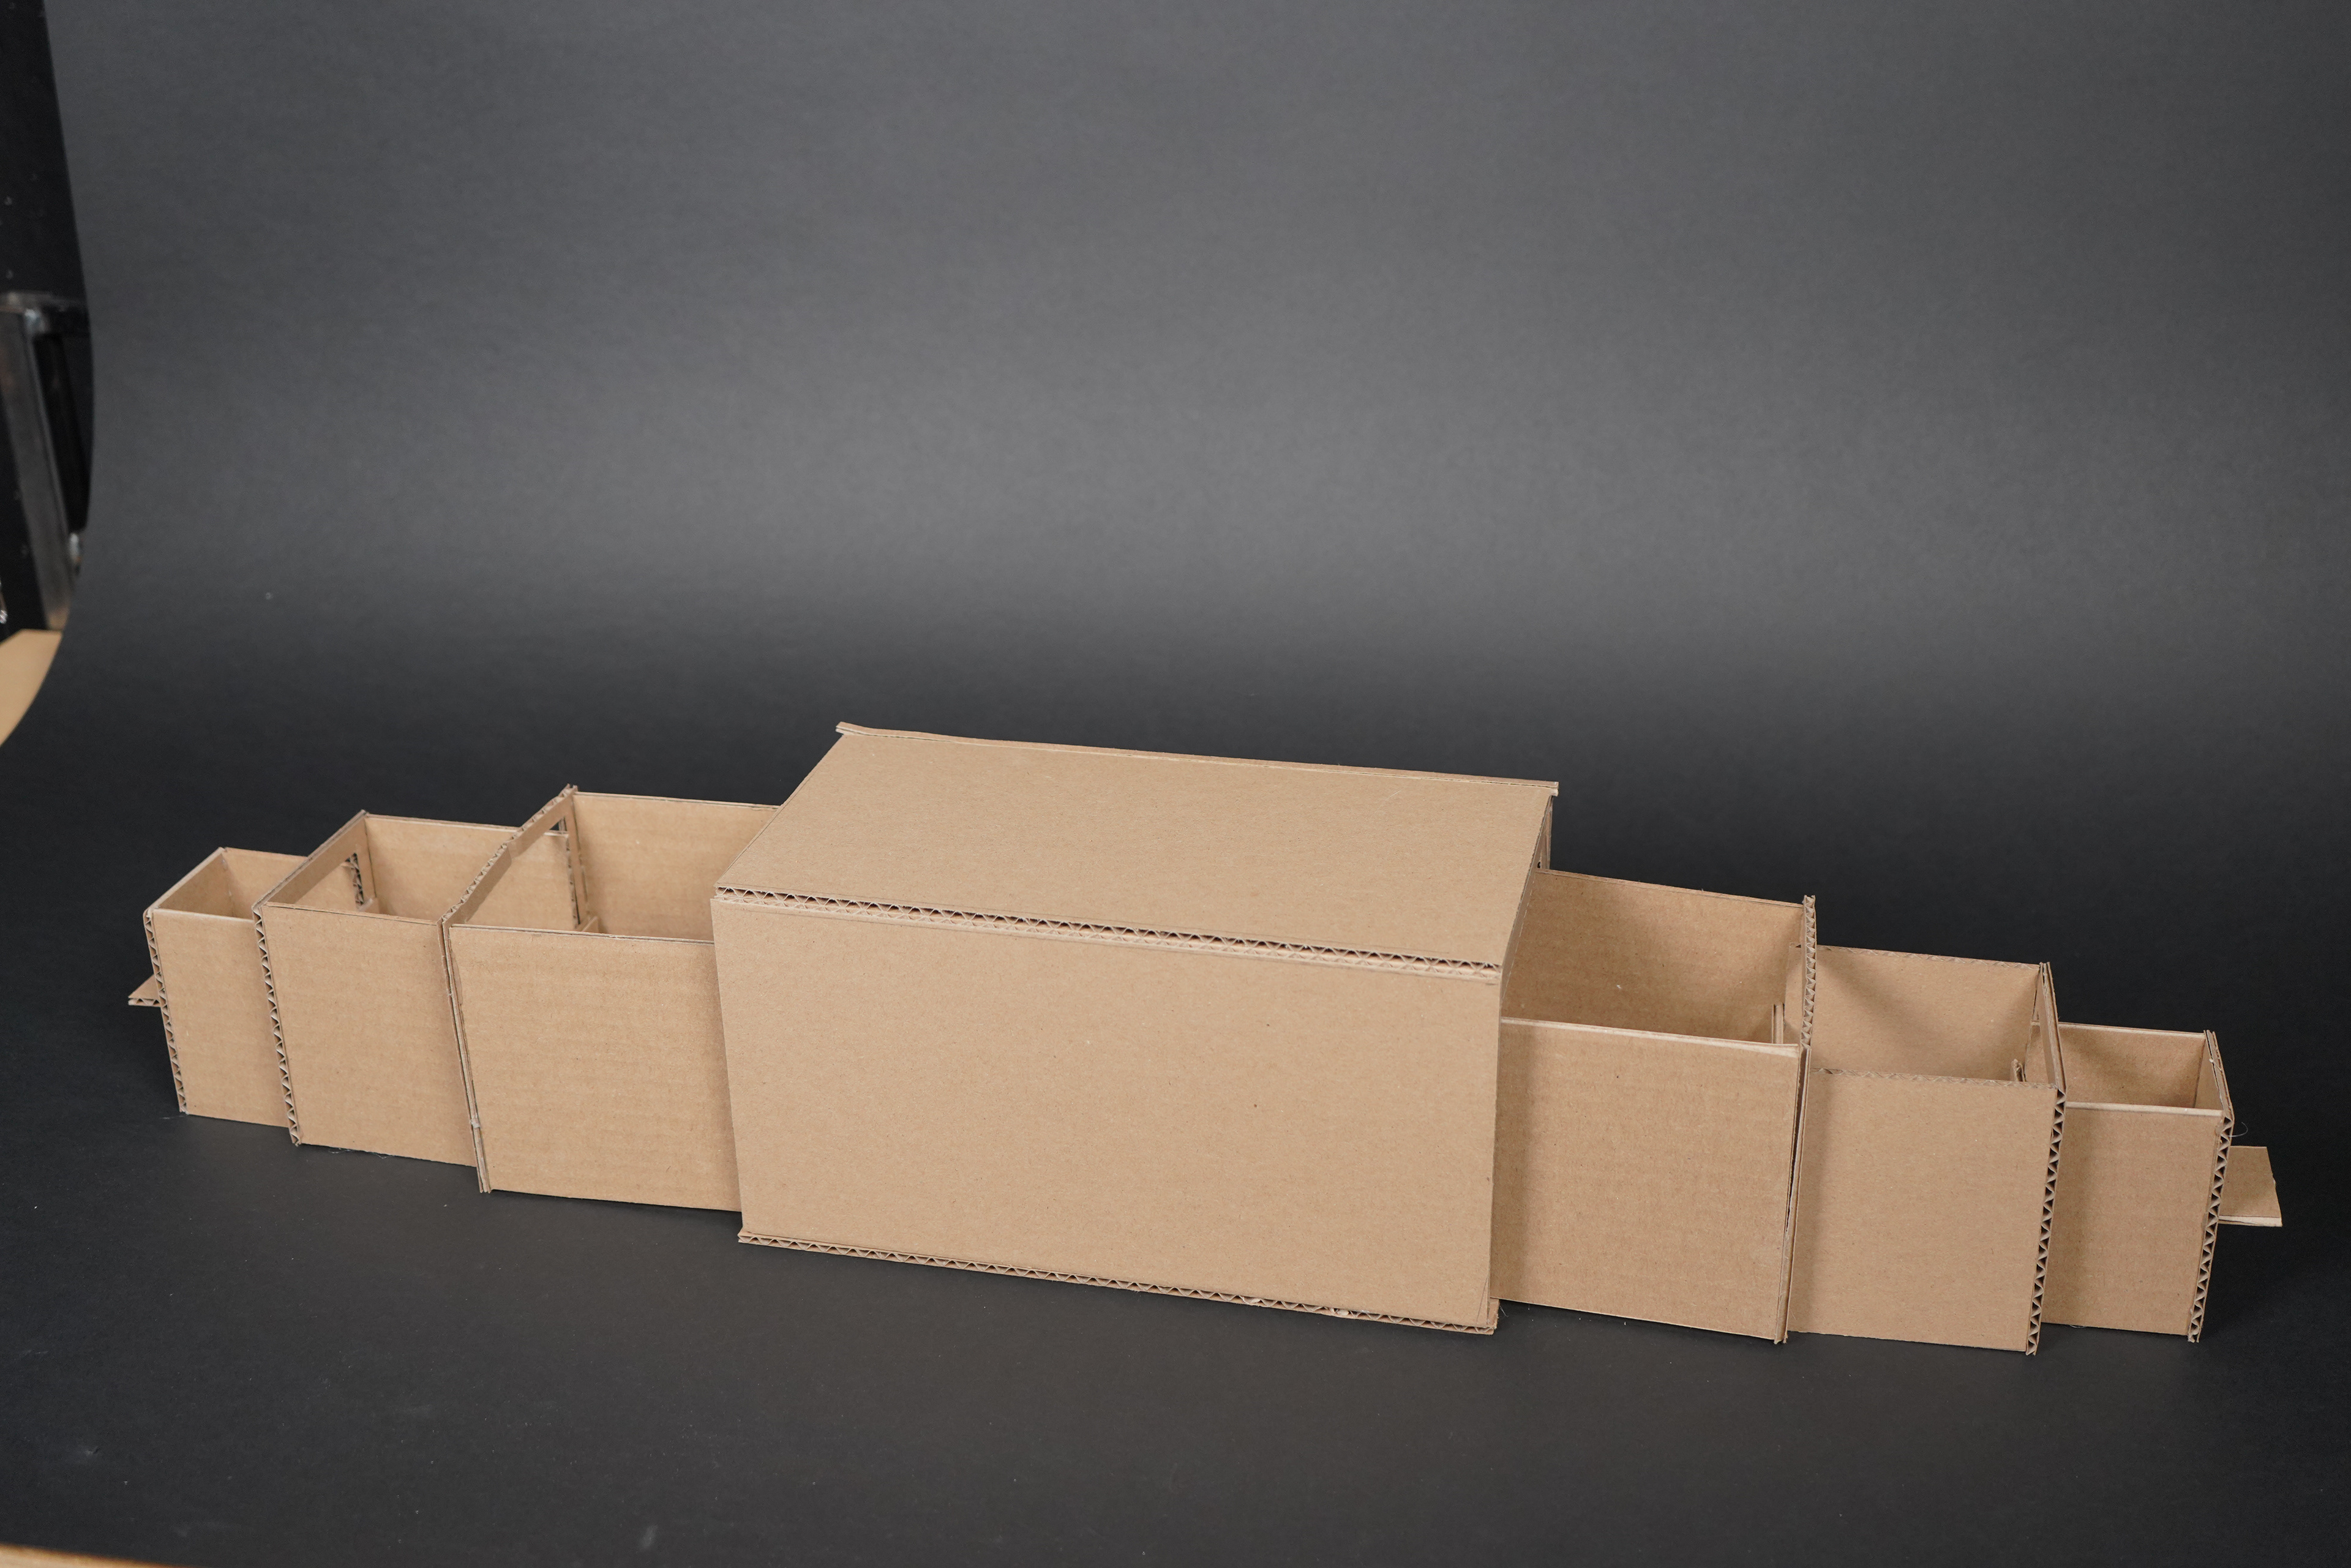
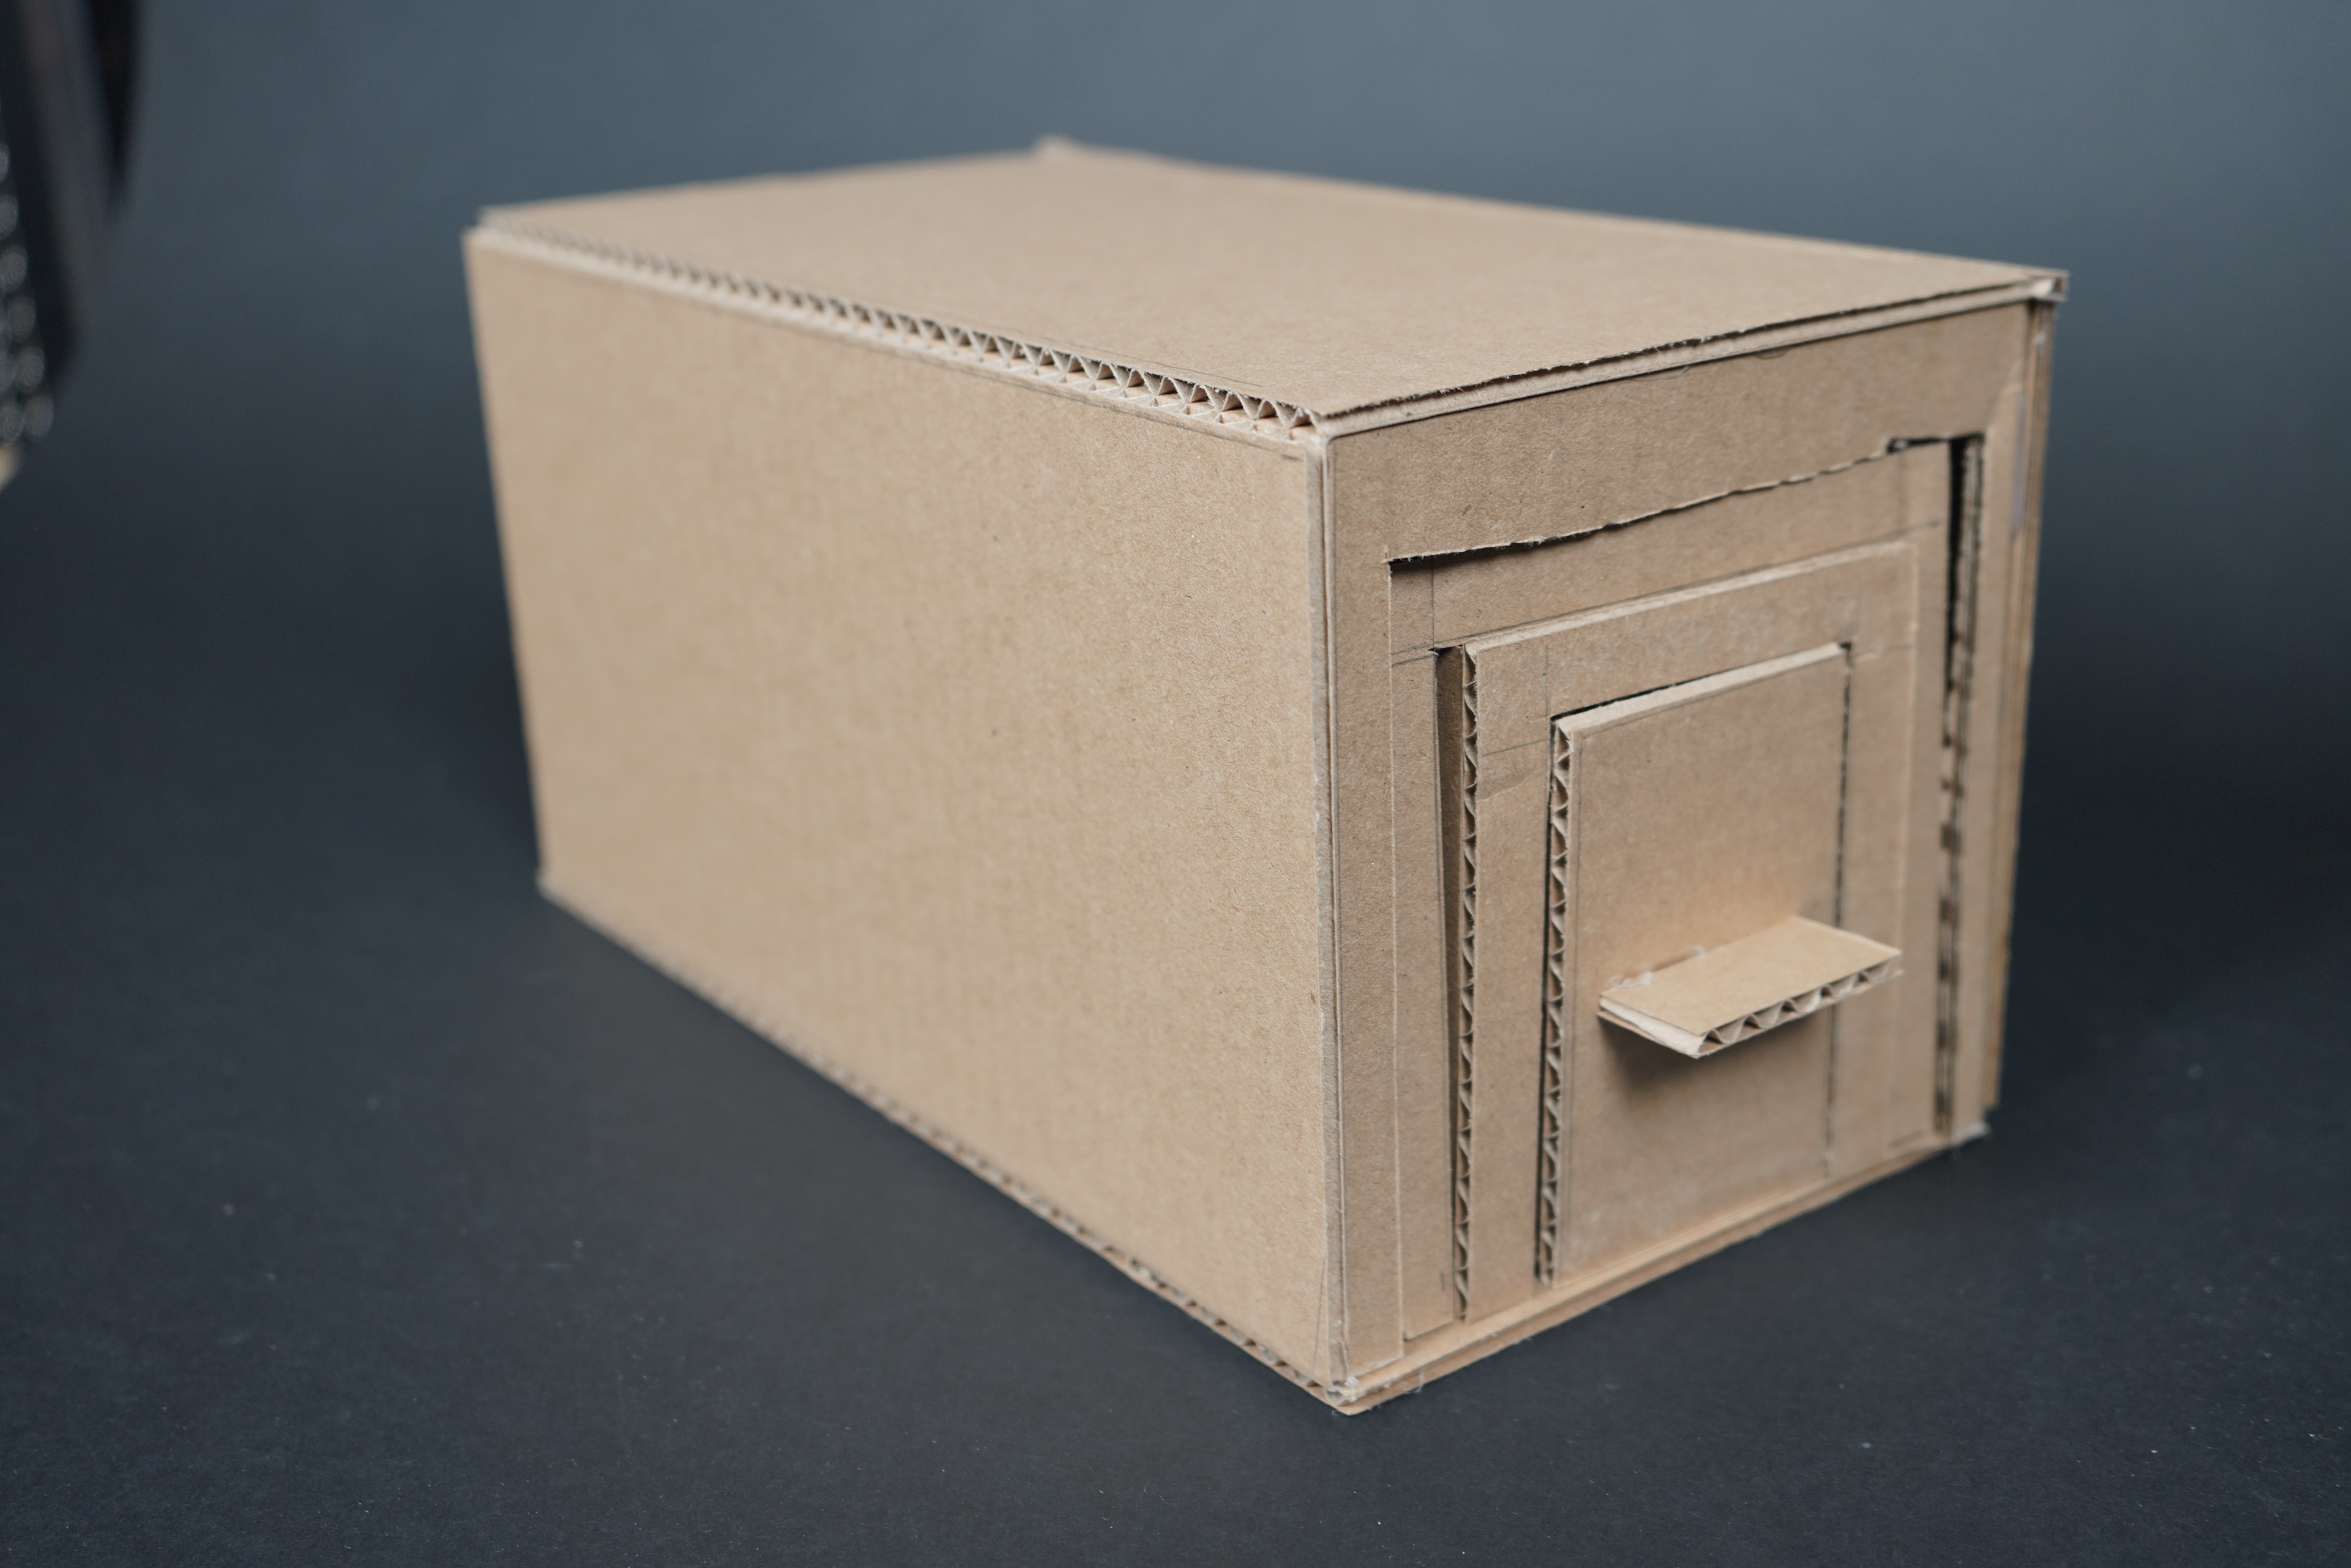
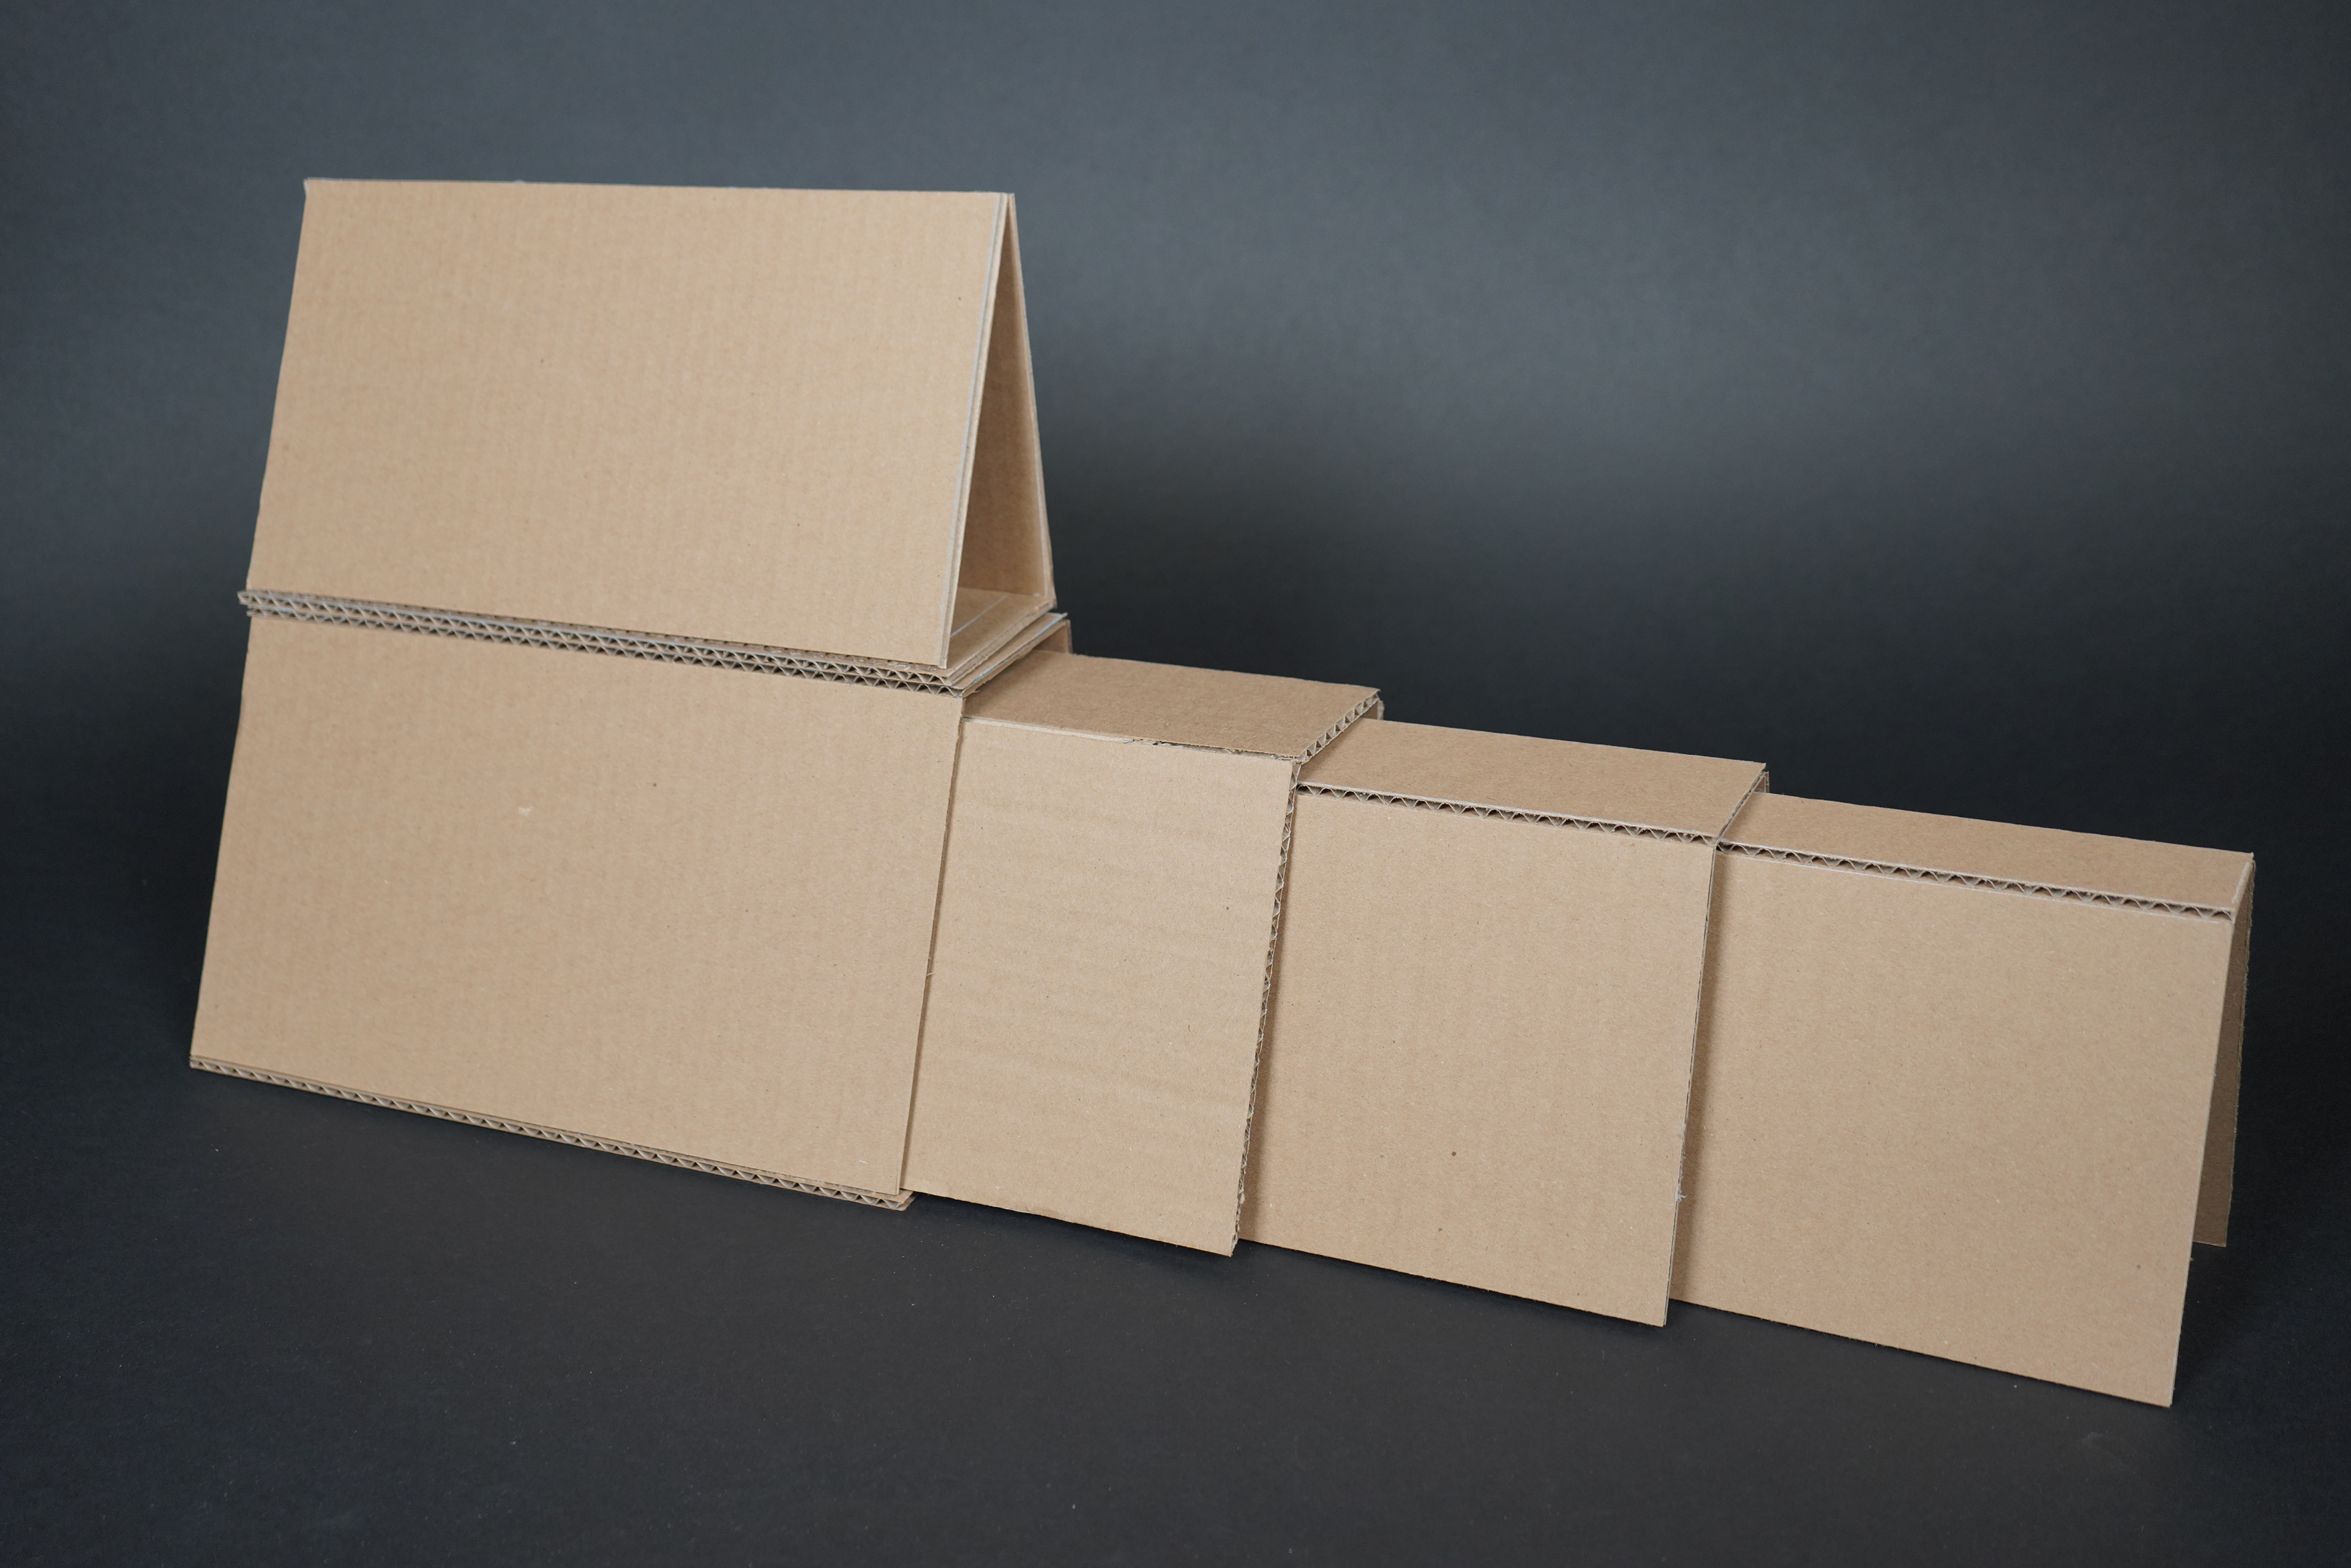
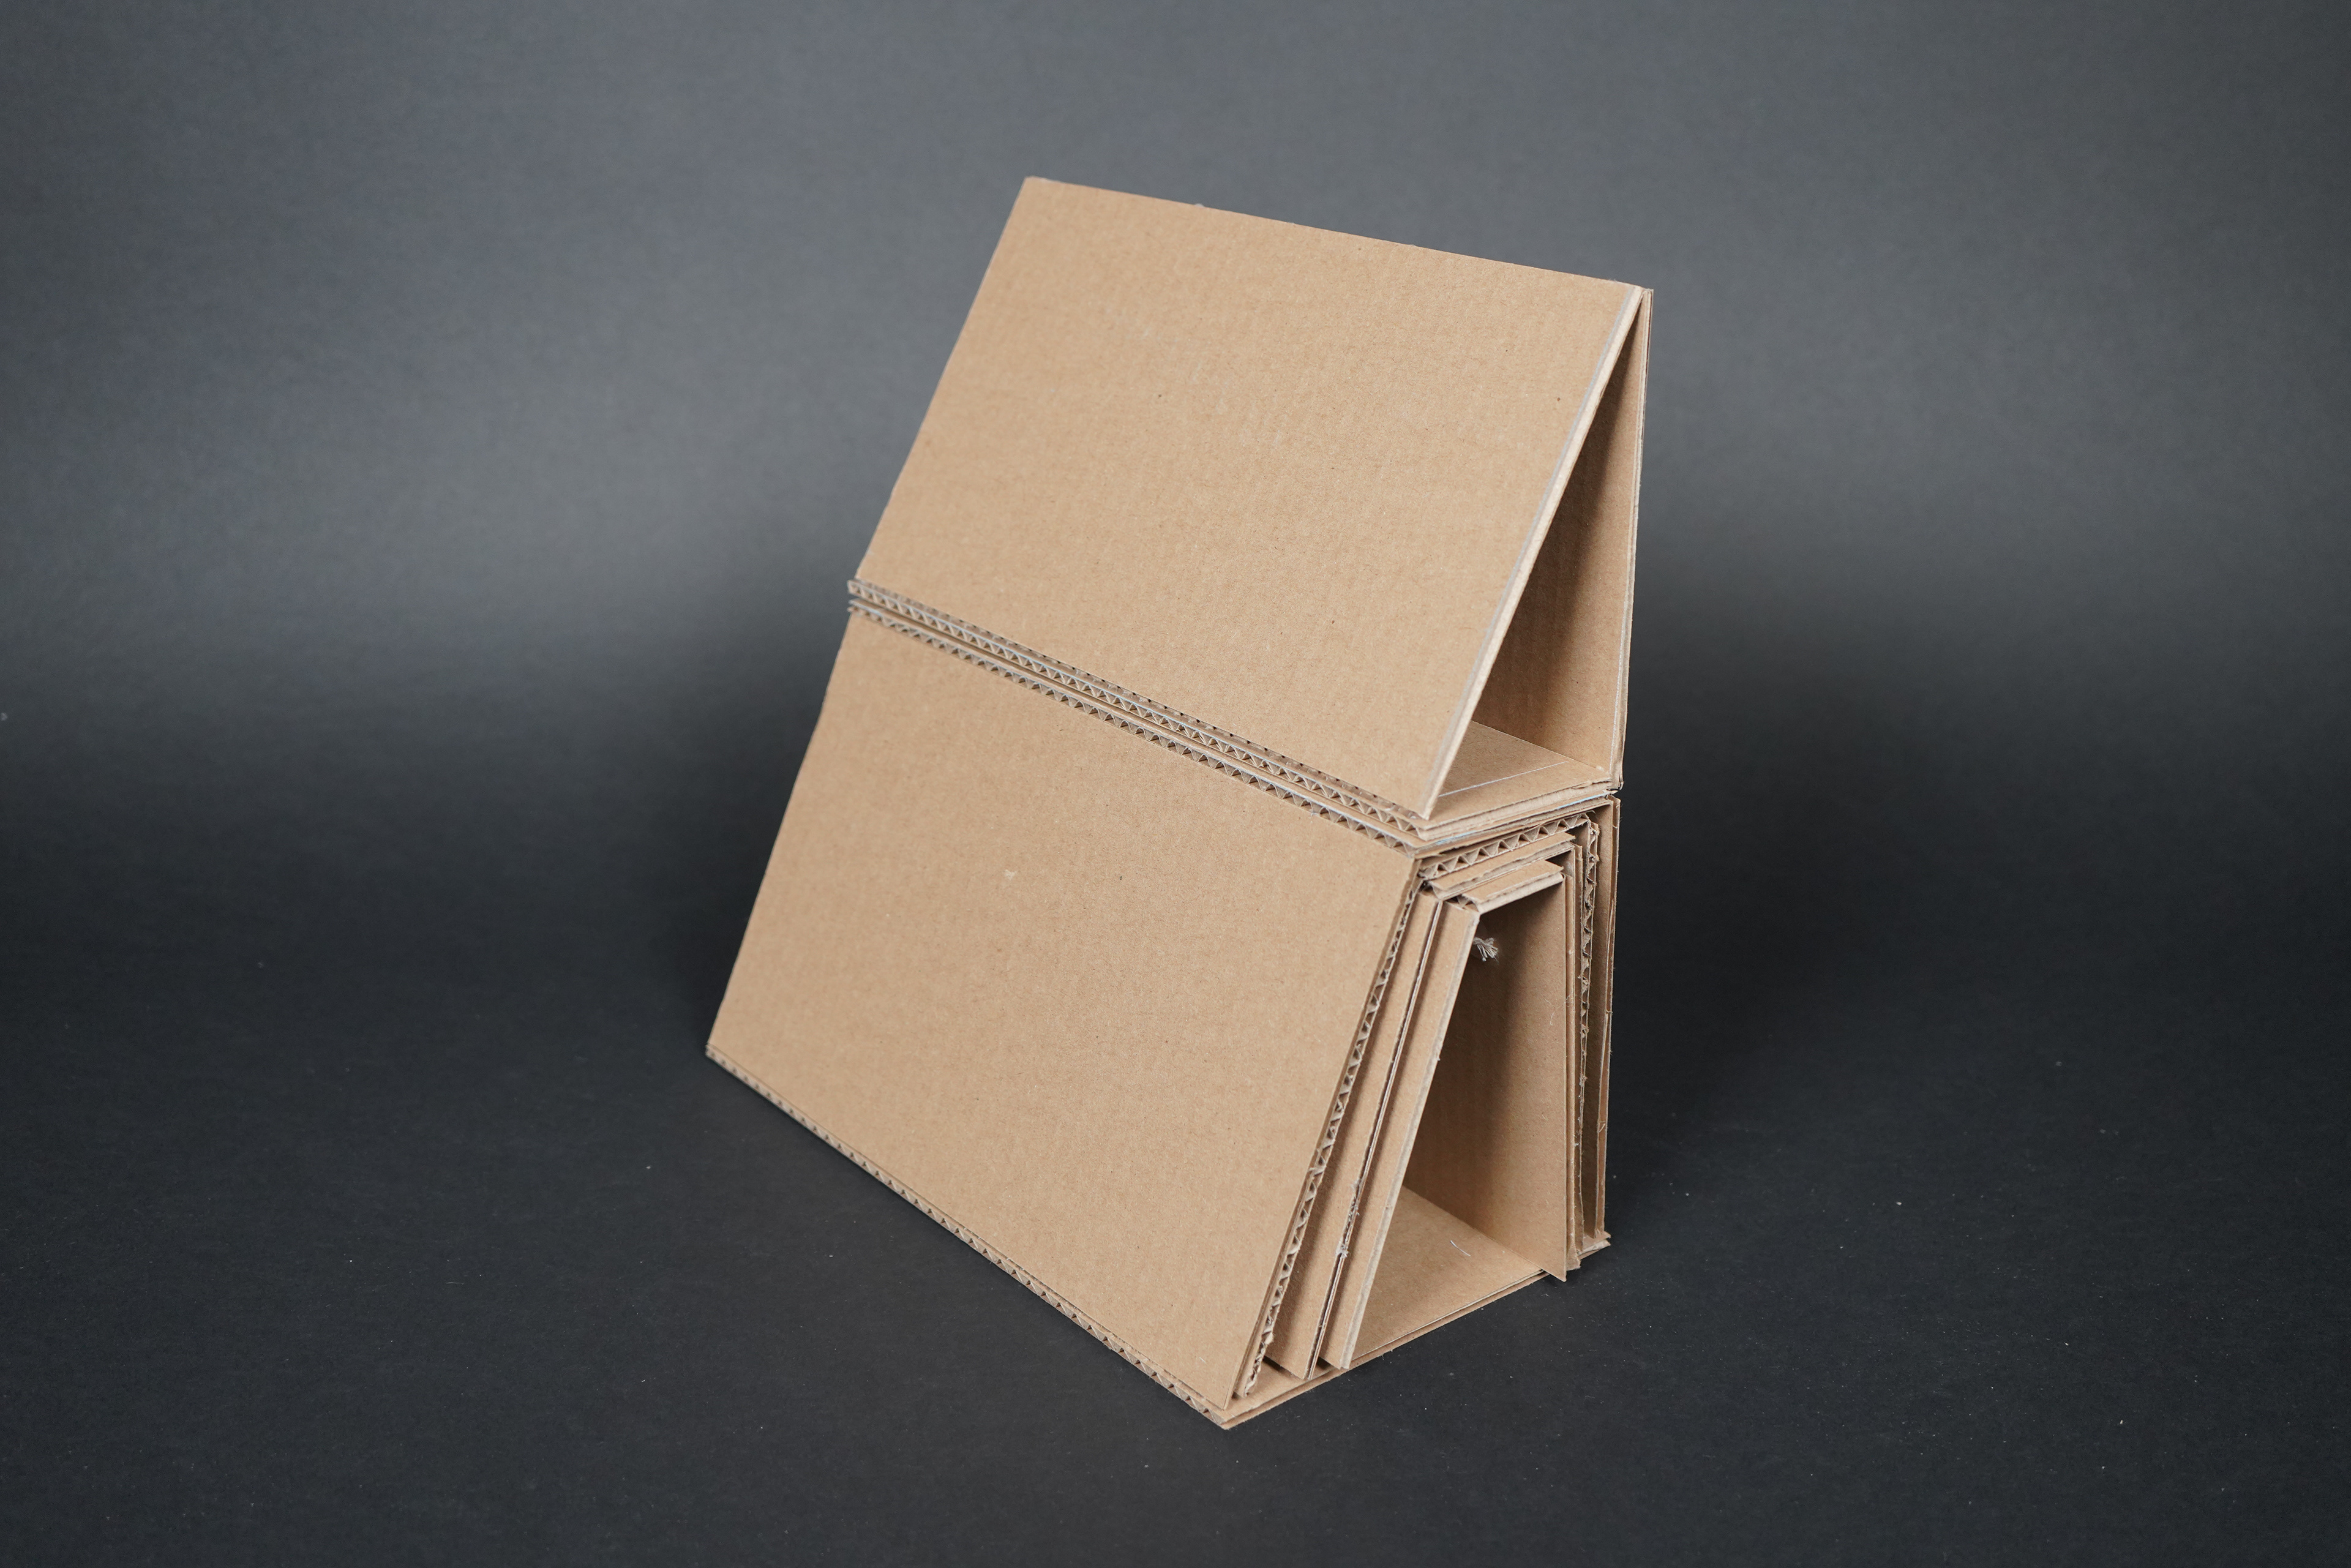
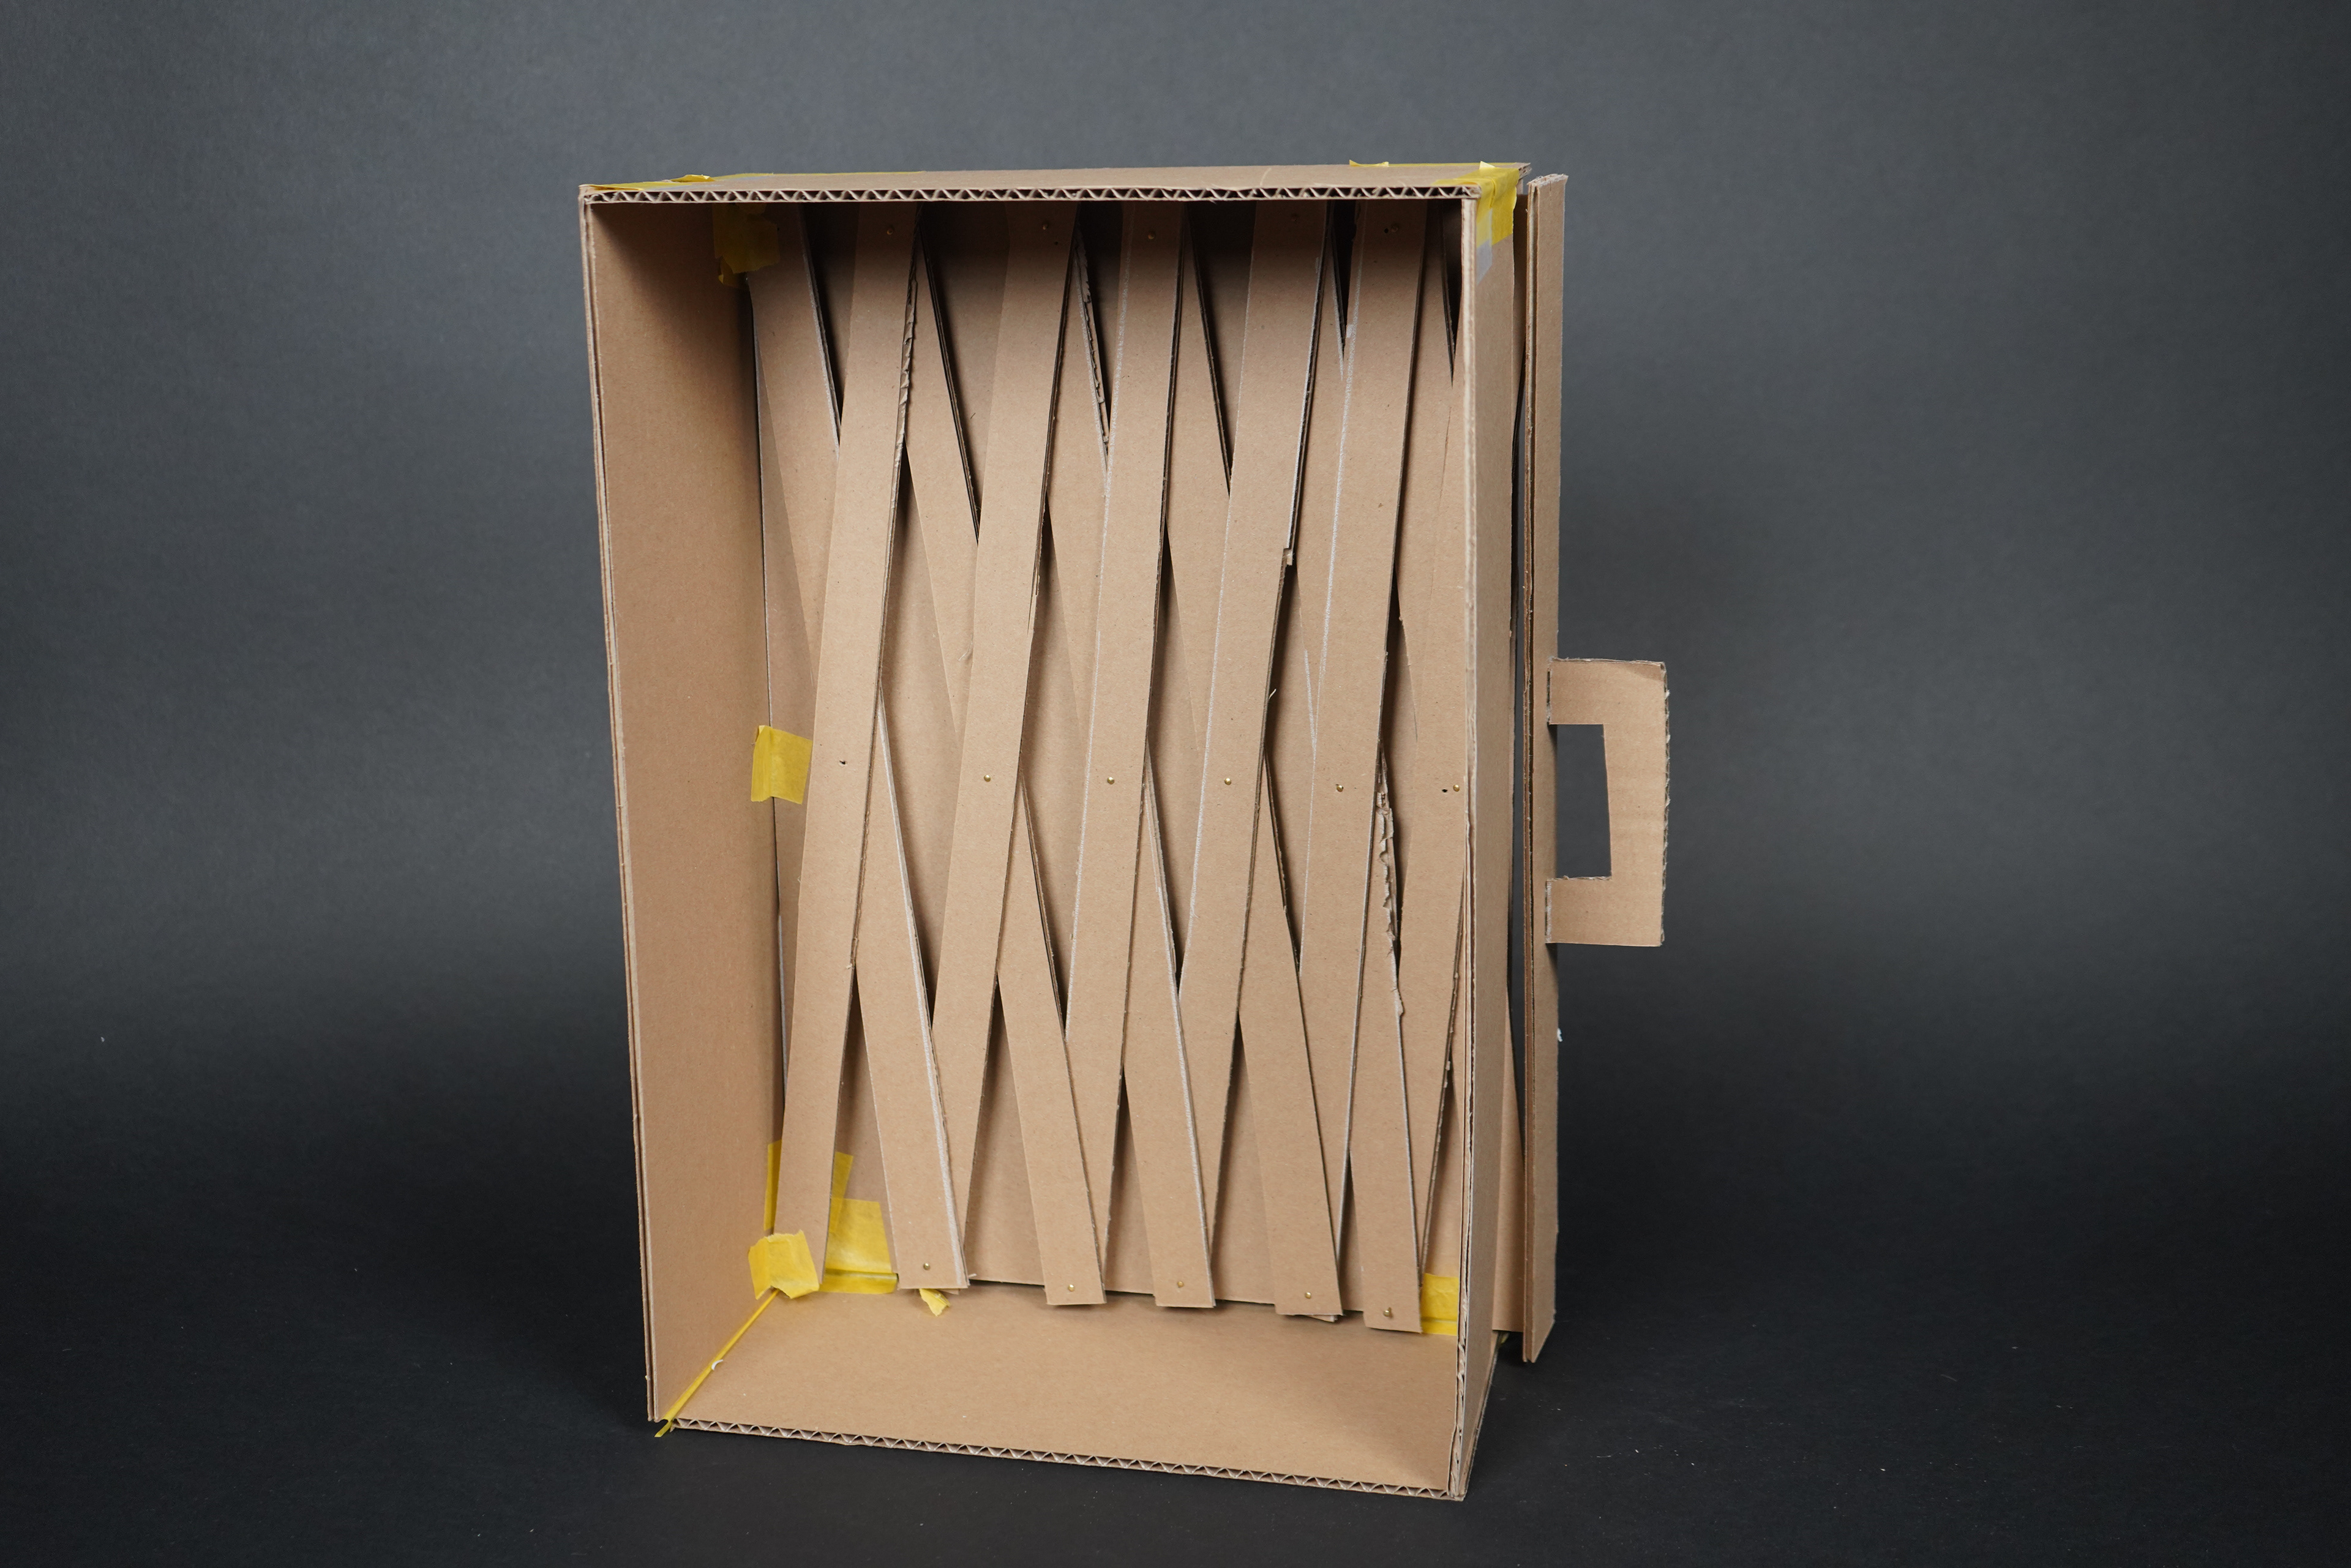
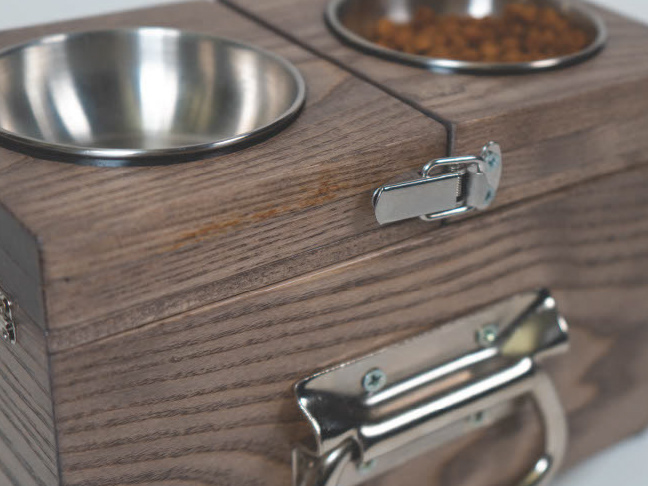
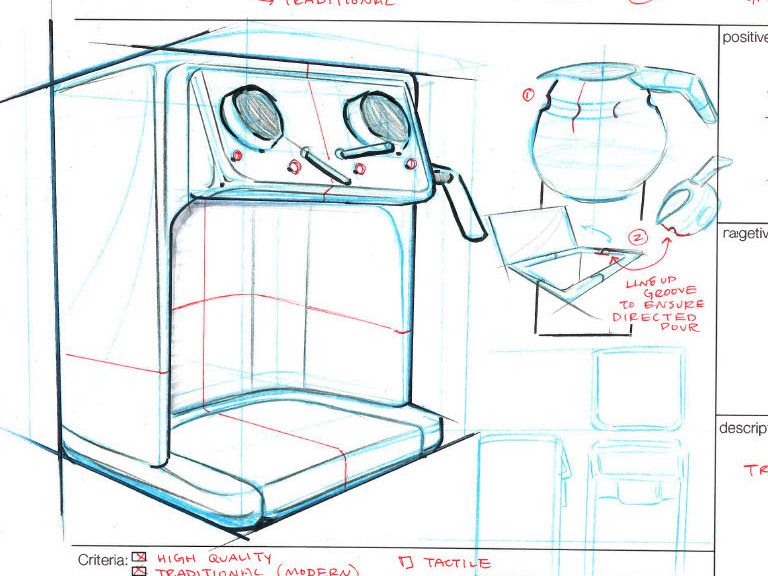
Final Modelmaking Process
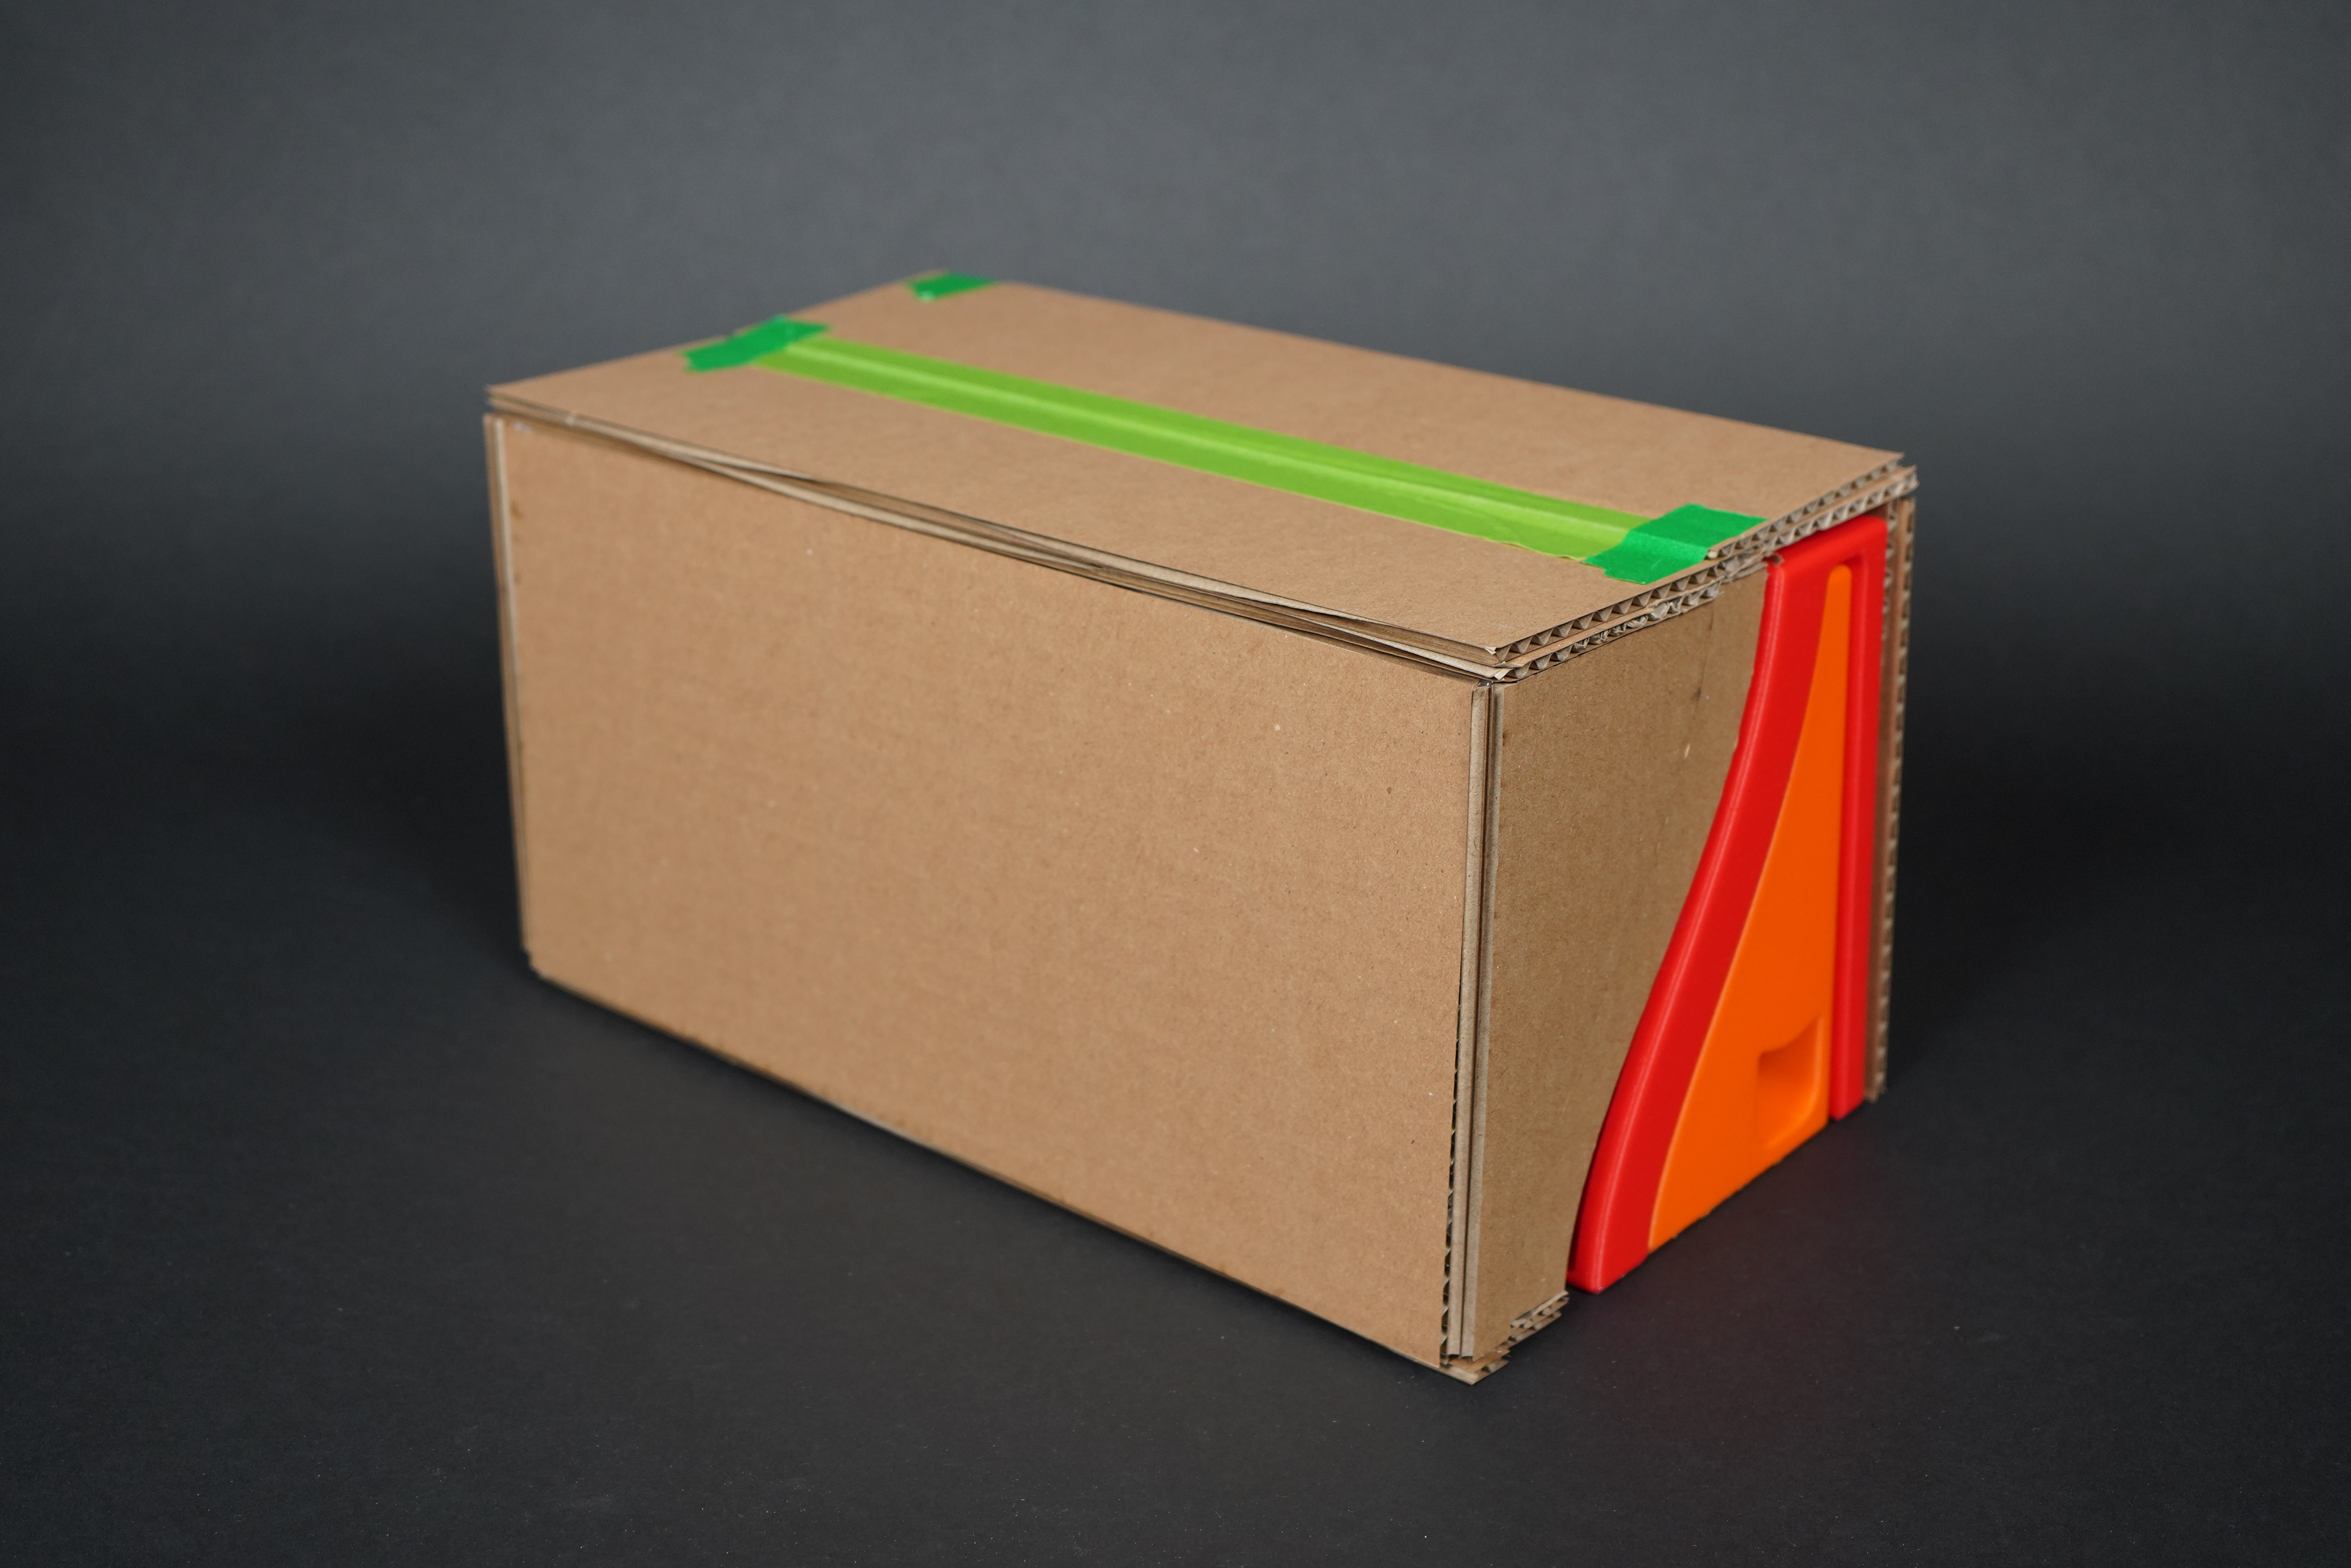
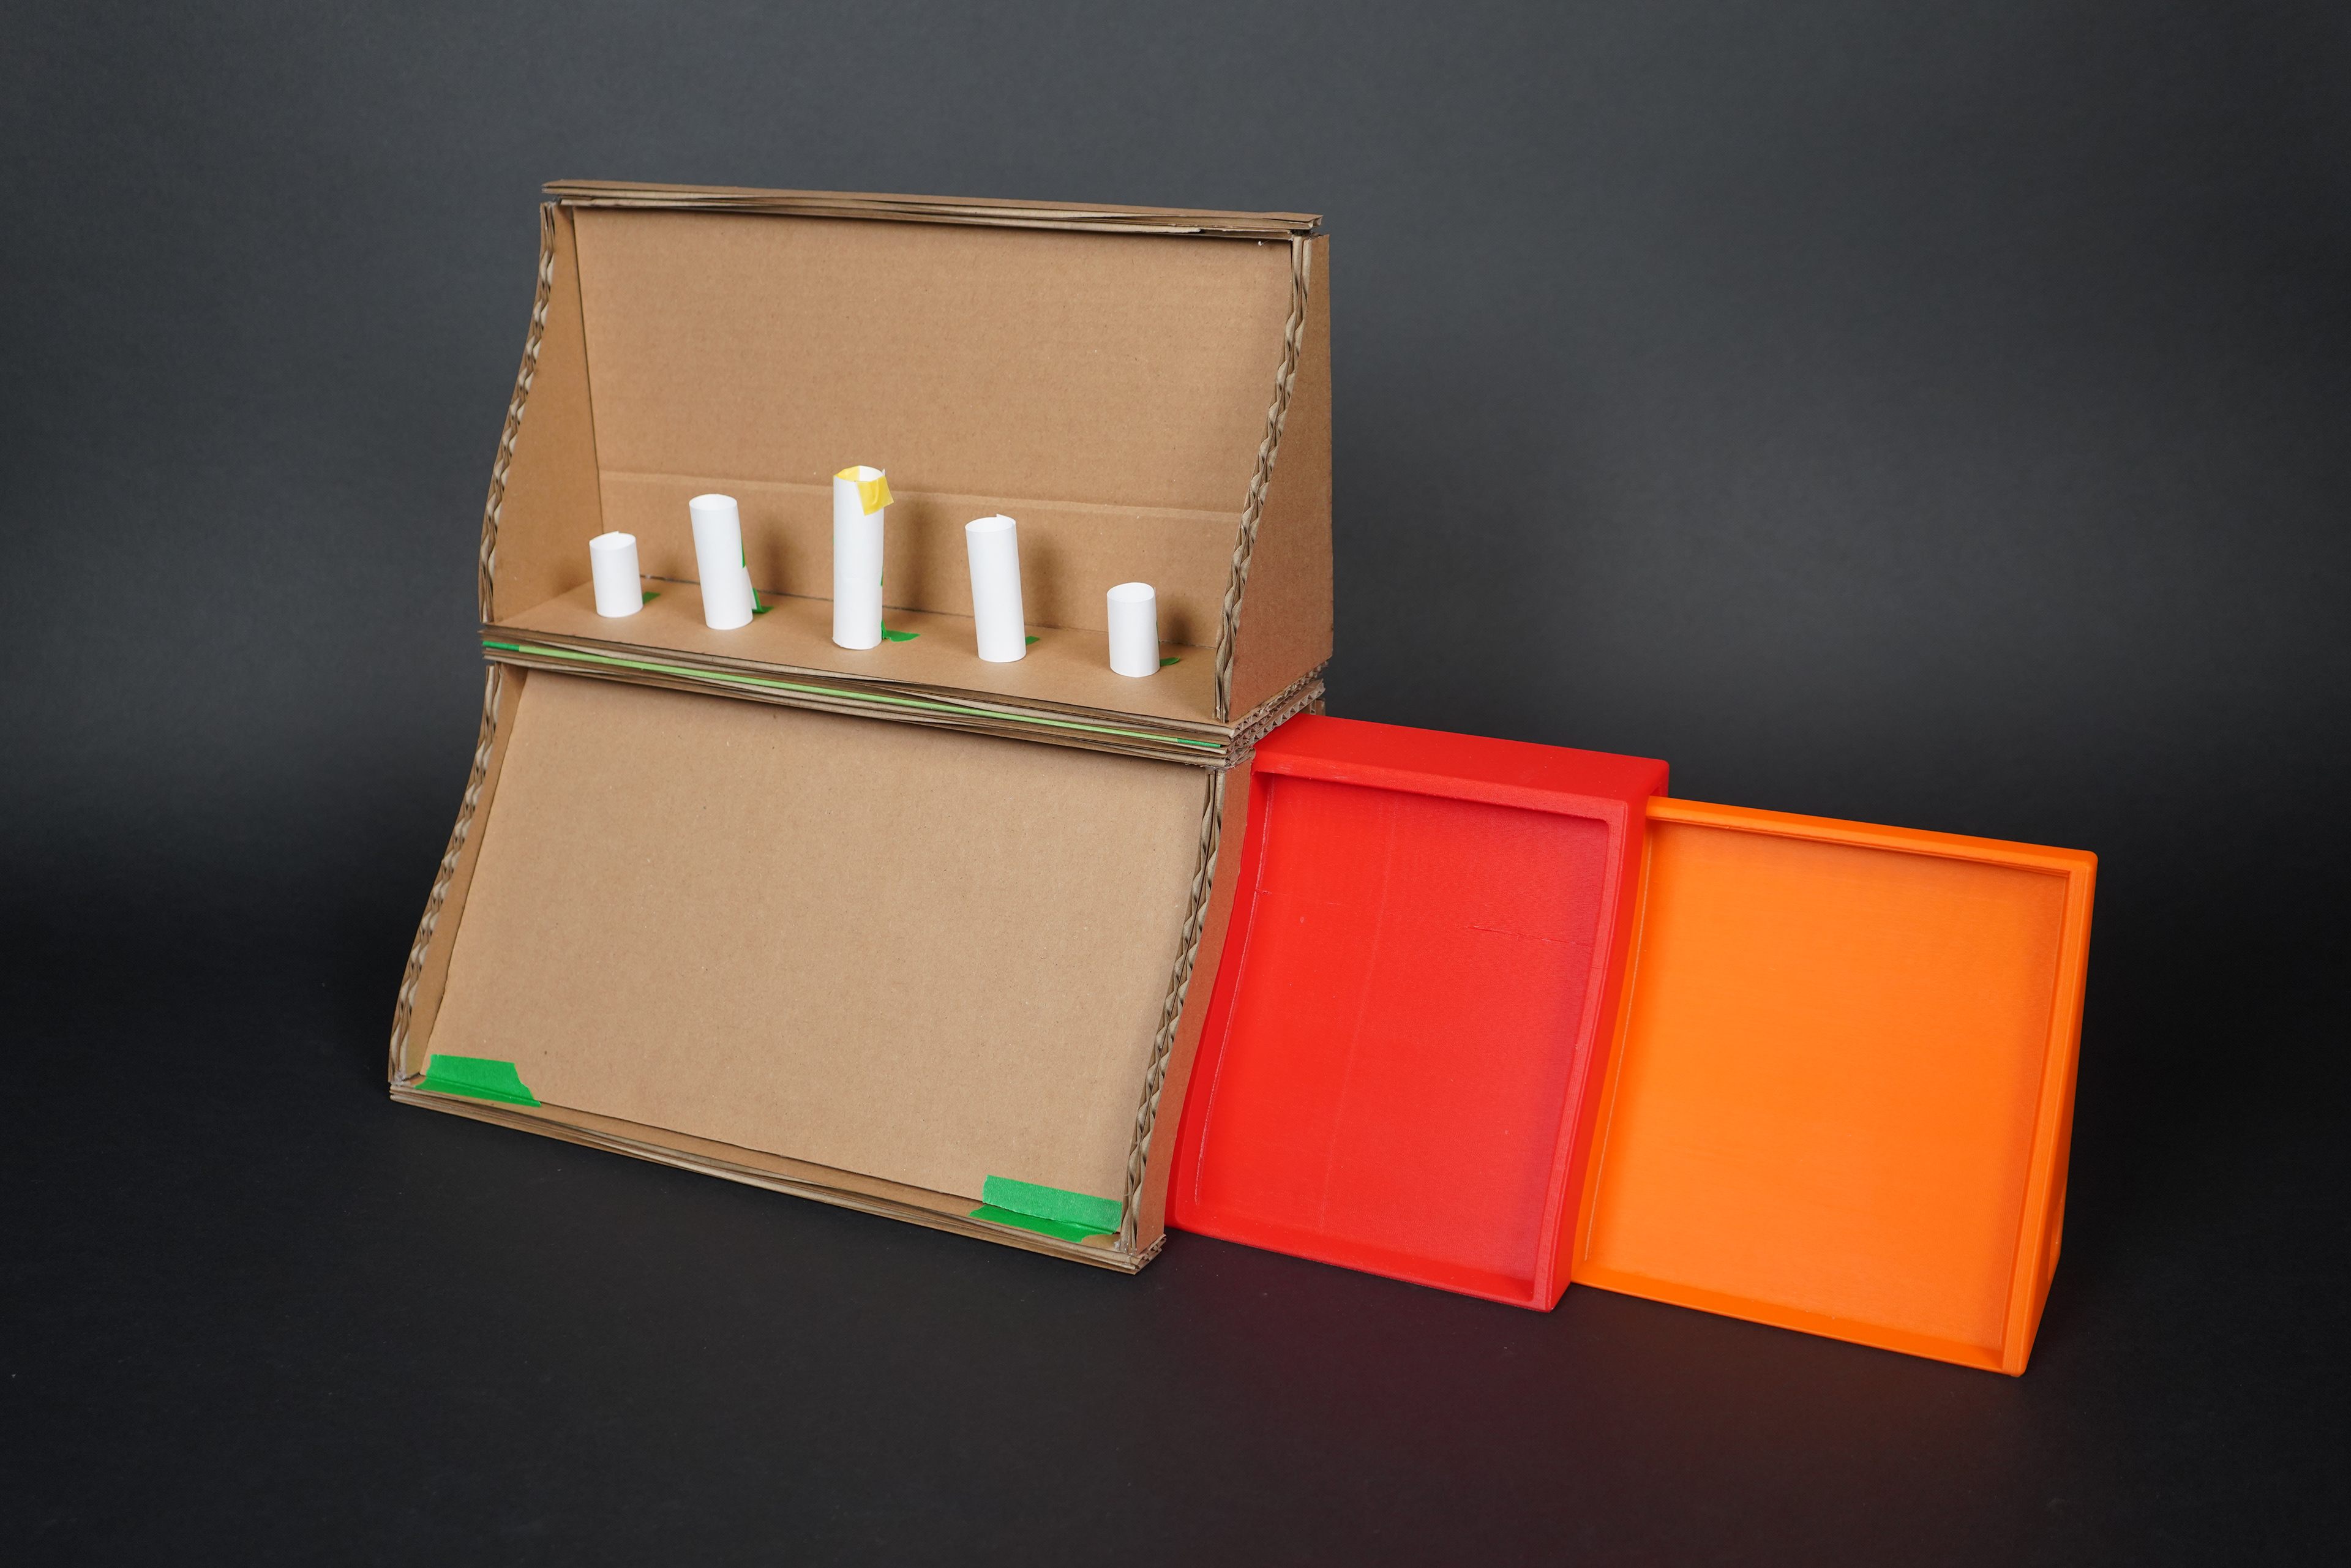
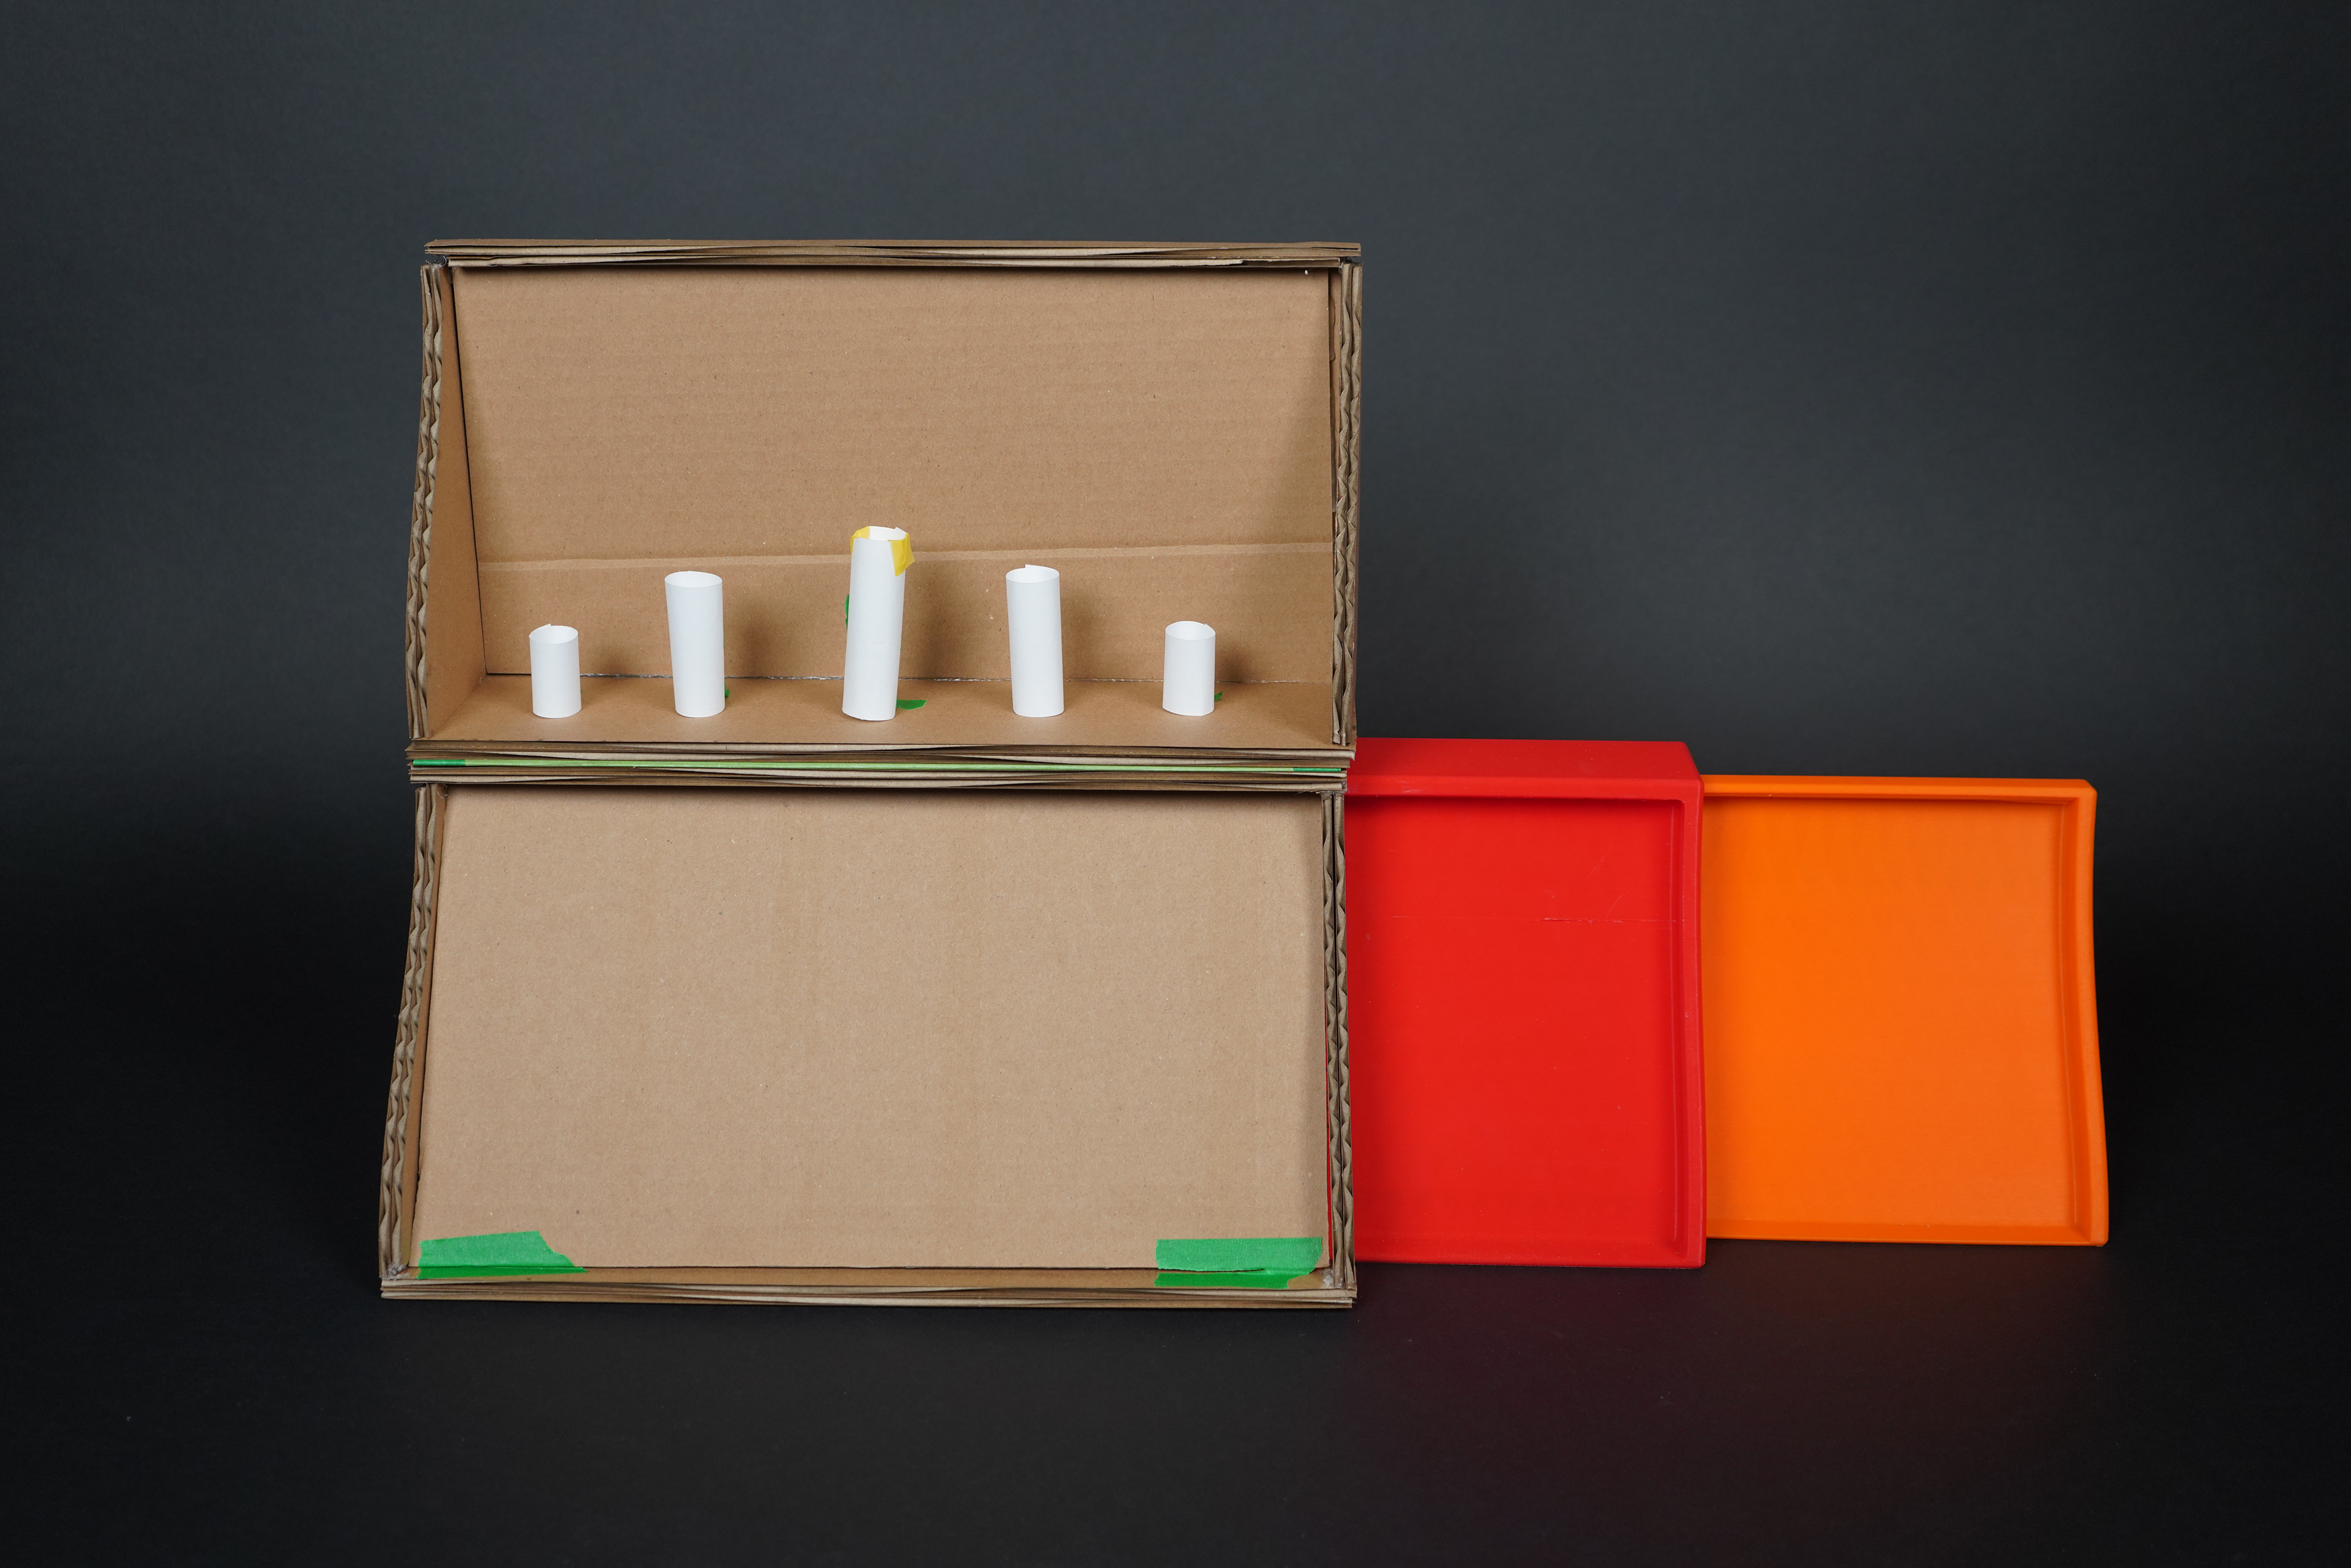
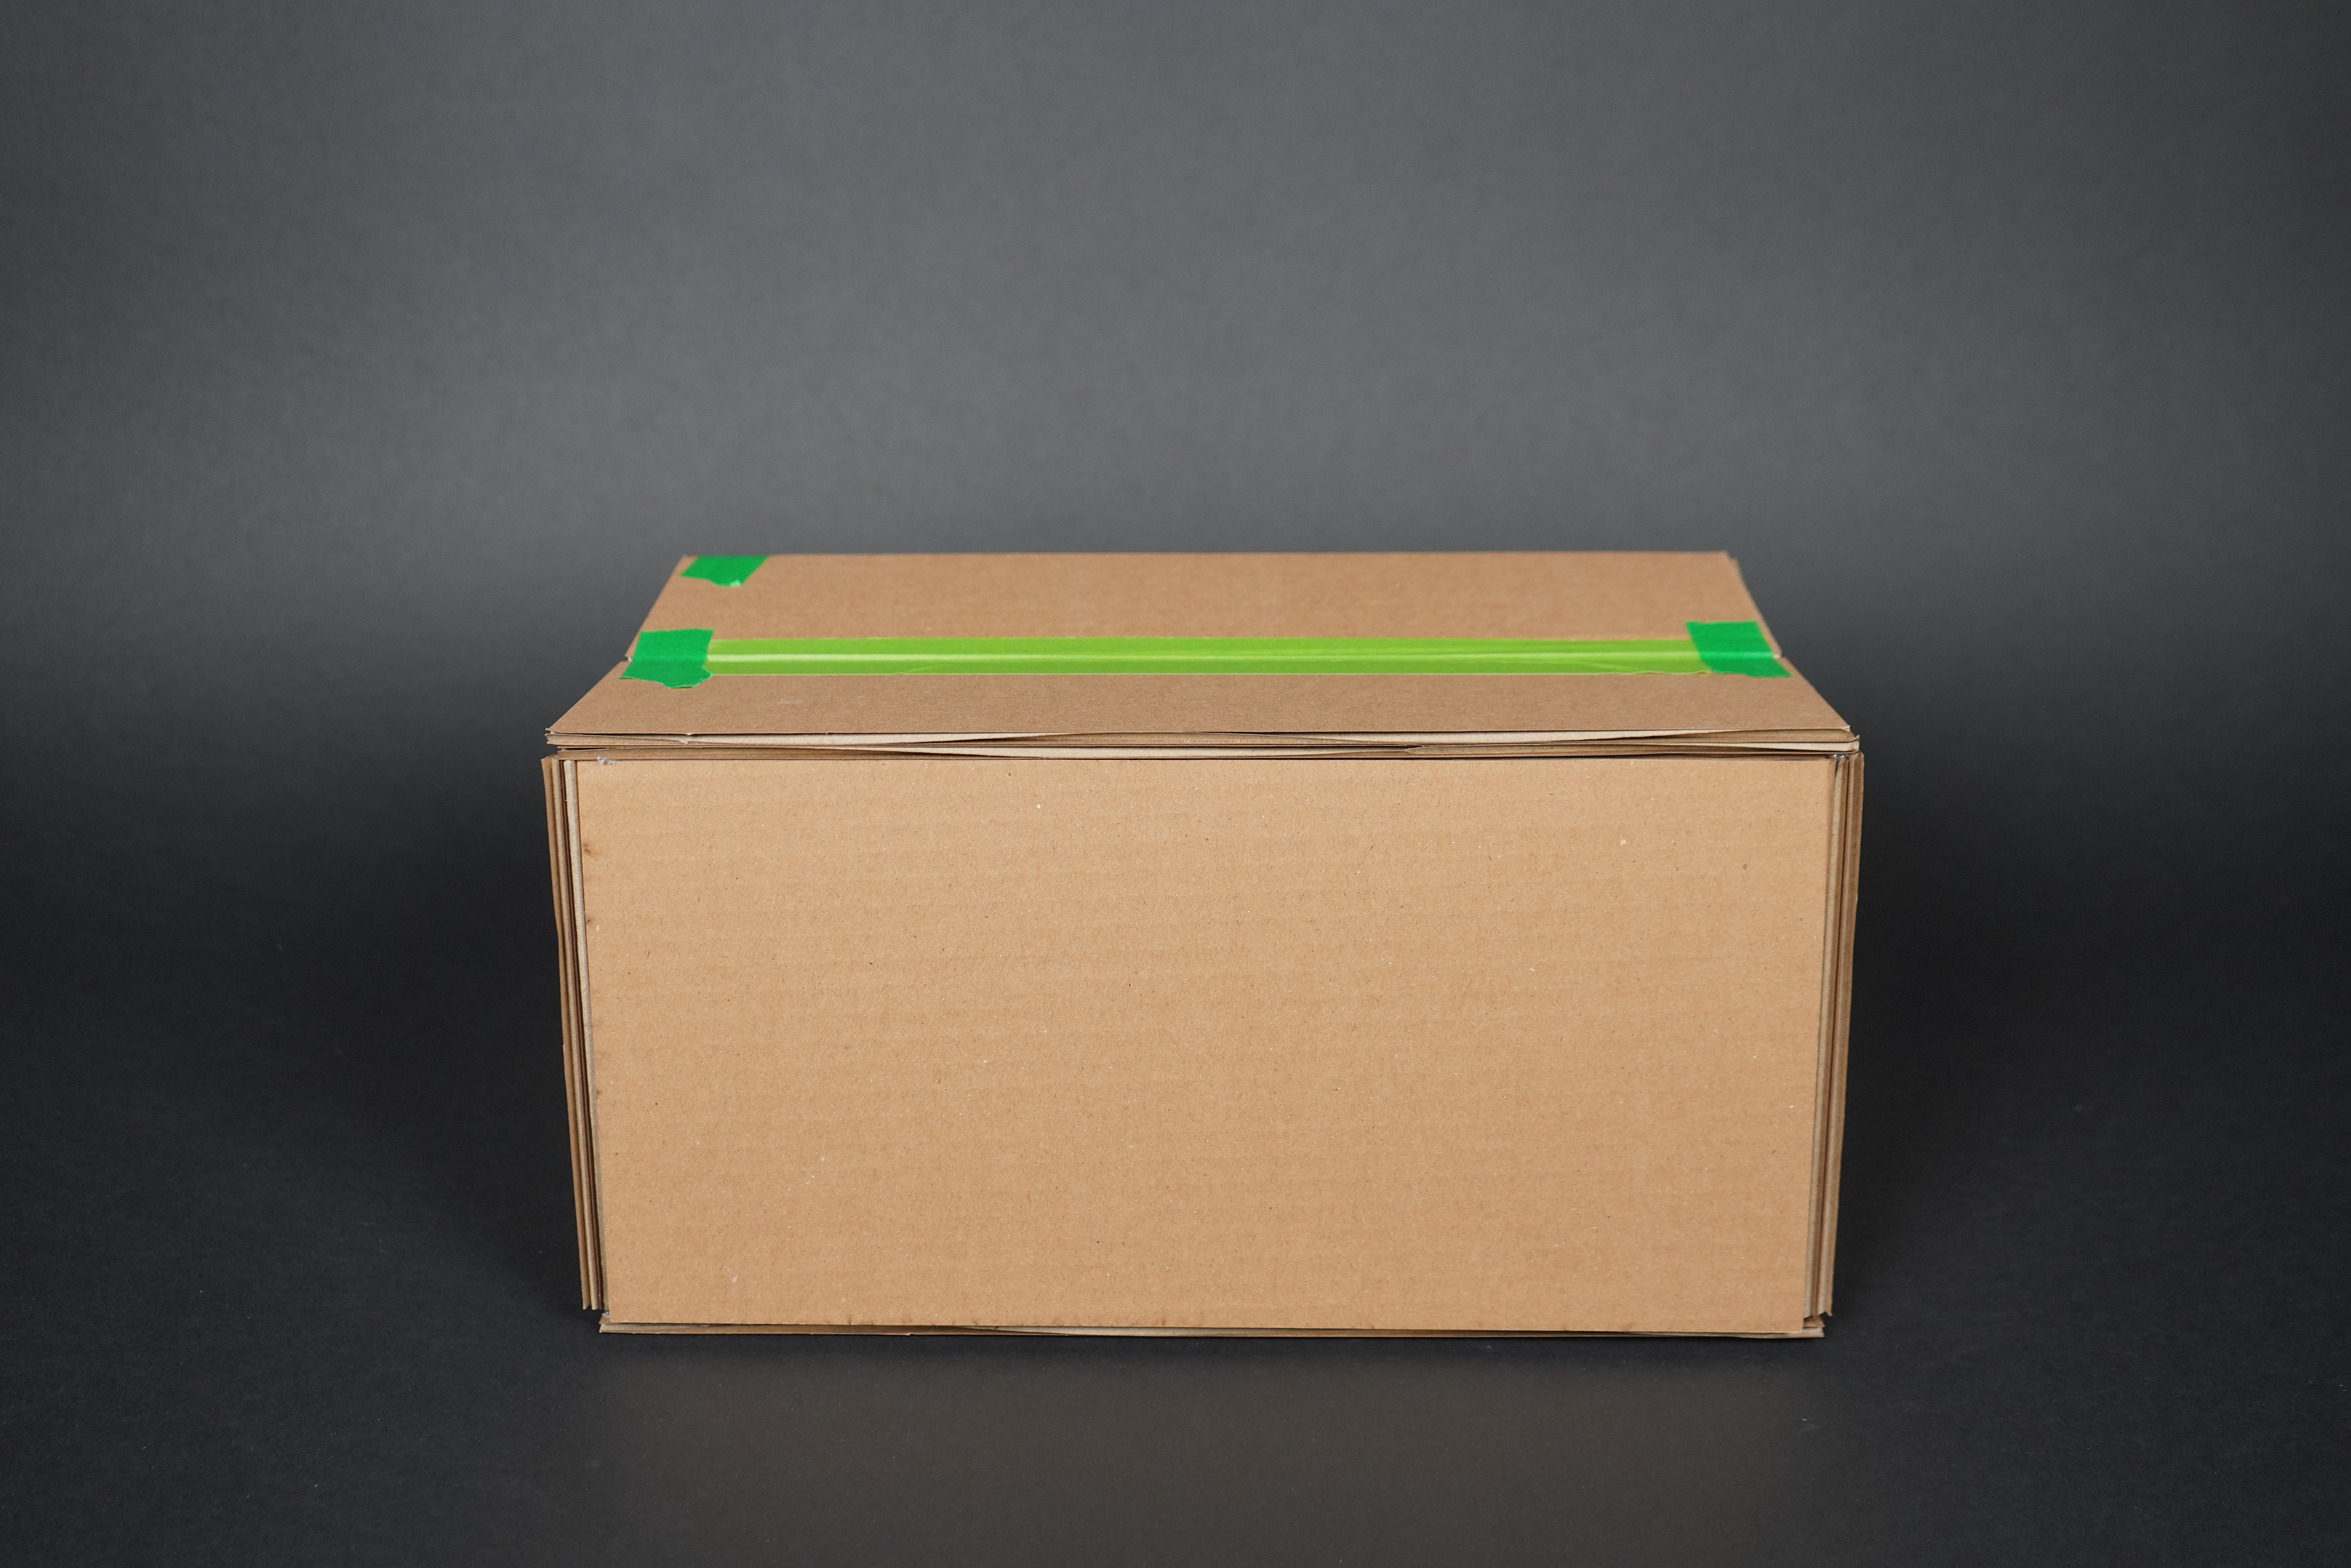
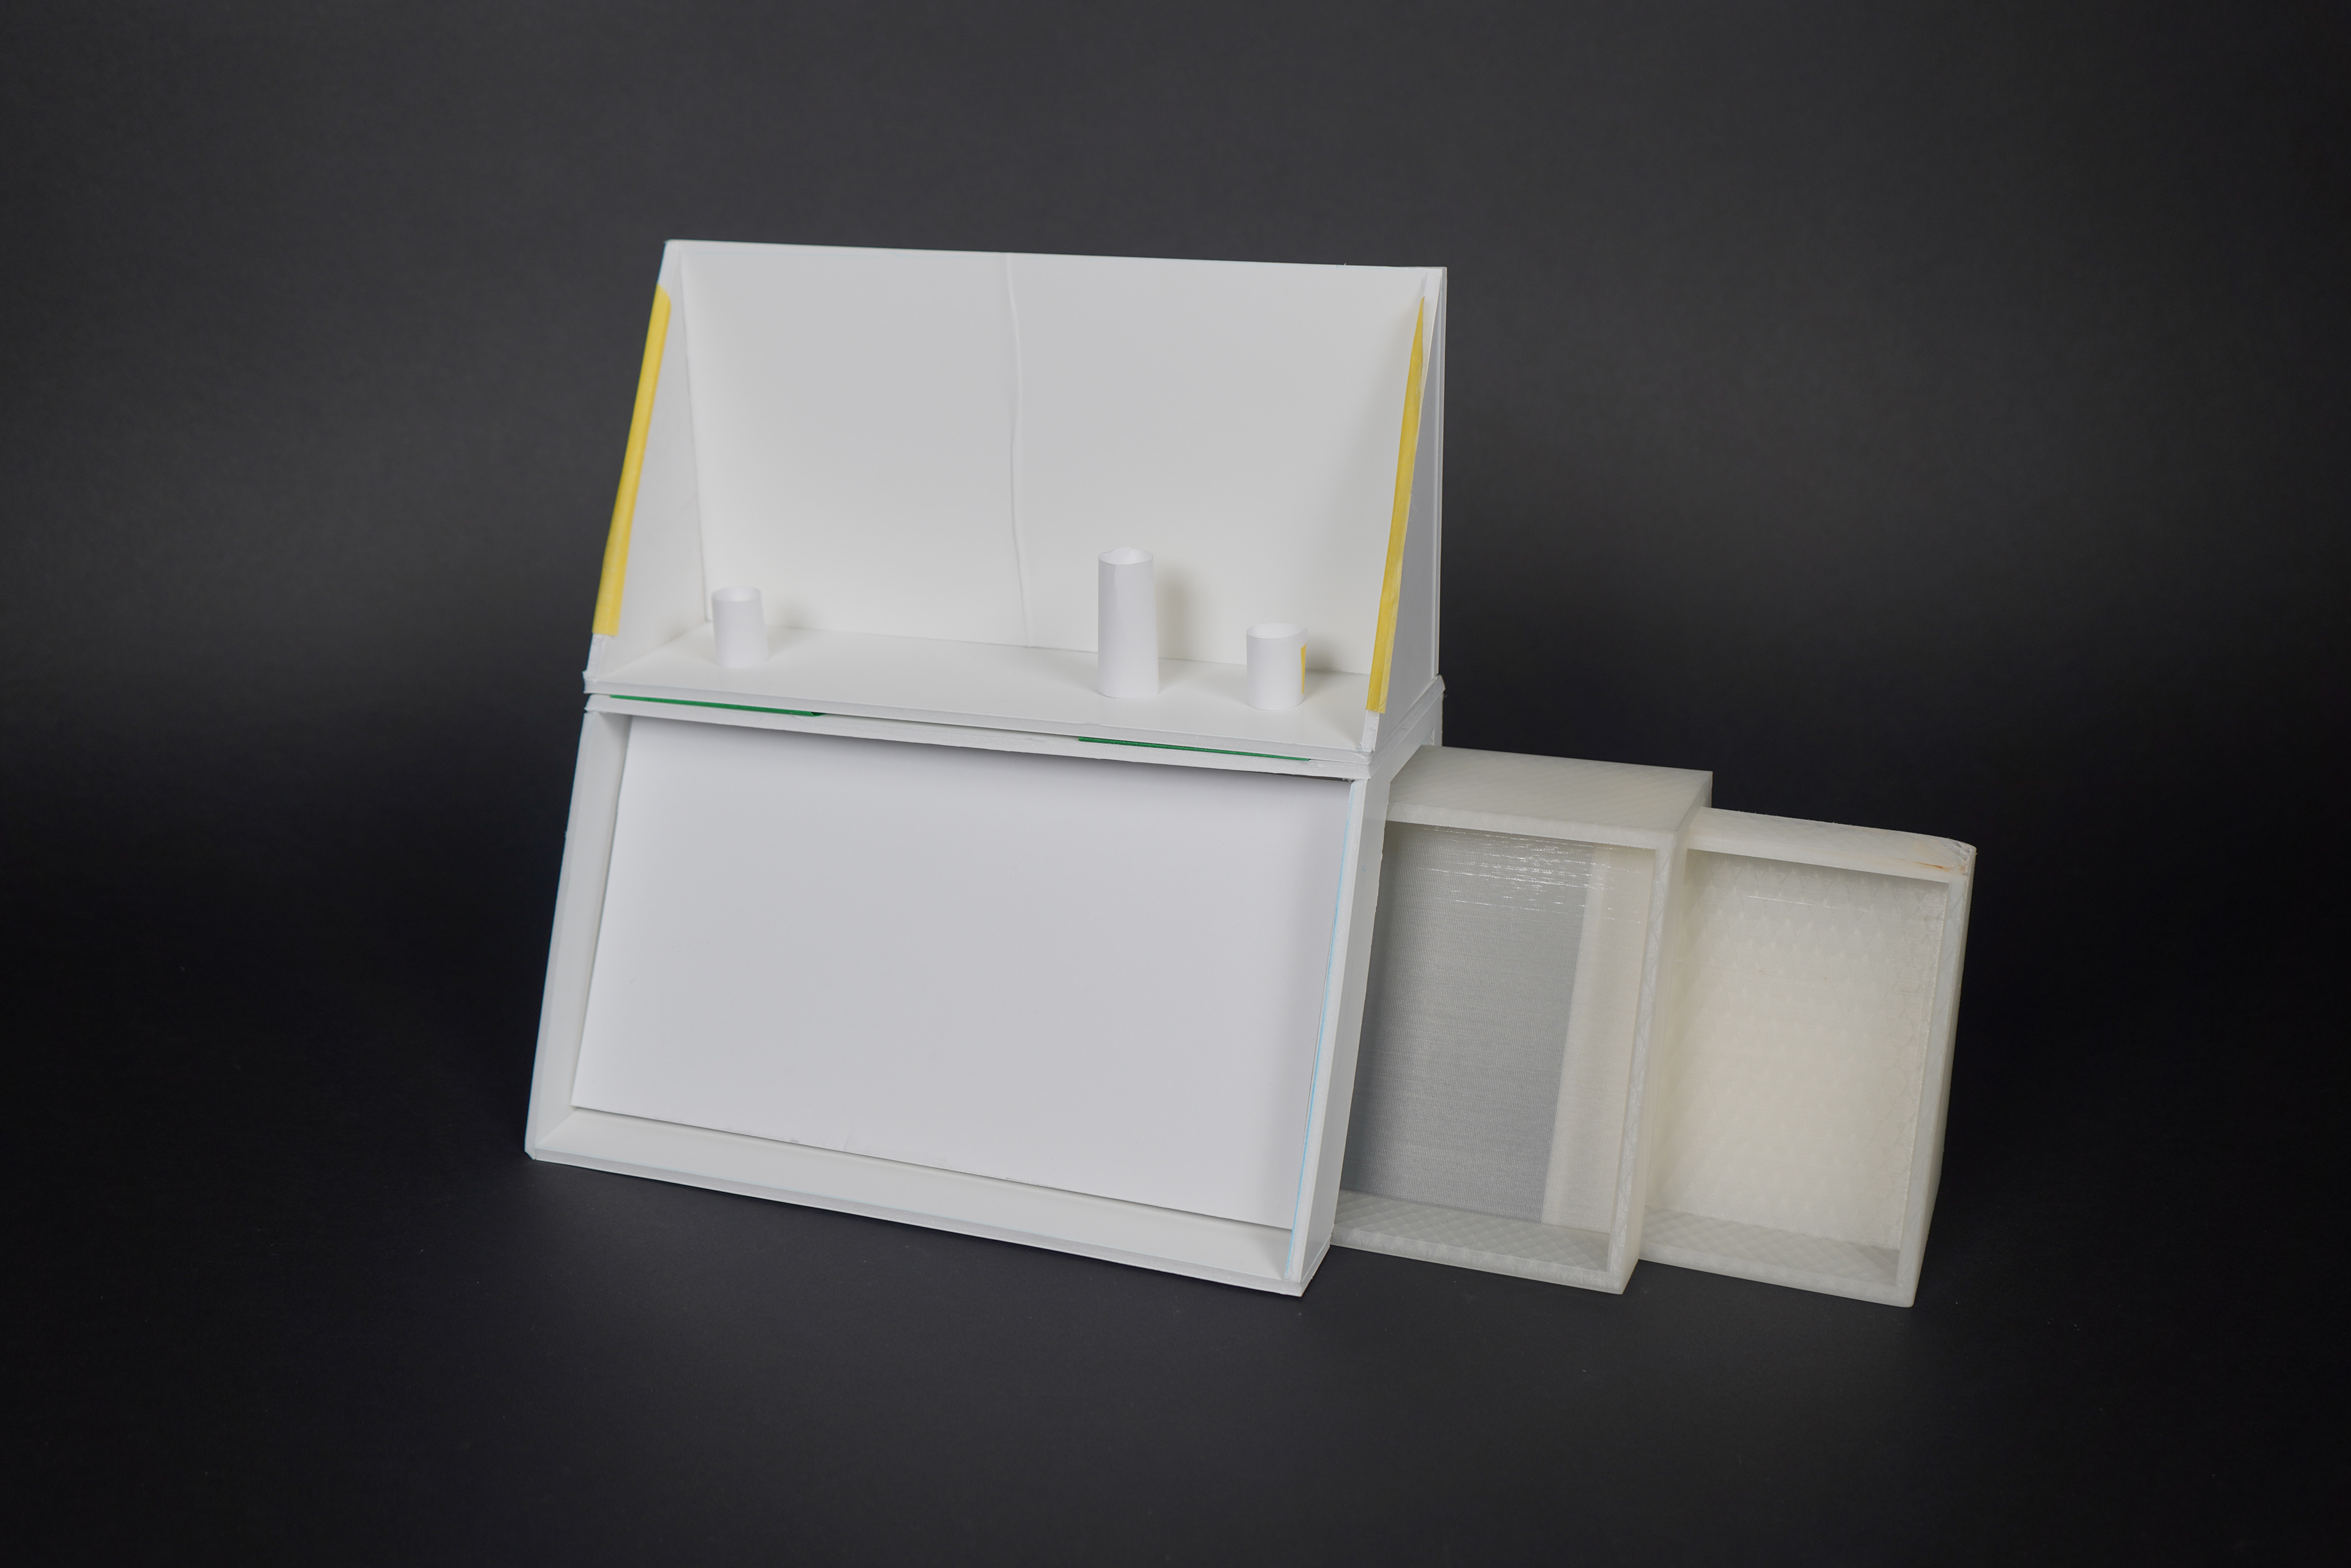
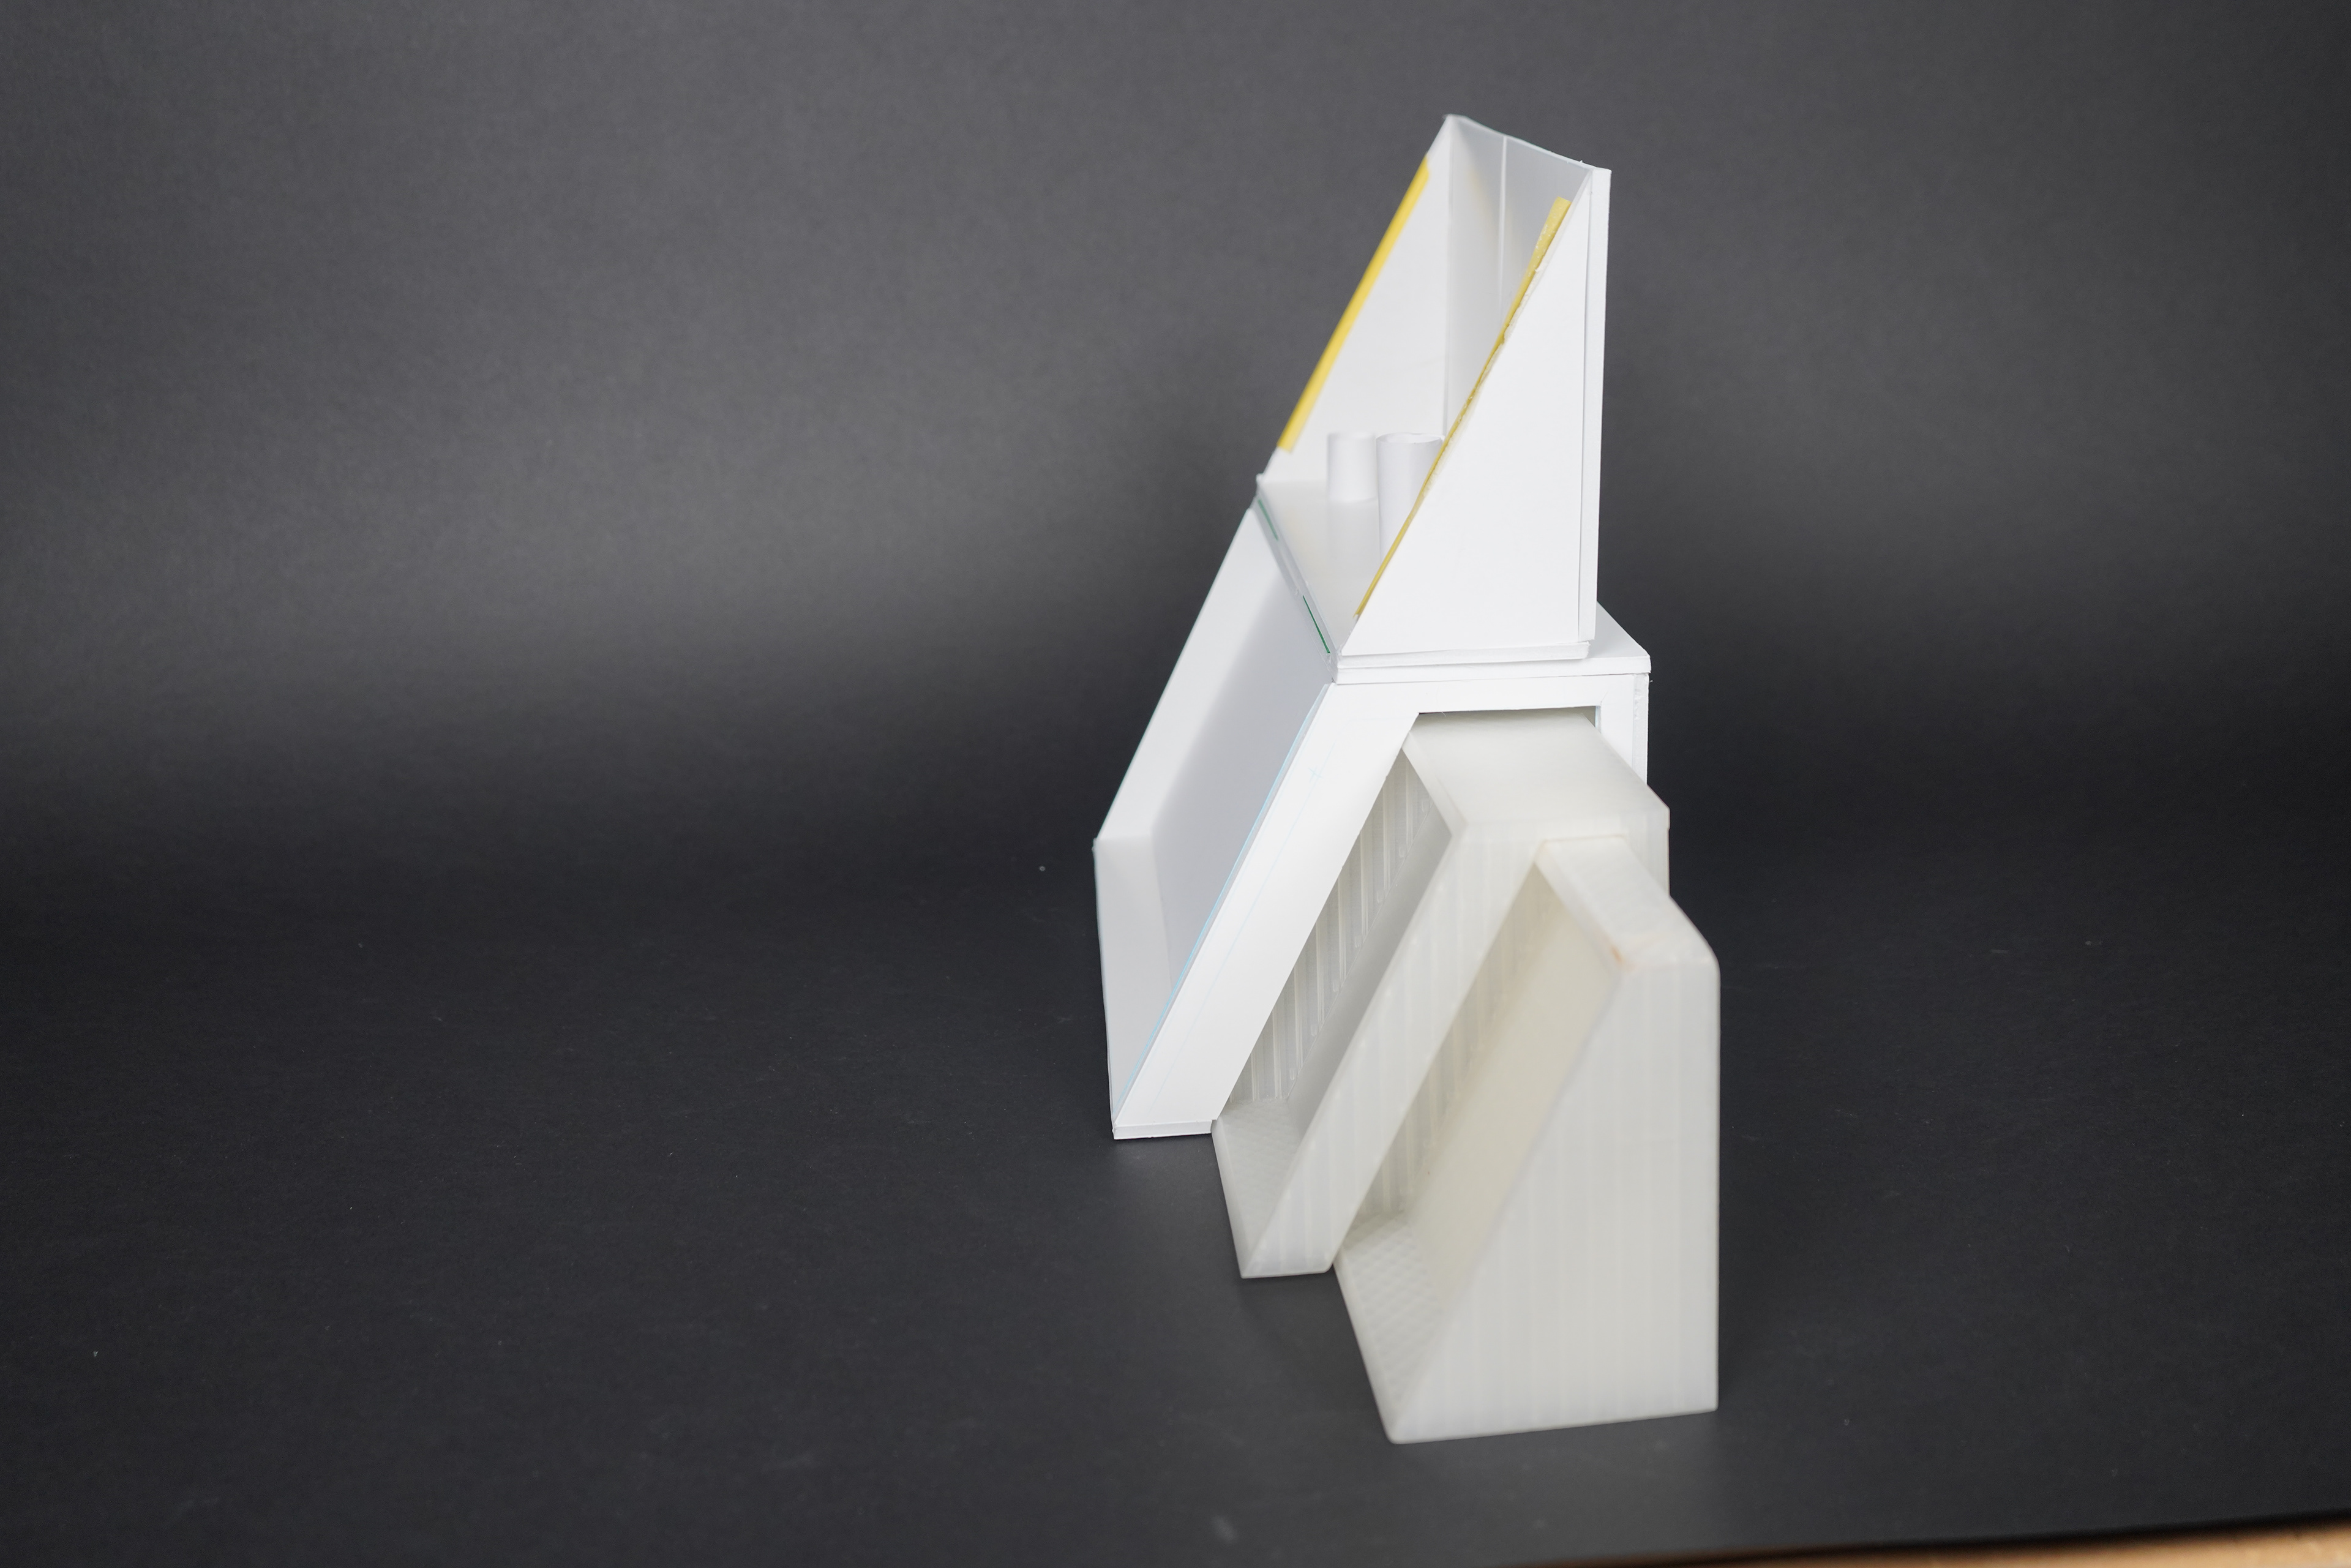
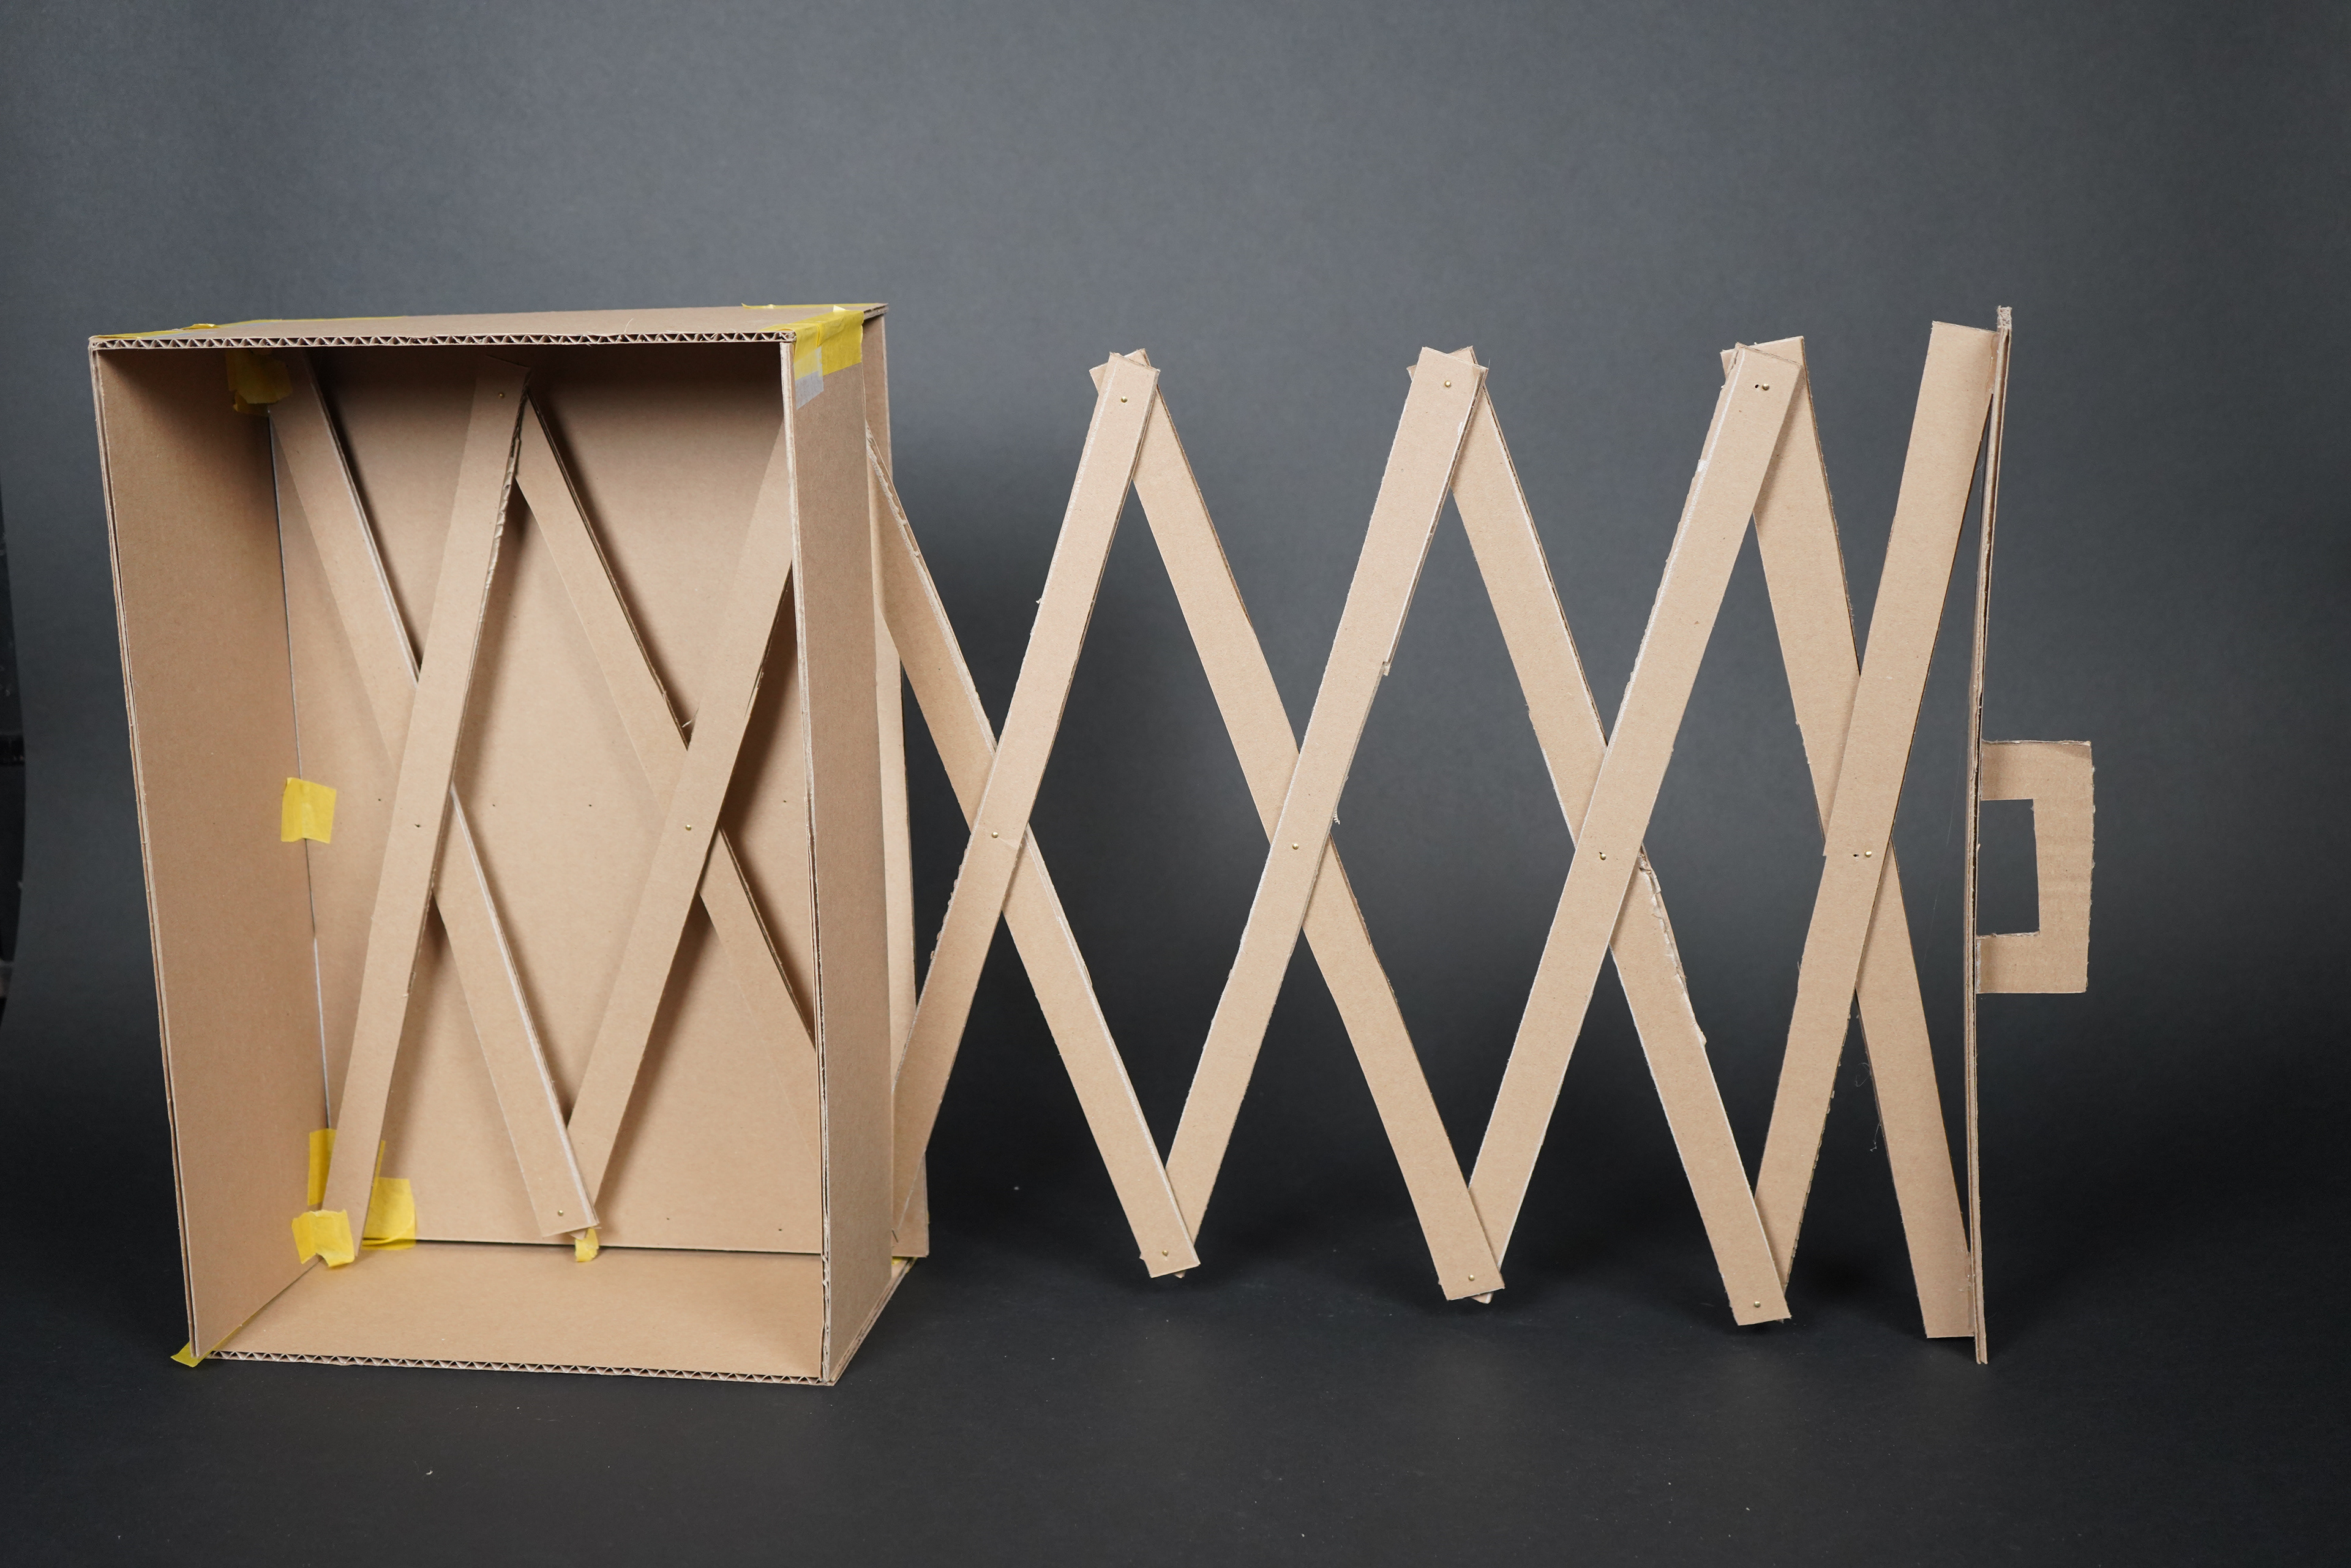
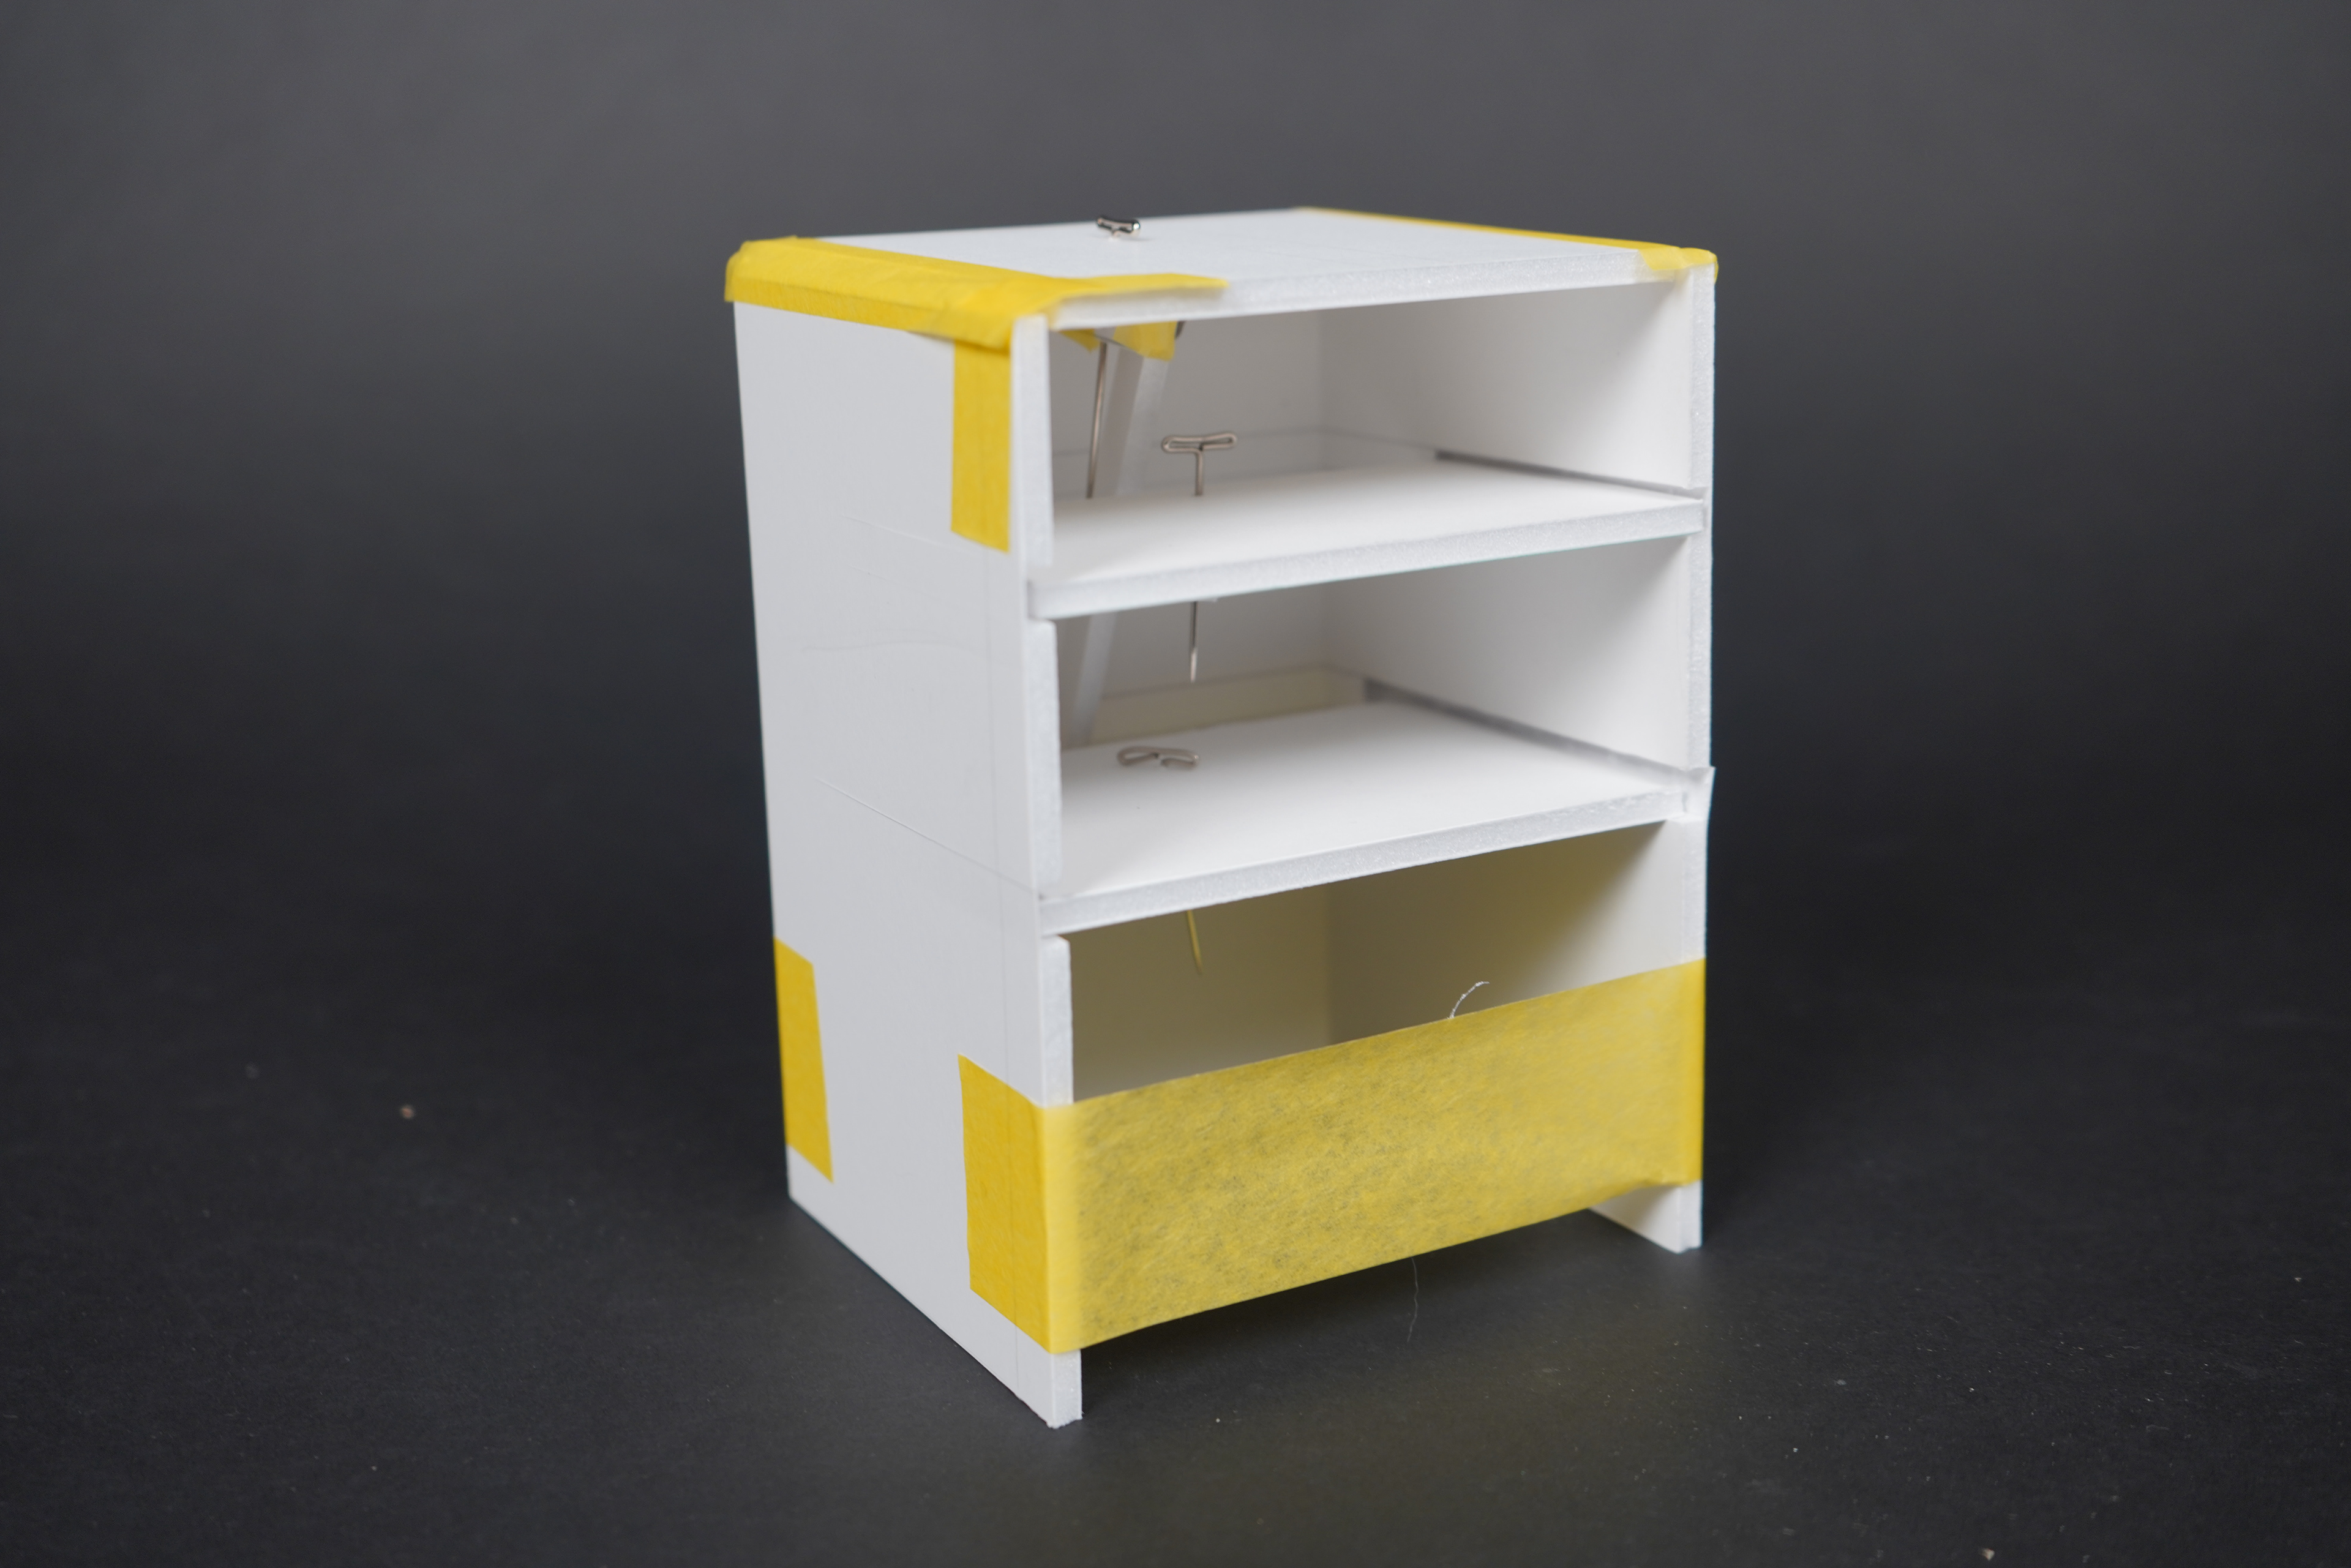
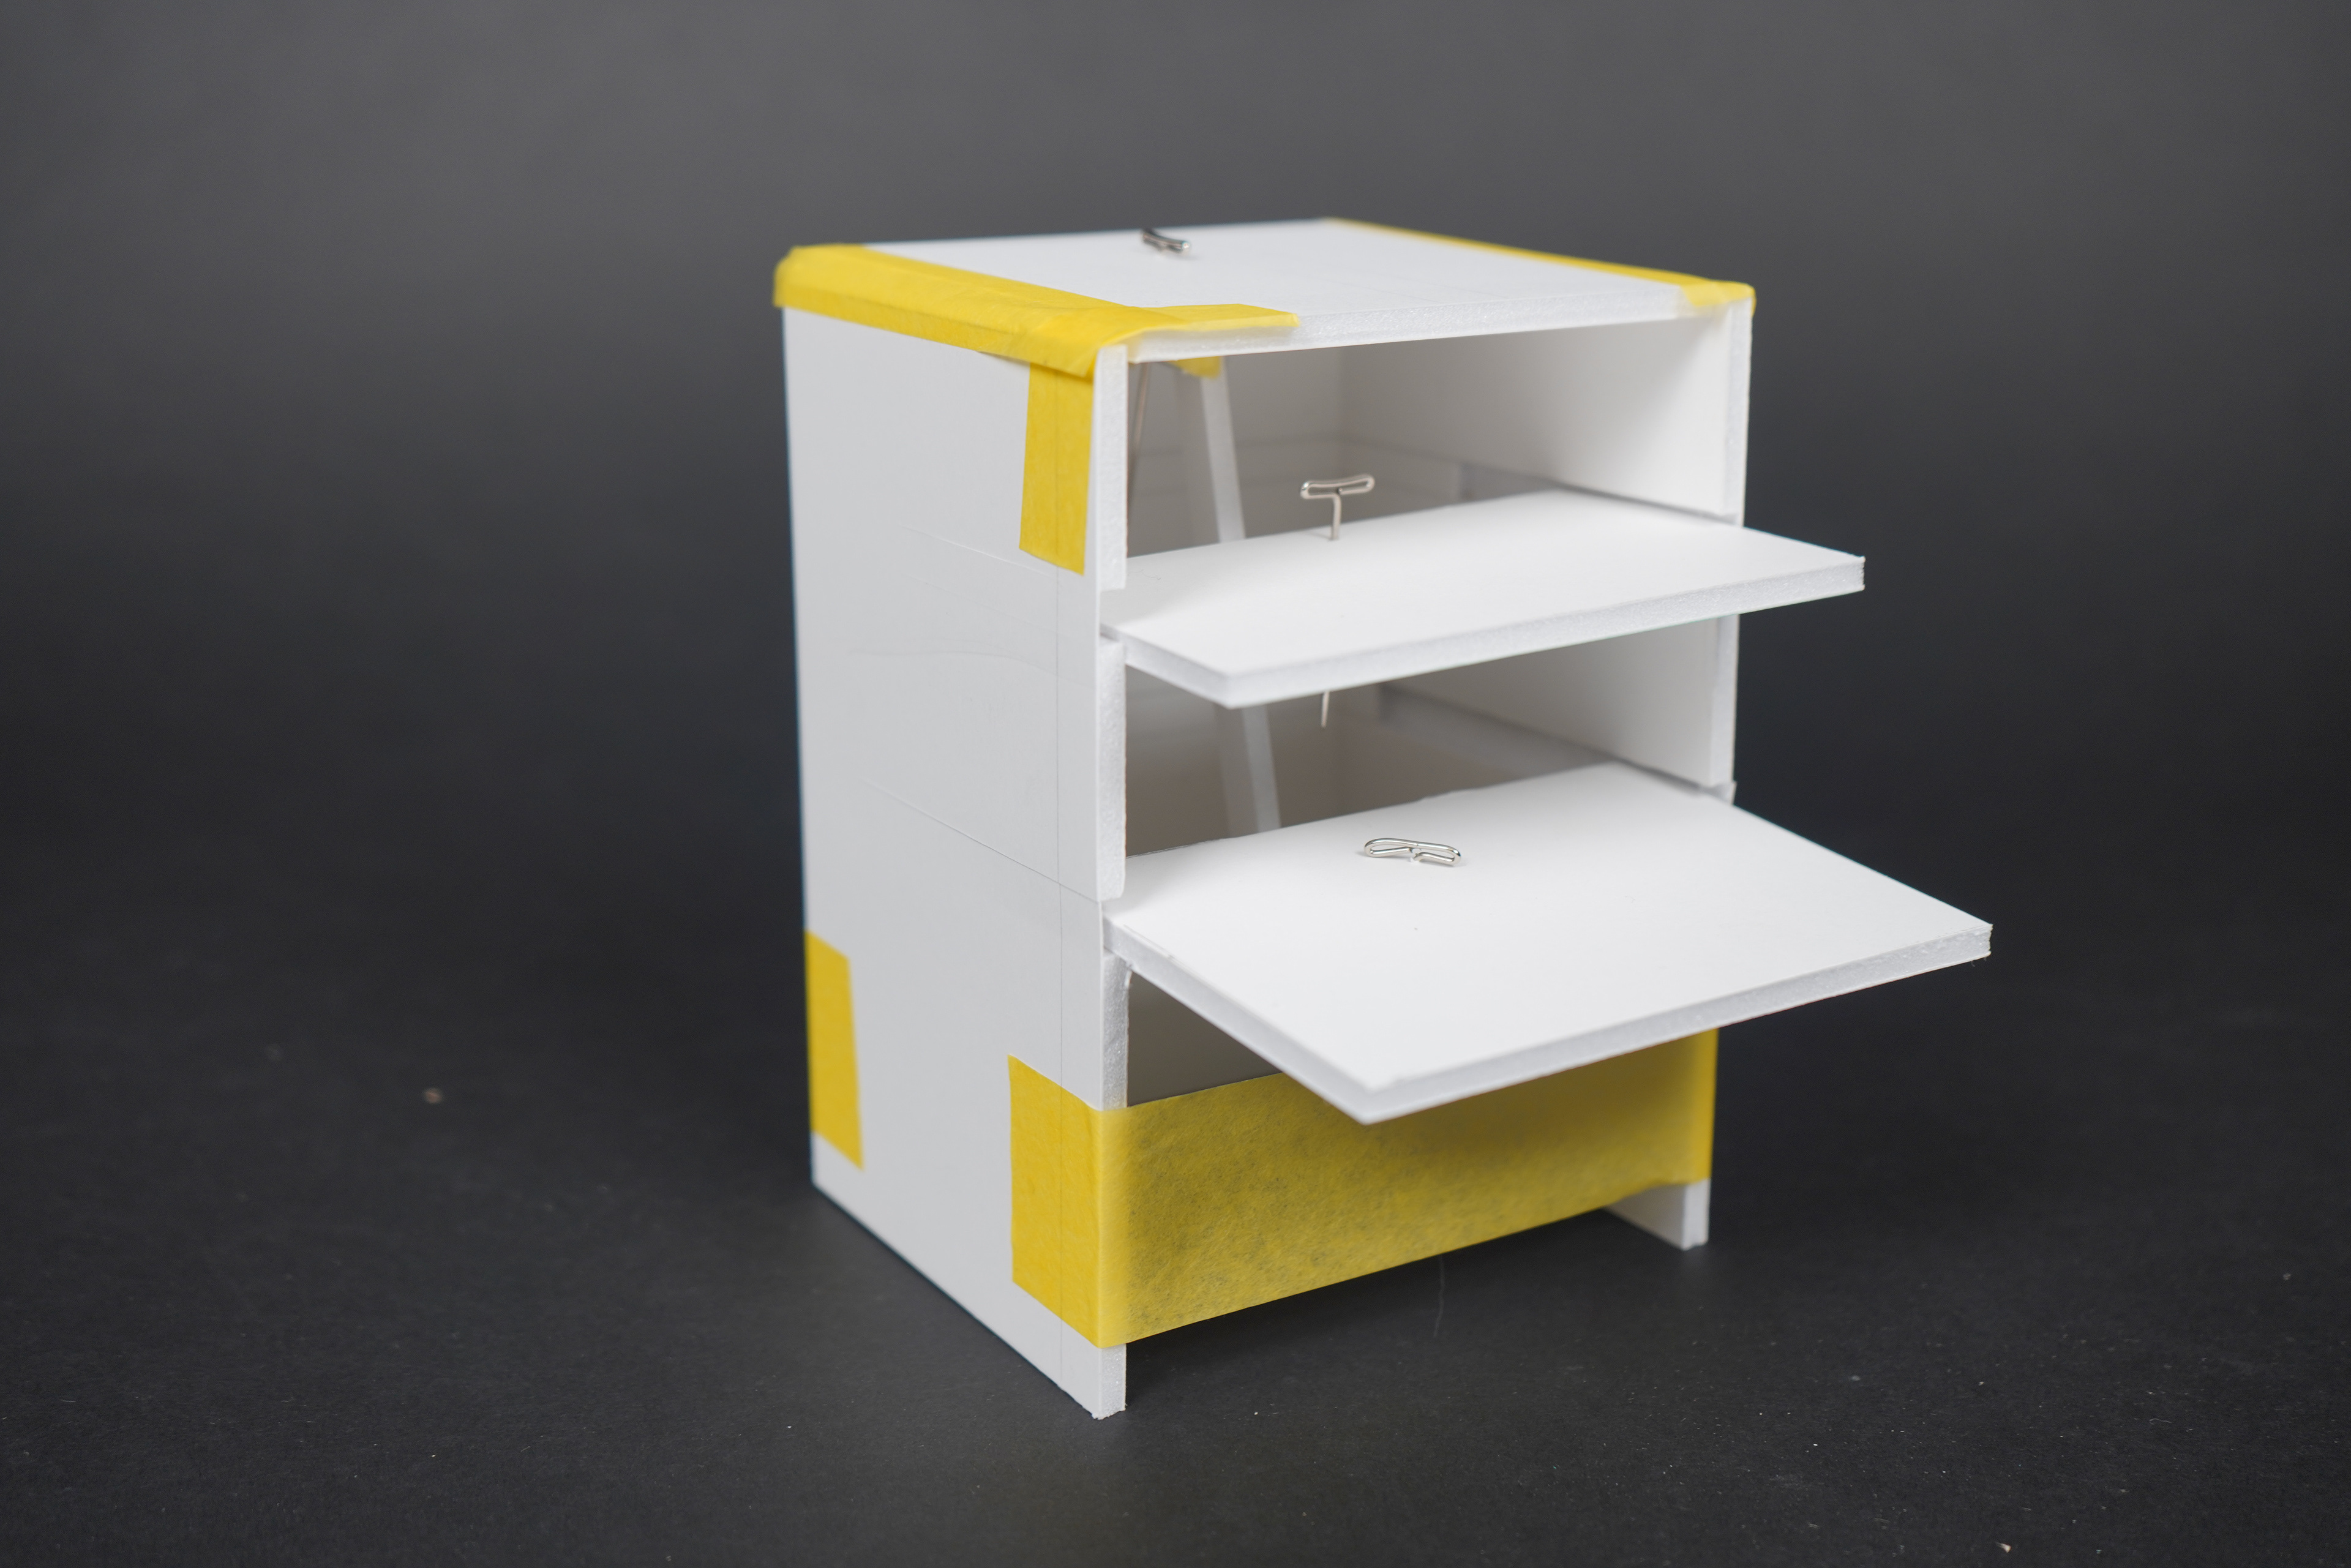
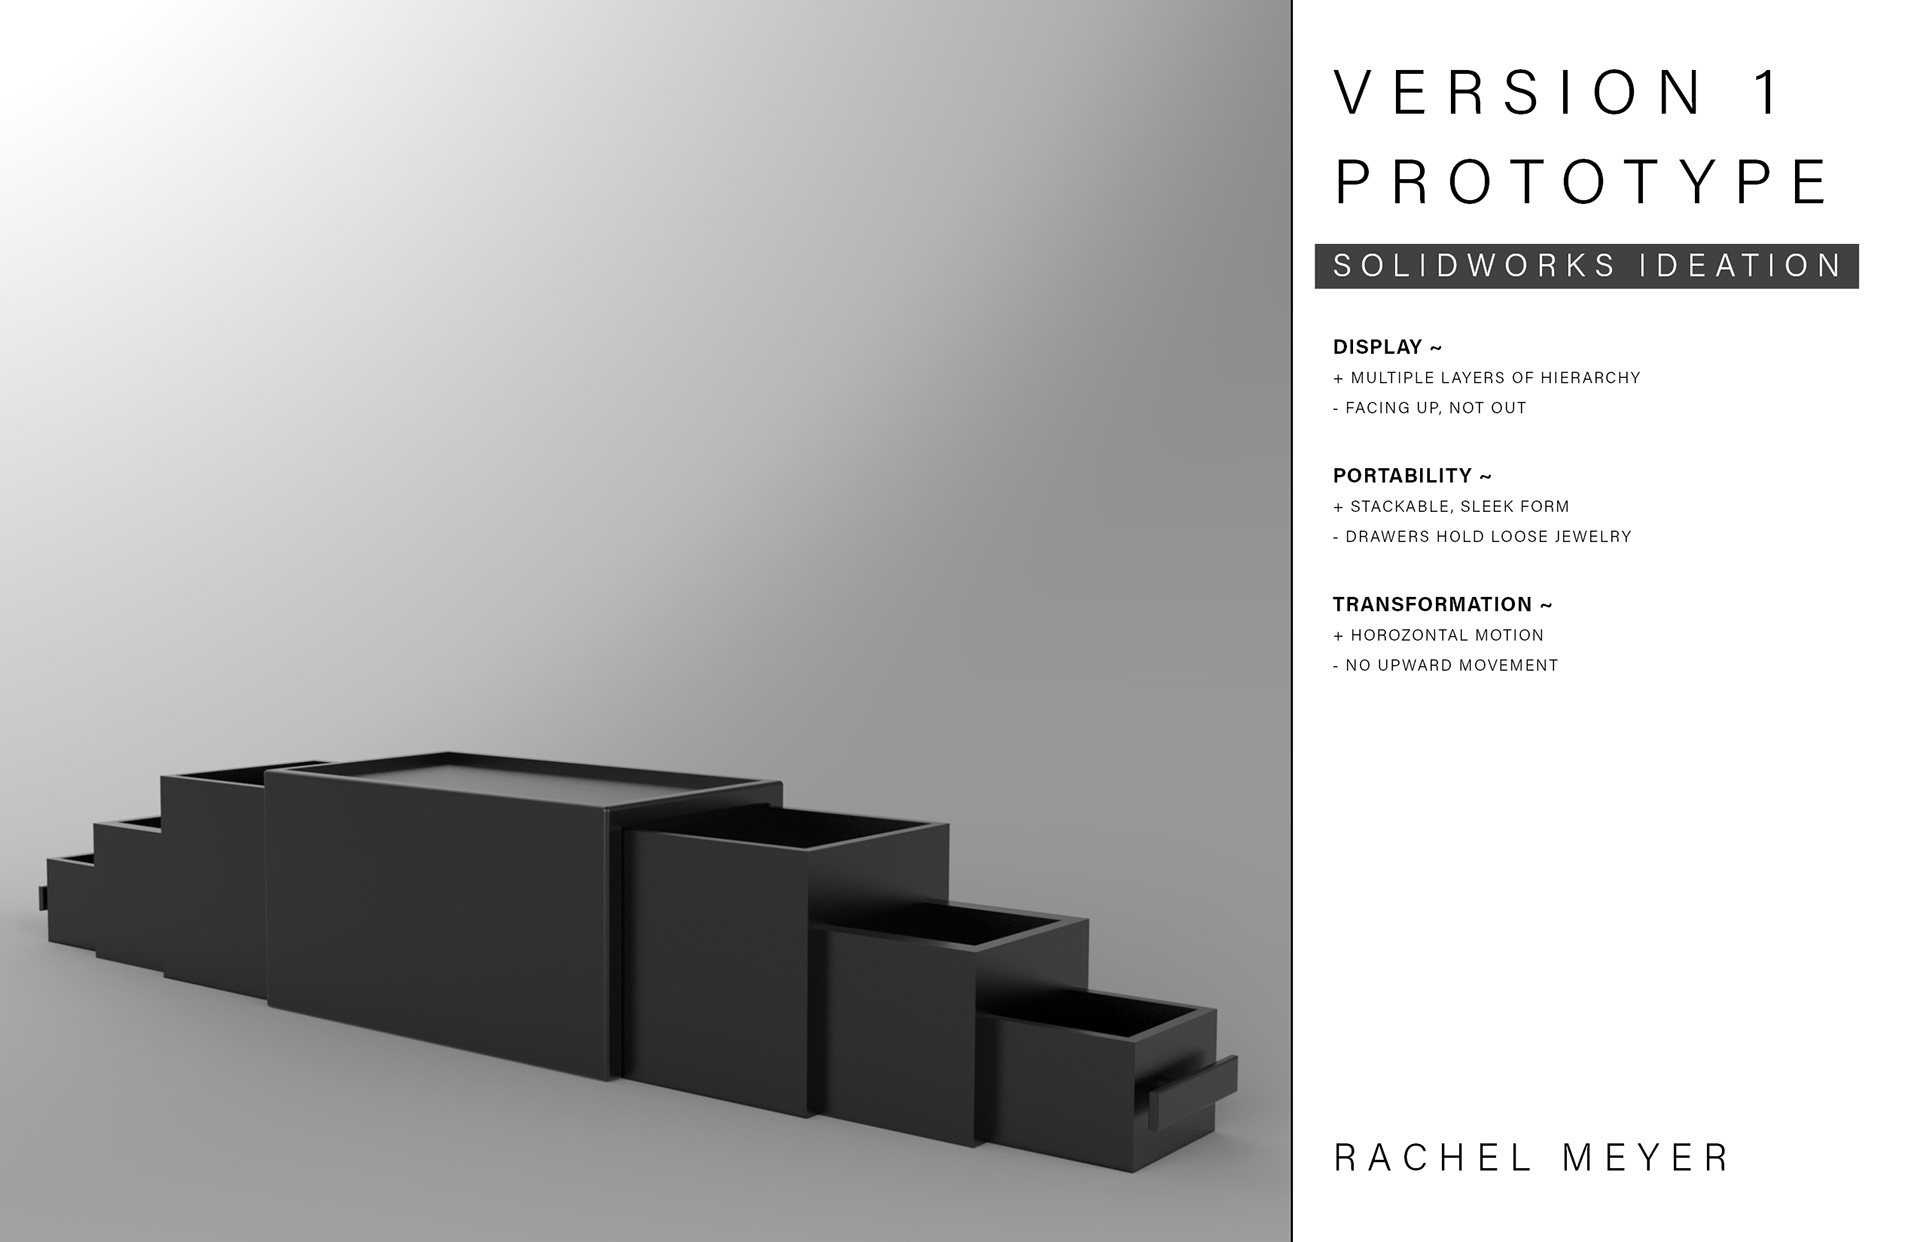
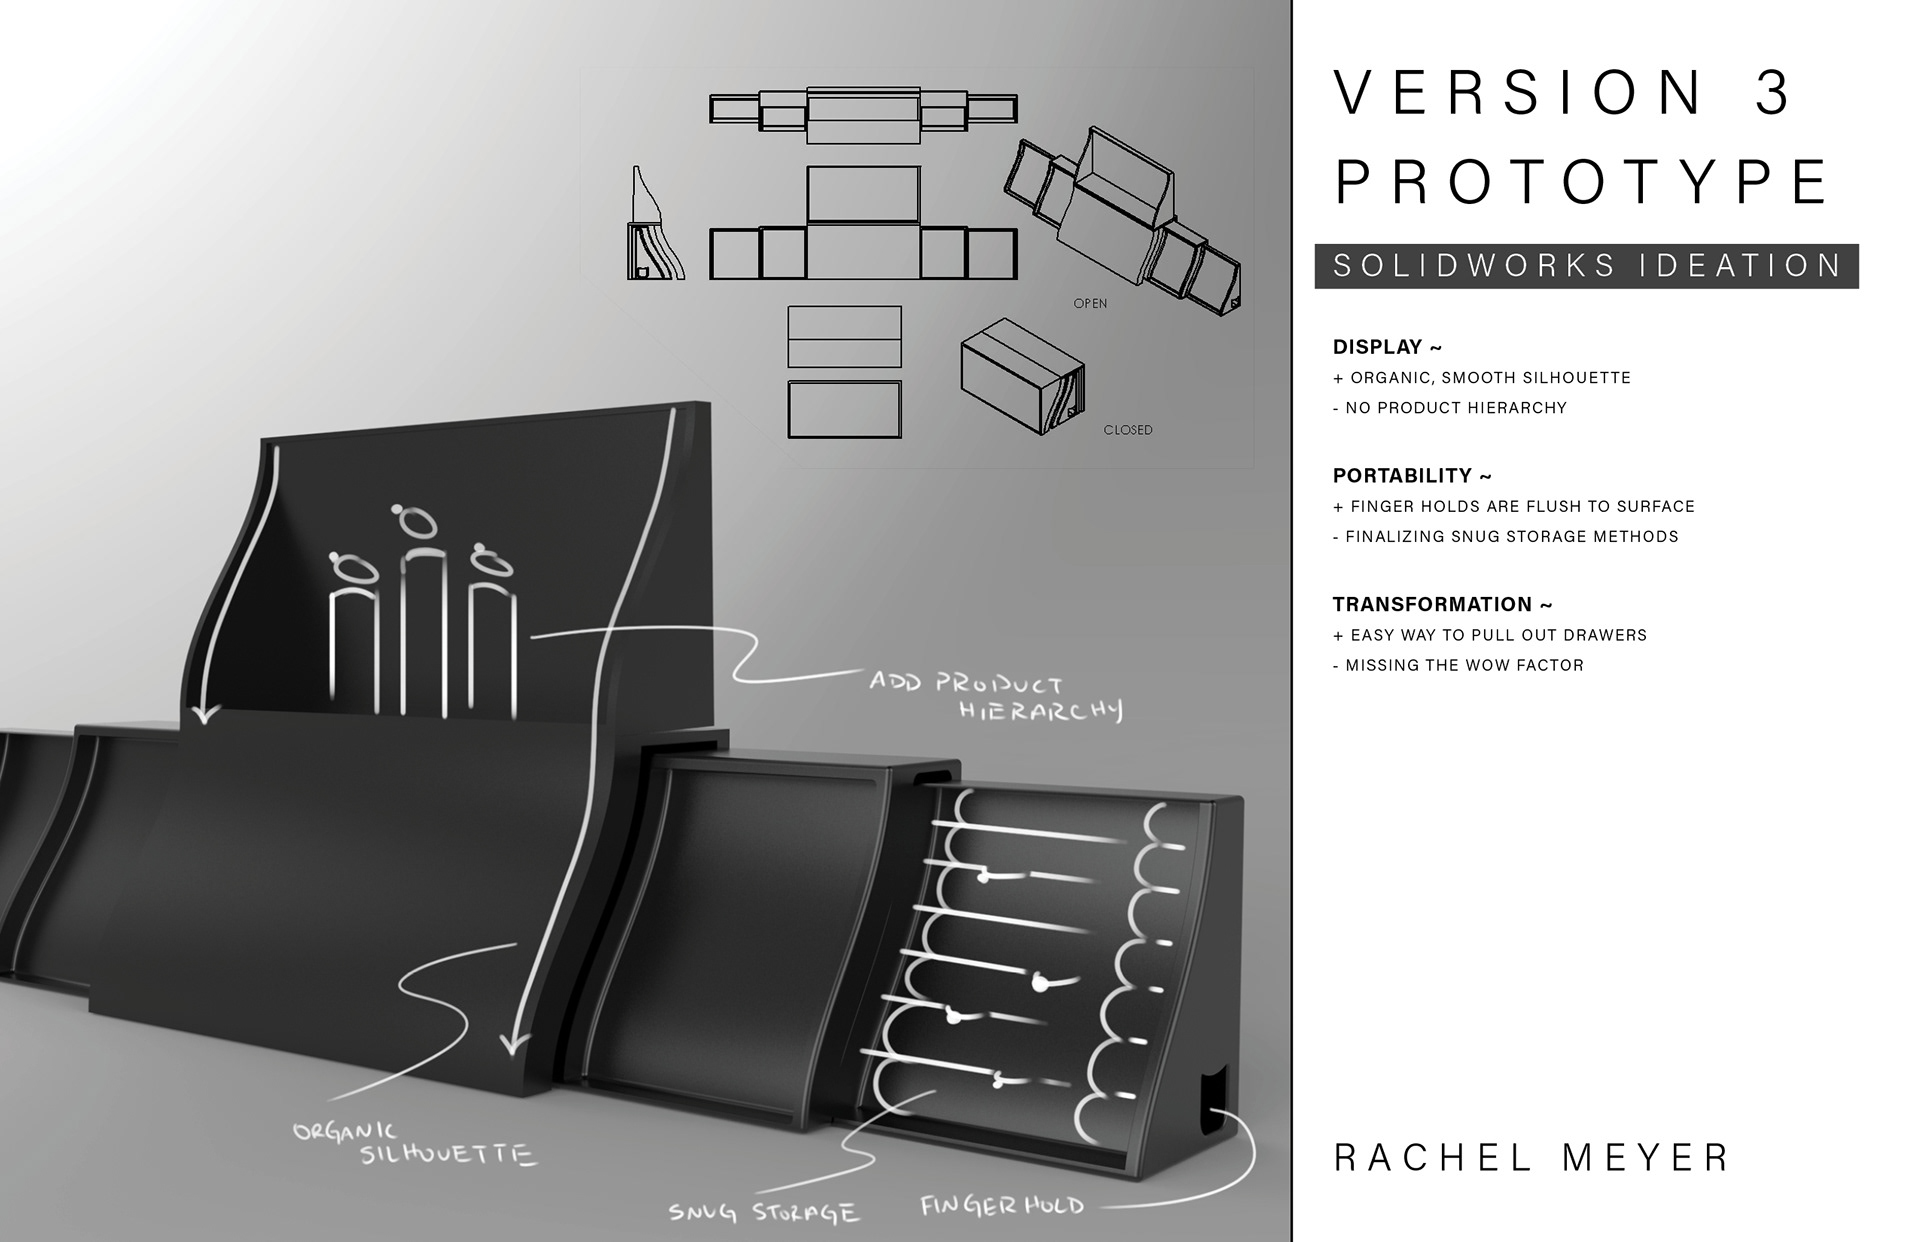
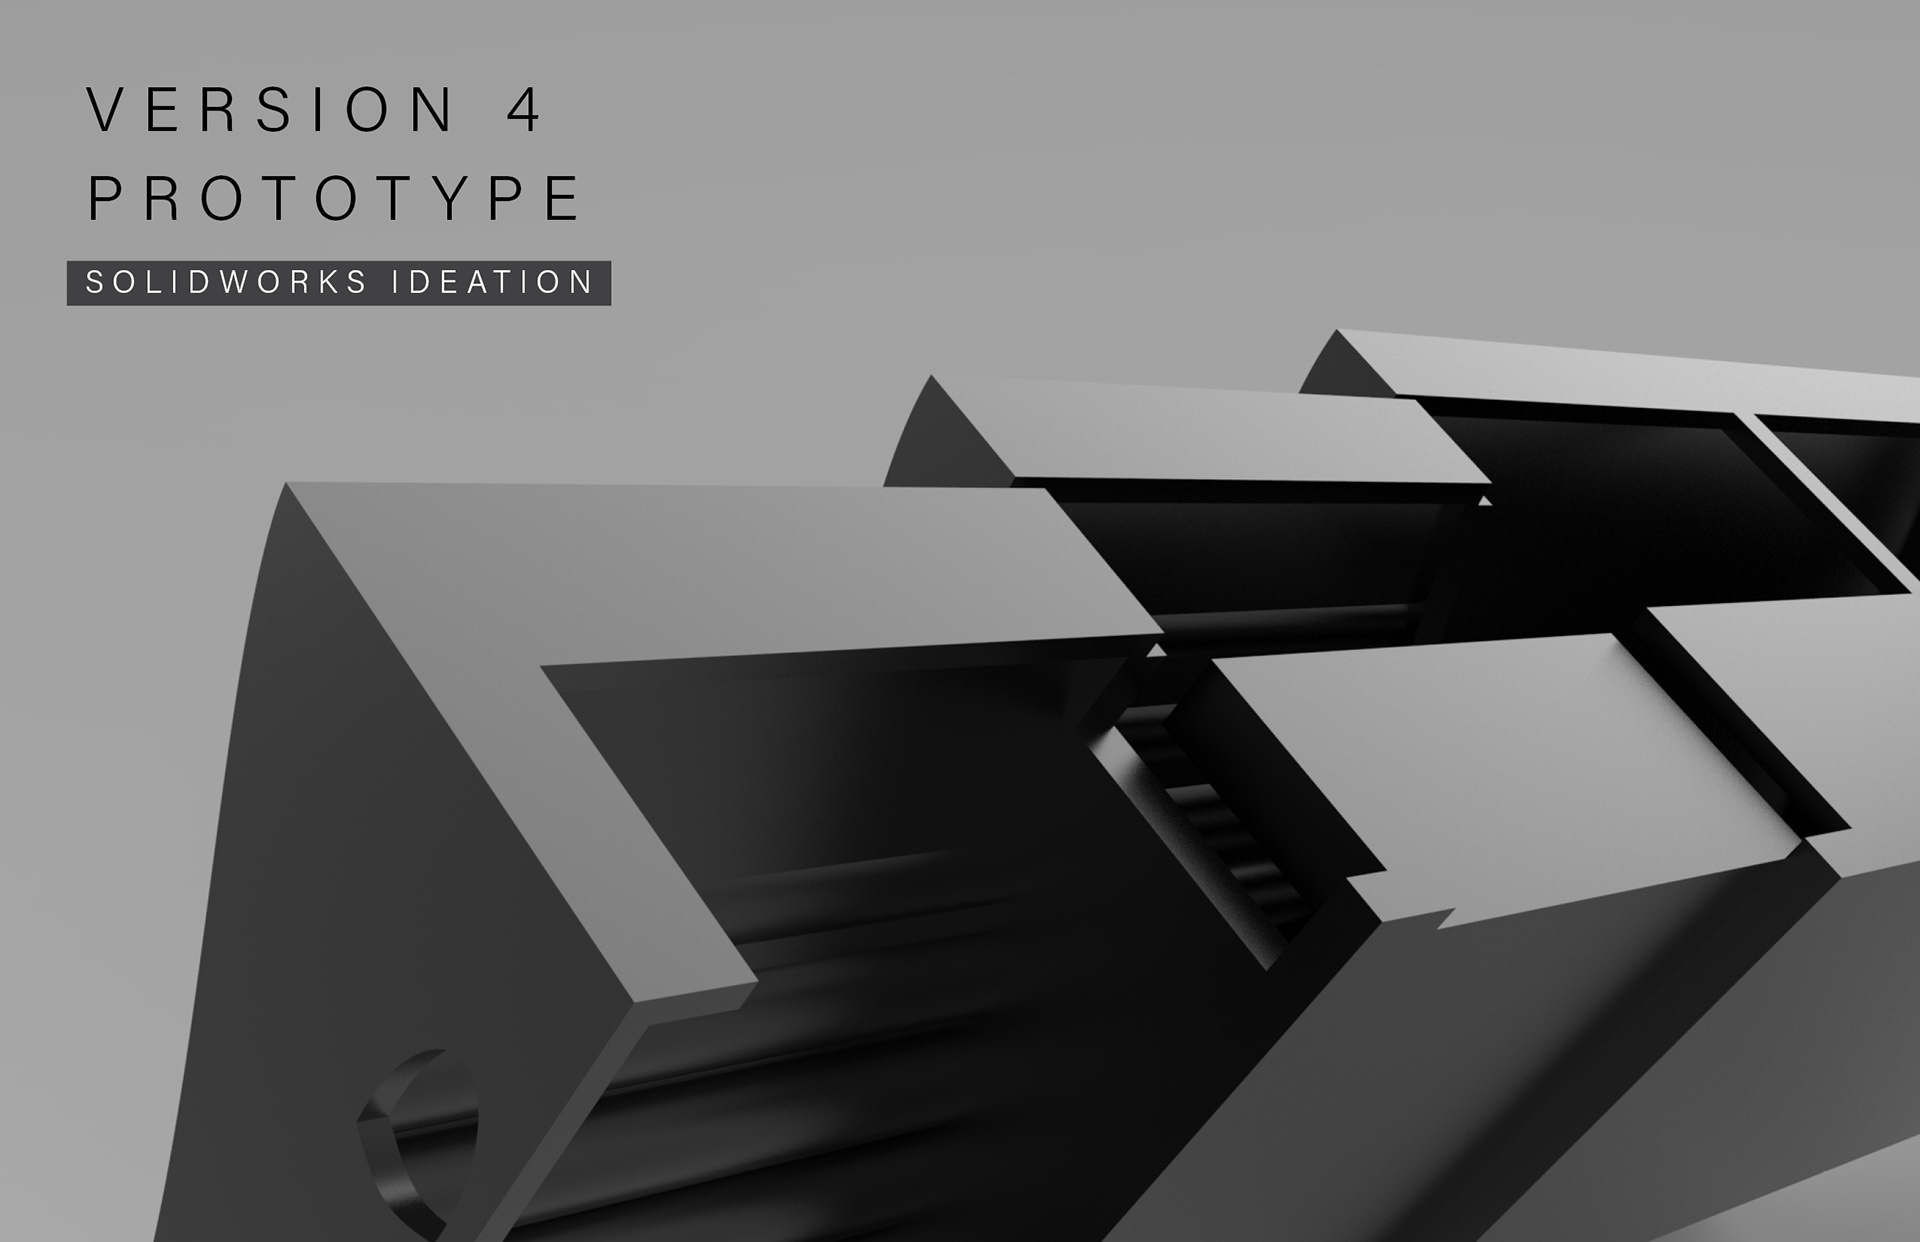
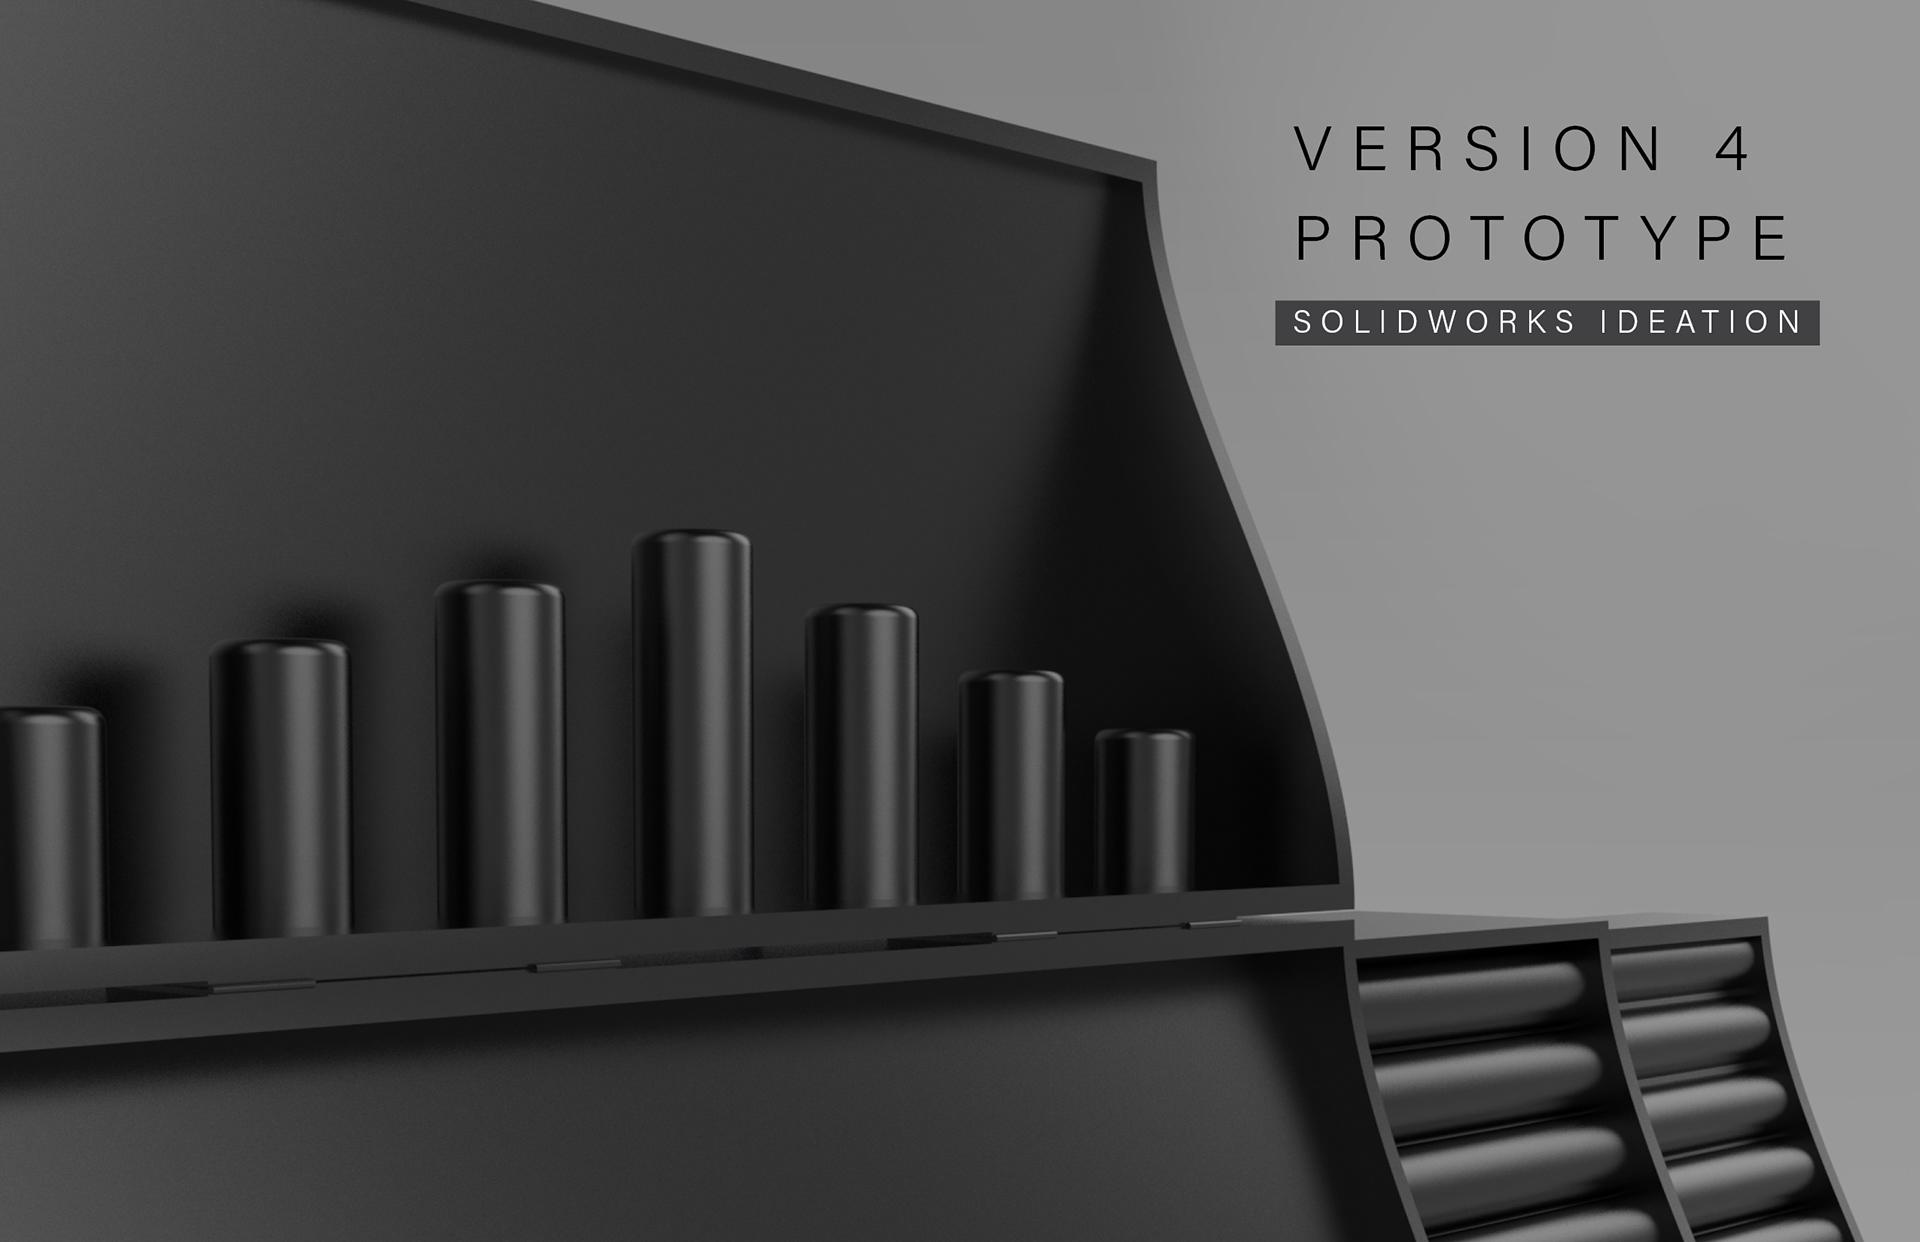
At the bottom of this page, you'll see the process I went through with physical prototypes to reach my final design. These exercises helped me understand how I might move forward with fabricating the Ring Haven the way I envisioned.
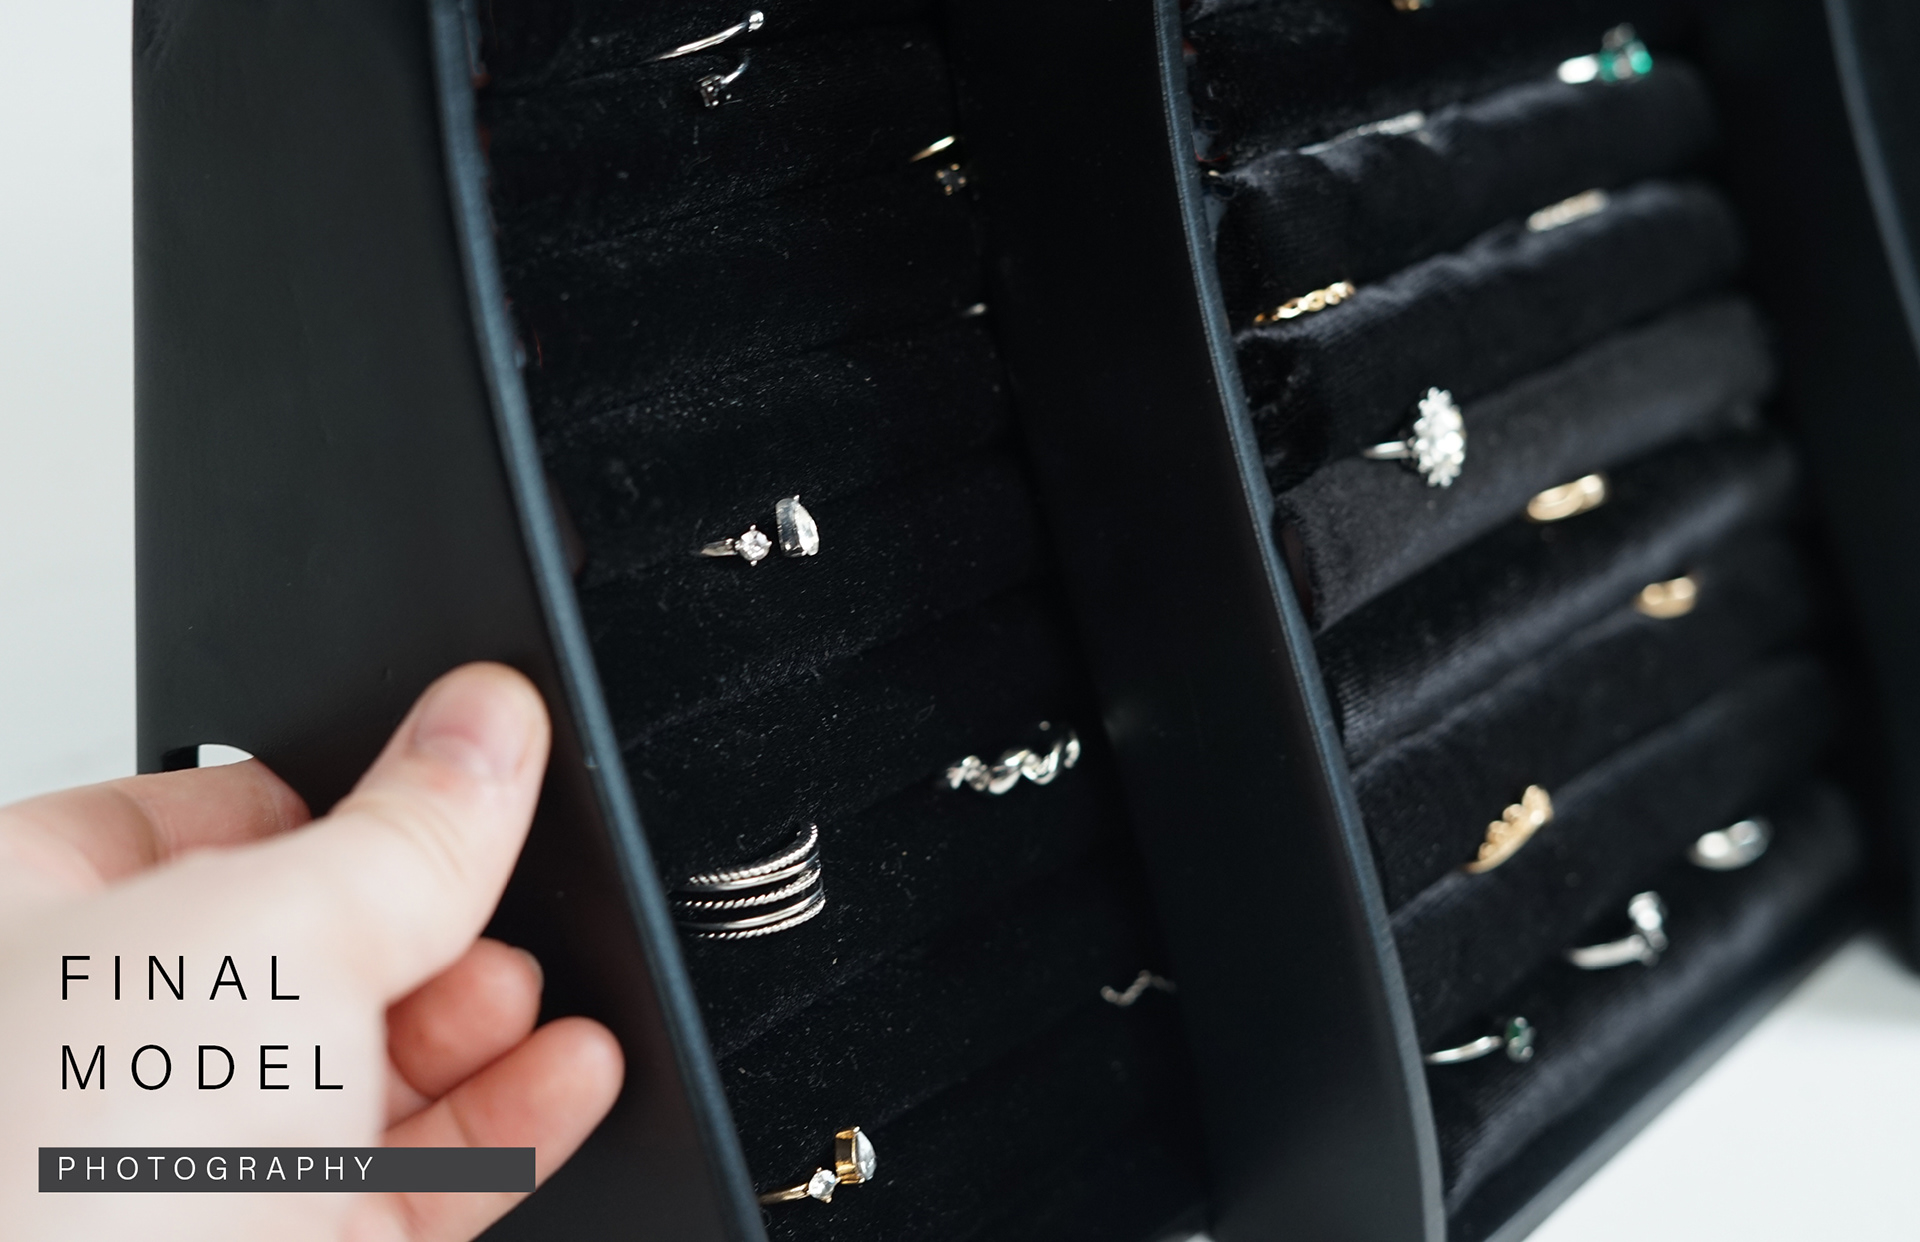
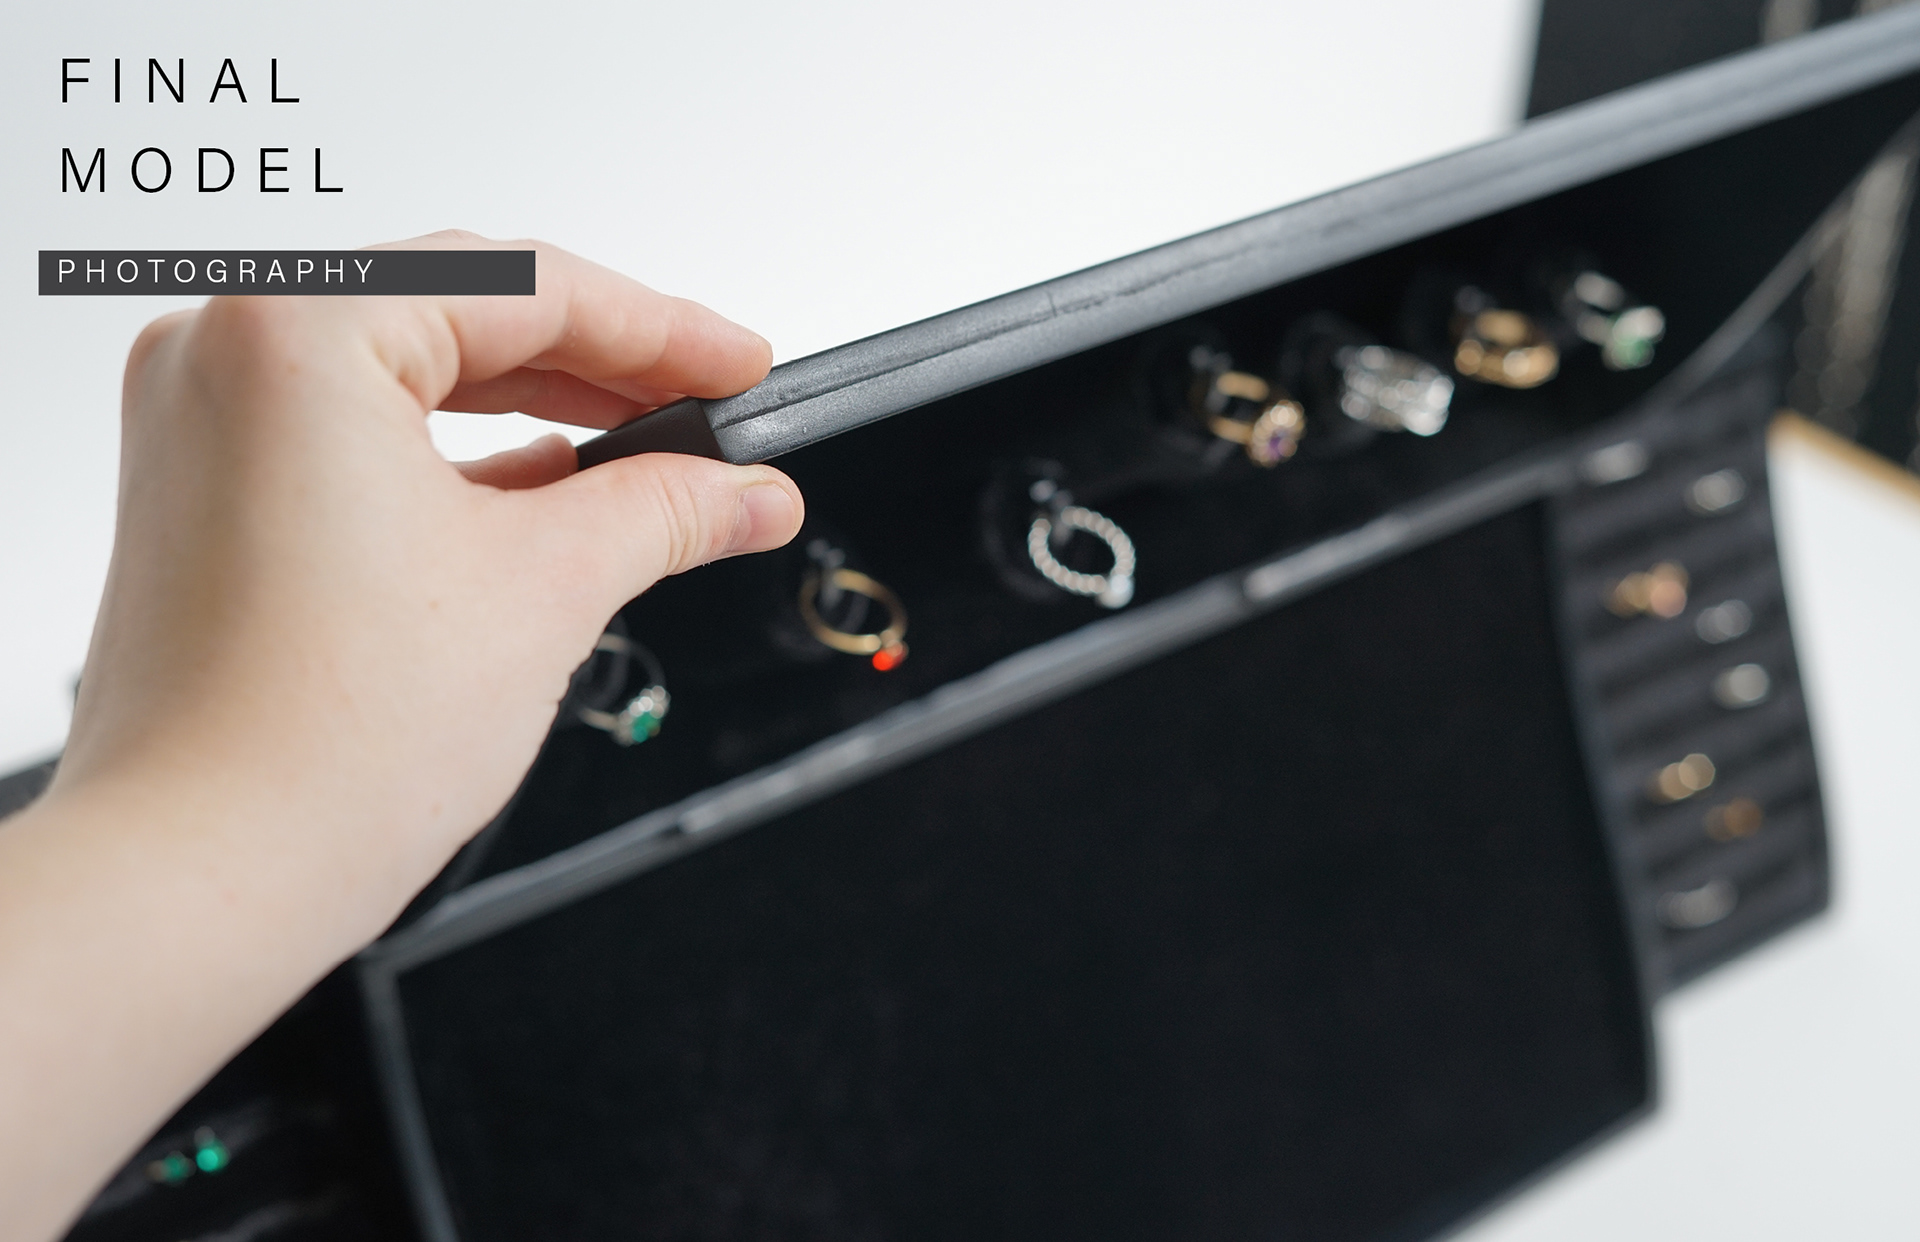
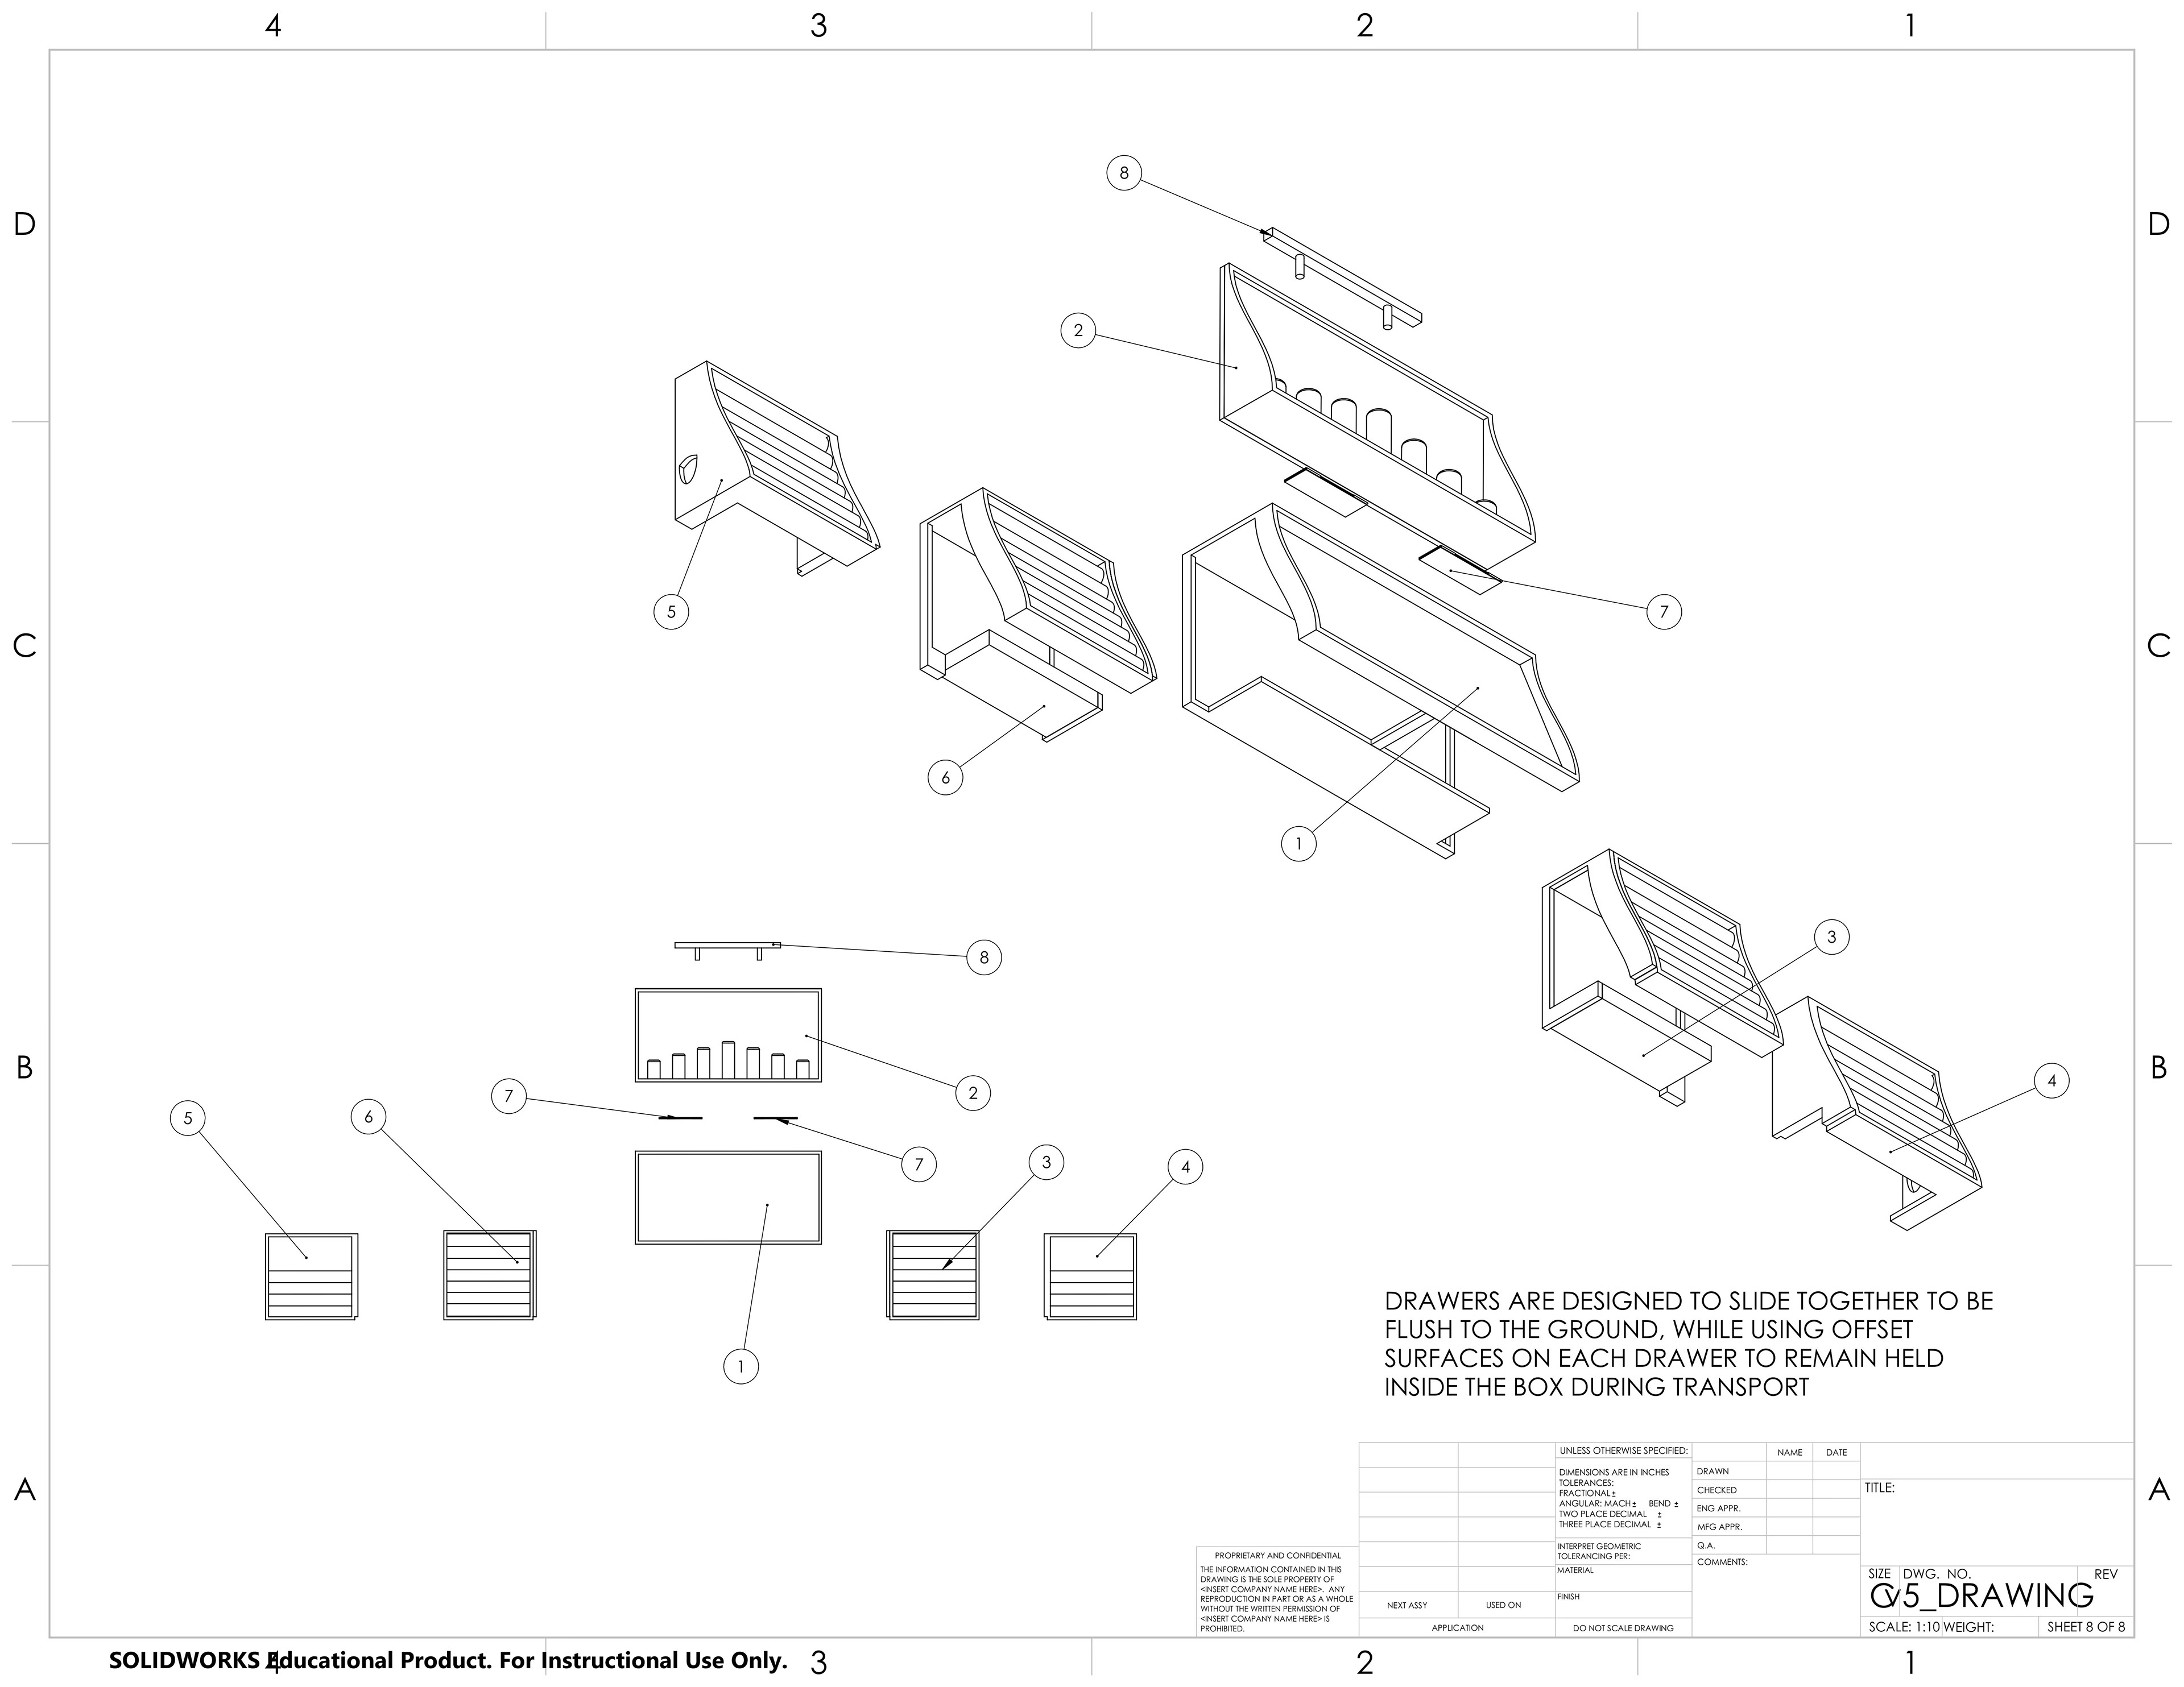
In the end, budget was realistically a main driver in the material choices, but I found it a good challenge to work around. The main concern was the sliding drawers, and ensuring that they were snug when the haven is carried but smooth when being expanded. The drawers needed to be flush with the table, and yet stay self contained when being carried.
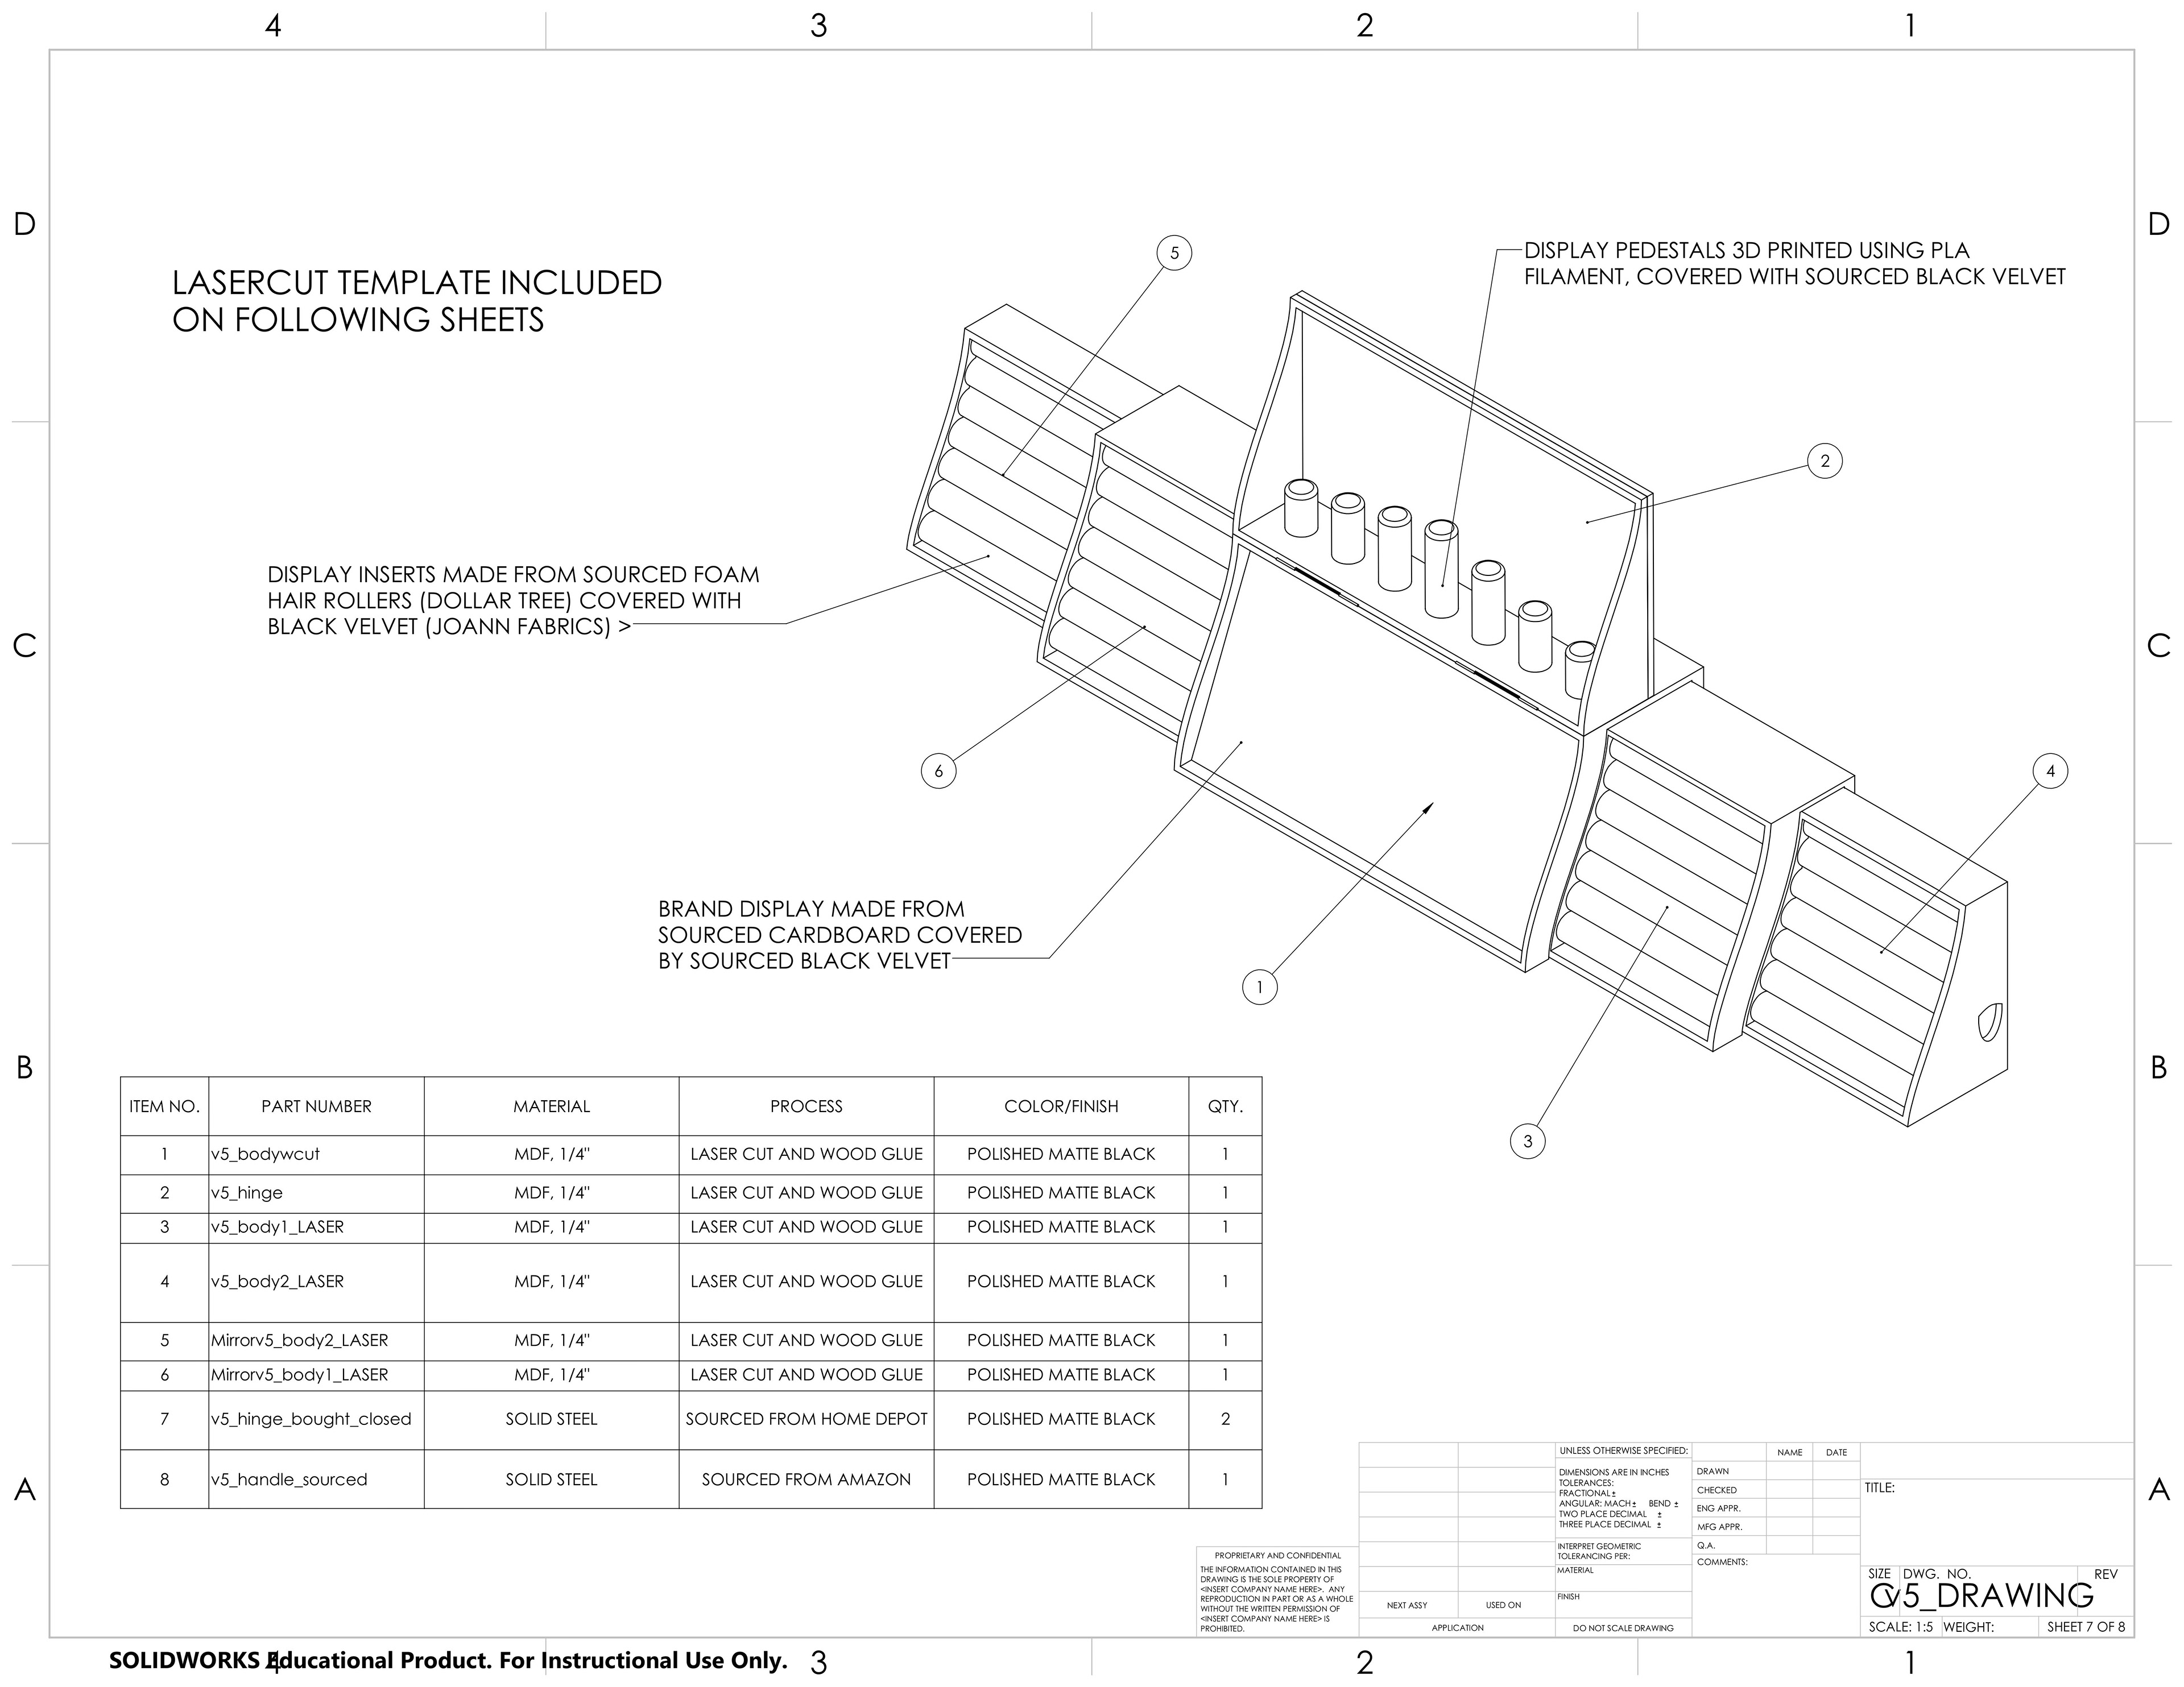
Materials used:
1/4" MDF frame
3D printed ring pedestals
Foam hair rollers
Black velvet fabric
Sourced 1.5" black hinges
Sourced 6" black handle
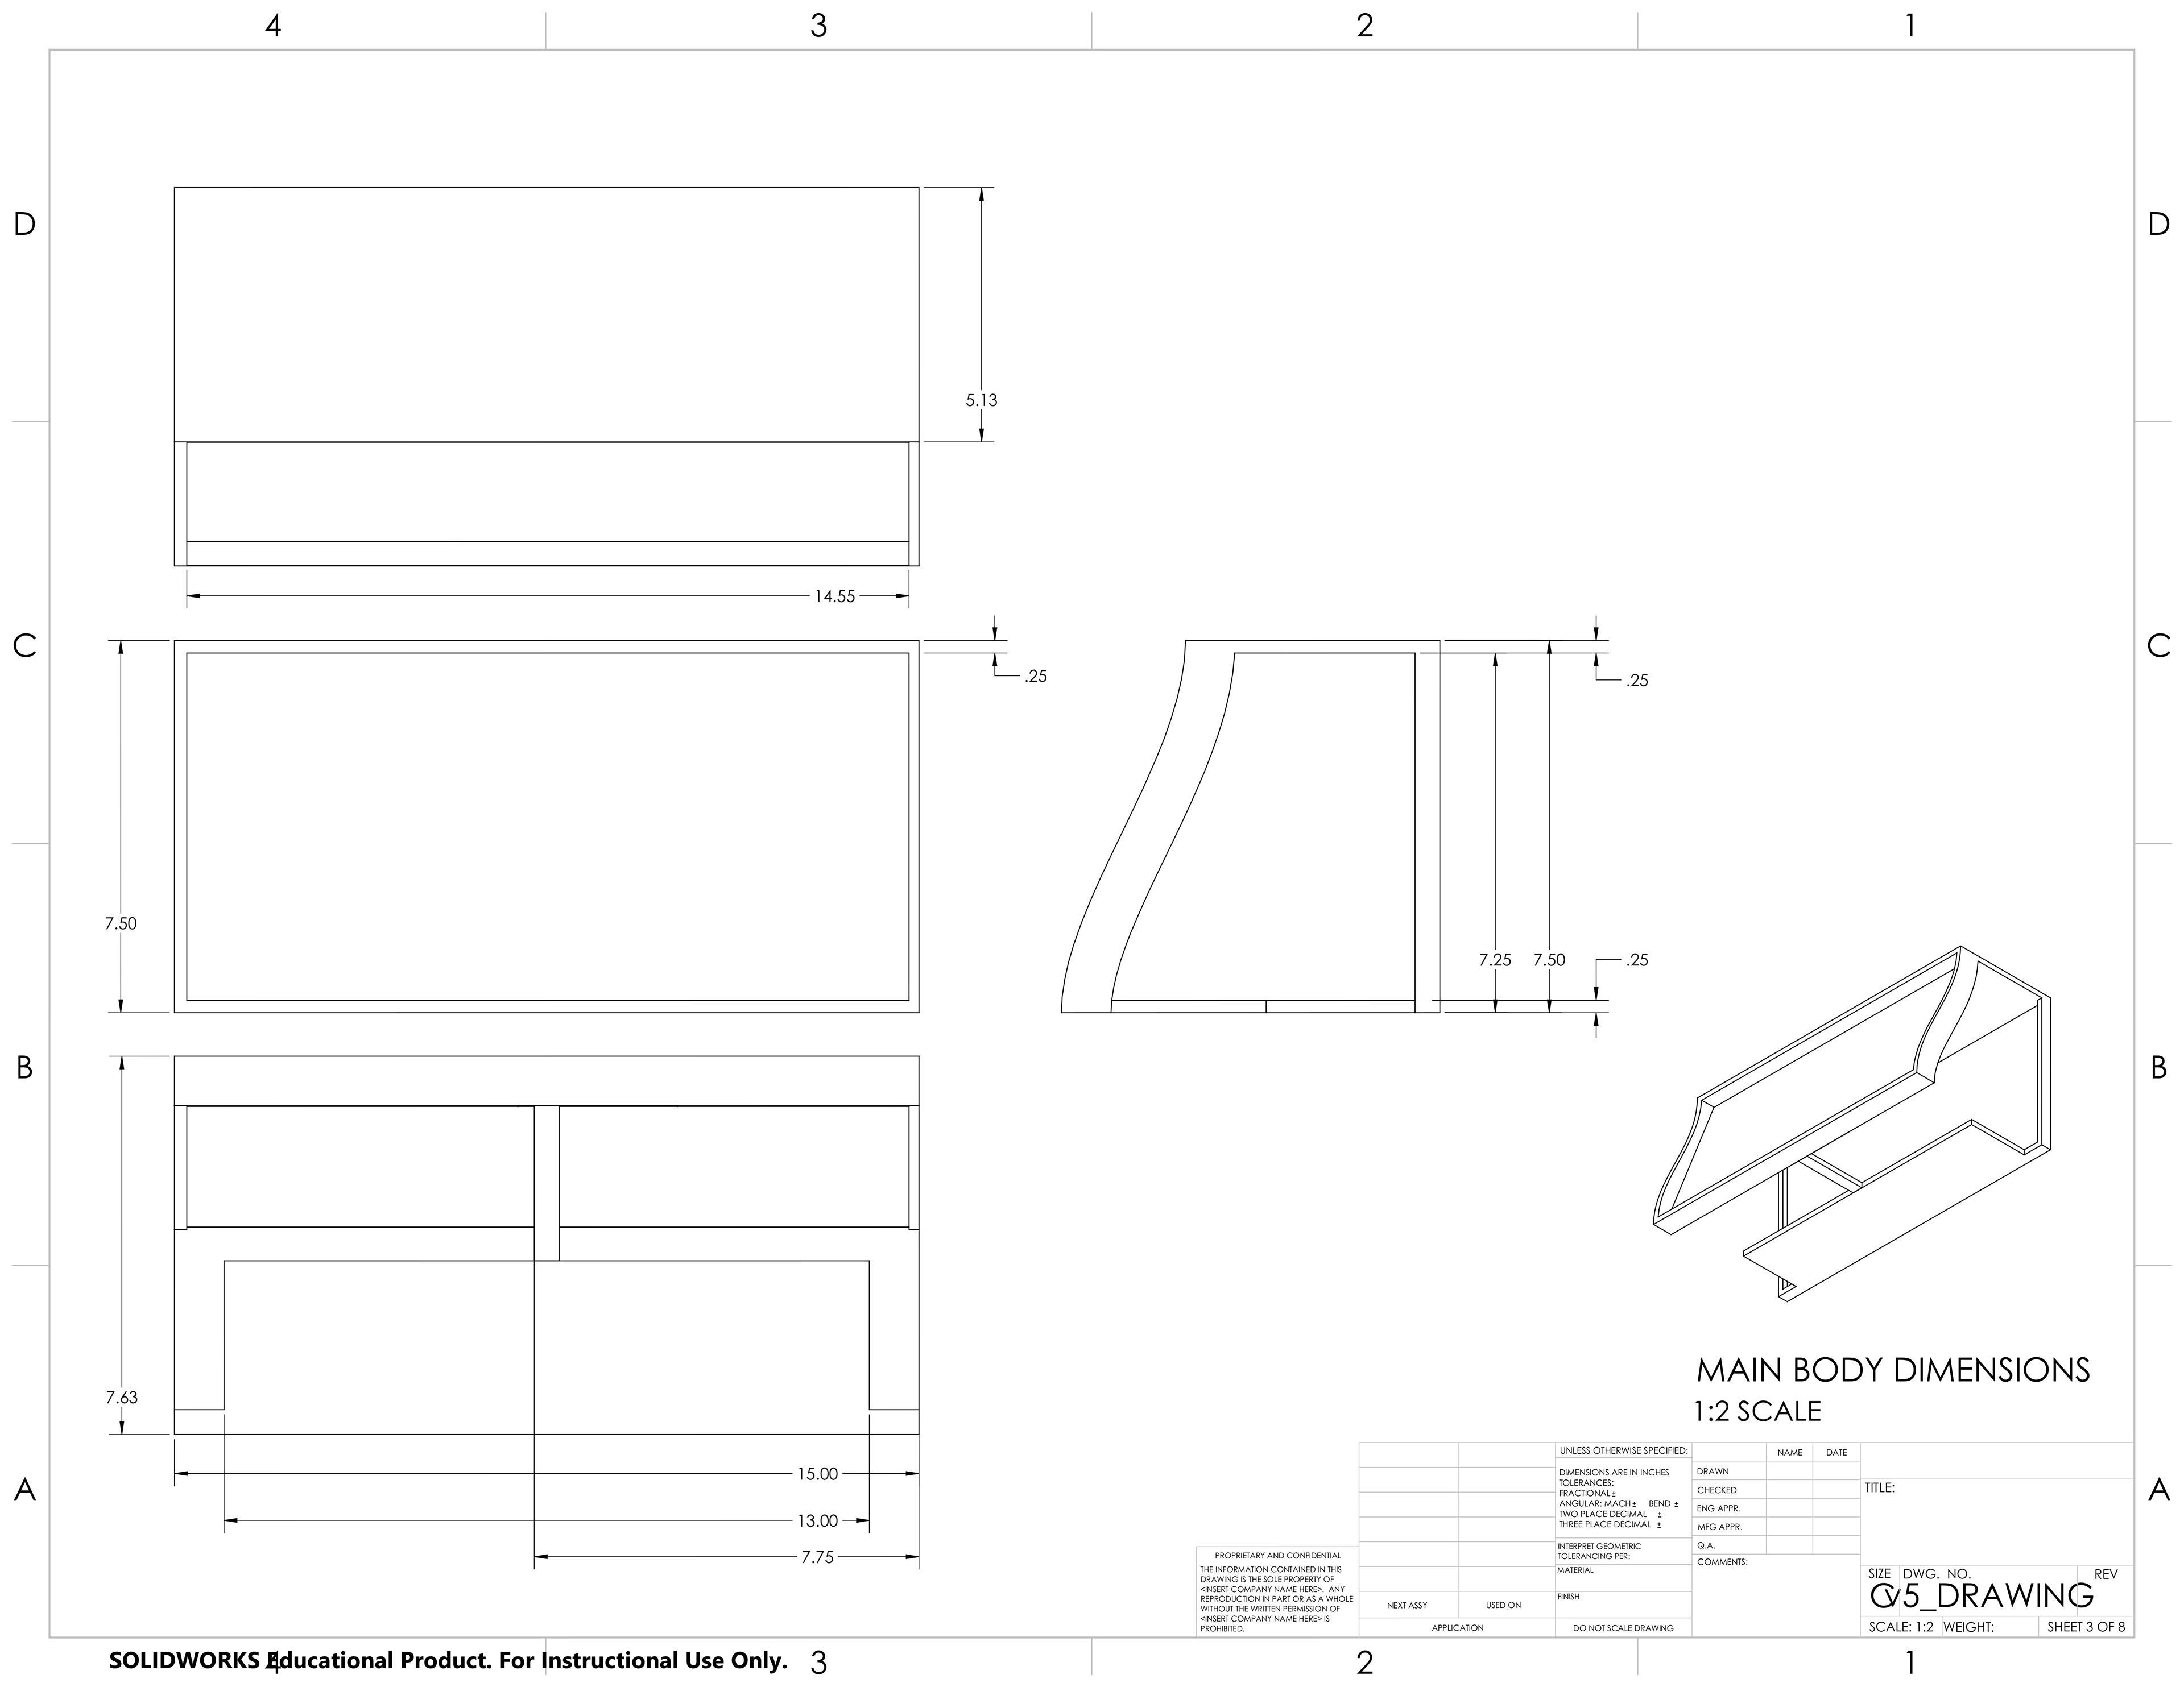
Frame modeled in Solidworks, part split, and laser cut
Sanded, assembled, and painted by hand
Physical Prototypes